Introduction
In the last lesson, you successfully built and ran a basic Express server. You learned the critical pattern of separating the application definition (app.js) from the server startup logic (server.js), which is essential for testing and maintainability.
Now, we move to the next crucial layer of a backend application: the database. An API's primary job is often to manage data, and for this course, our database will be MongoDB. This lesson focuses on connecting your Express application to a MongoDB database. You will:
- Set up a free cloud-hosted MongoDB database using MongoDB Atlas.
- Install Mongoose, the standard library for modeling and interacting with MongoDB in Node.js.
- Securely connect your application to the database using the
MONGO_URIenvironment variable. - Implement a production-ready pattern to ensure the server only starts after a successful database connection.
This step is non-negotiable for building the data persistence layer of your API.
1. Setting Up Your MongoDB Database
Before you can connect to a database, you need one. We'll use MongoDB Atlas, which offers a generous free tier perfect for development and your exam.
The following video provides a complete walkthrough. Your goal is to get a connection string (URI) that looks something like mongodb+srv://<username>:<password>@....
Intro to MongoDB and Mongoose | Node.js Tutorials for Beginners
This video from Dave Gray will guide you through creating a free MongoDB Atlas account, a new project, a shared cluster, a database user, and configuring network access. Follow it closely to set up your database.
Watch from 01:52 to 07:35. Follow these steps precisely: Sign up or log in to MongoDB Atlas. Create a new project. Build a free shared cluster. When prompted, 'Add my own data'. Create a database named examDB and a collection named items. Under 'Database Access', create a database user. Note down the username and password; you will need them. Under 'Network Access', click 'Add IP Address' and choose 'Allow Access from Anywhere' (0.0.0.0/0). This is crucial for development and deployment. Finally, click 'Connect', choose 'Connect your application', and copy the connection string provided.
Once you have the connection string, it's time to add it to your project securely.
2. Configure Your Environment
Your connection string contains sensitive credentials (your password). It must never be hardcoded into your source code. You'll use the .env file you created in the first module.
Action: Update Your .env File
- Open your
.envfile in the root of your project. - Add a new line to define your
MONGO_URI. - Paste the connection string you copied from MongoDB Atlas.
- Crucially, you must replace
<password>with the actual password you created for your database user. Also, ensure the database name in the string isexamDB.
Your .env file should now look like this (with your own credentials):
PORT=5000
MONGO_URI=mongodb+srv://your-username:your-password@cluster0.xxxxx.mongodb.net/examDB?retryWrites=true&w=majority
This ensures your secret URI is loaded into process.env.MONGO_URI by dotenv, keeping it separate from your code.
3. Install and Configure Mongoose
Mongoose is an Object Data Modeling (ODM) library for MongoDB and Node.js. It manages relationships between data, provides schema validation, and is used to translate between objects in code and their representation in MongoDB. It's the industry standard.
Step 1: Install Mongoose
Open your terminal in the project root and run:
npm install mongoose
Step 2: Create the Connection Logic
To maintain a clean project structure, we'll create a dedicated file to handle the database connection.
Action: Create src/config/db.js
- In your
src/folder, create a new sub-folder namedconfig. - Inside
src/config, create a new file nameddb.js. - Add the following code to
src/config/db.js:
const mongoose = require('mongoose');

const connectDB = async () => {
  try {
    // mongoose.connect() returns a promise
    const conn = await mongoose.connect(process.env.MONGO_URI);
    console.log(`MongoDB Connected: ${conn.connection.host}`);
  } catch (error) {
    console.error(`Error connecting to MongoDB: ${error.message}`);
    process.exit(1); // Exit process with failure
  }
};

module.exports = connectDB;
This code defines and exports a single async function, connectDB.
- It uses
mongoose.connect()to establish the connection, reading the URI from your environment variables. - It's wrapped in a
try...catchblock. If the connection fails (e.g., wrong password), it will log the error and terminate the application. This "fail-fast" approach prevents the server from running in a broken state.
The code pattern above is a standard for production applications. You can see it demonstrated in the following article.
Connecting Express to MongoDB with Mongoose, .env, and .gitignore
The article 'Connecting Express to MongoDB with Mongoose' provides a clear, text-based example of this exact connection pattern.
Review the code block under 'Step 4: Create MongoDB Config'. It is nearly identical to what you just wrote, confirming this is a common and effective pattern.
4. Connect on Server Startup
Now, we need to call connectDB() from our main server.js file. The goal is to connect to the database before the server starts listening for HTTP requests.
Action: Update server.js
Modify your root server.js file to integrate the database connection. The new version will use an async function to orchestrate the startup sequence.
// This must be the first line to ensure environment variables are loaded
require('dotenv').config();

const app = require('./src/app');
const connectDB = require('./src/config/db');

const PORT = process.env.PORT || 5000;

// Function to start the server
const startServer = async () => {
  try {
    // 1. Connect to the database
    await connectDB();

    // 2. Start listening for requests
    app.listen(PORT, () => {
      console.log(`Server is running on port ${PORT}`);
    });
  } catch (error) {
    console.error('Failed to start server', error);
    process.exit(1);
  }
};

// Execute the server start function
startServer();
By wrapping the startup logic in an async function, we can await the connectDB() promise. The server will only proceed to app.listen() after a successful database connection is confirmed.
5. Verify the Connection
You are now ready to test the complete setup.
Run your server from the root directory:
npm start
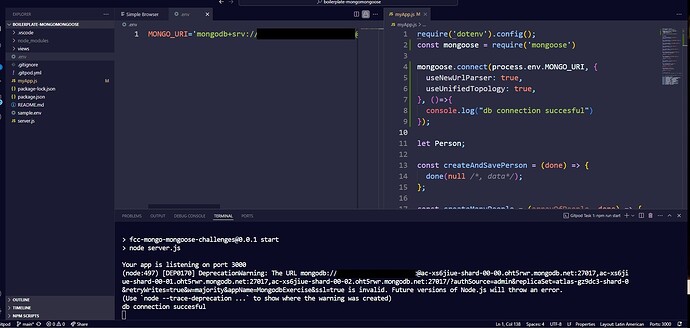
If everything is configured correctly, you should see two messages in your console, in this order:
MongoDB Connected: cluster0.xxxxx.mongodb.net
Server is running on port 5000
If you see an error message, double-check your MONGO_URI in the .env file. Common mistakes include typos in the password or not correctly setting the network access rules in MongoDB Atlas.
Conclusion
You have now bridged your application and your database. This is a massive step forward.
Key Takeaways:
- Mongoose is the library used to connect to and interact with MongoDB from Node.js.
- Database connection strings and other secrets must be stored in a
.envfile and accessed viaprocess.env. - Connection logic should be encapsulated in its own module (e.g.,
src/config/db.js) for clean code. - A robust server startup sequence connects to the database before listening for traffic. Using
async/awaitmakes this sequence clean and easy to read.
With a persistent data store now connected, you're ready to define the structure of your data. In the next lesson, you will use Mongoose to create a Schema and a Model, which are the blueprints for the data your API will manage.