Hello! Welcome to the third lesson in our "Modern React Fundamentals" module.
In our last lesson, we explored how the useState hook gives our components a "memory," allowing them to manage their own data and re-render when that data changes. We built a simple counter, which was a great first step into creating interactive UIs.
Today, we'll apply that knowledge to one of the most common tasks in web development: handling user input through forms. Your goal is to build a controlled form to capture and handle user input with useState. This is a critical skill for any full-stack application because it's how we'll gather data from the user to send to our server.
1. What is a Controlled Form?
In standard HTML, form elements like <input>, <textarea>, and <select> naturally keep their own state. When you type into an input field, the browser's DOM manages and updates its value internally.
In React, we want to bring that state under React's control. A controlled component (or controlled form) is one where the form's data is handled by a React component's state. React becomes the "single source of truth" for the input's value.
This creates a bidirectional data flow:
- State to UI: The value of the input field is always determined by the React state. We achieve this by setting the input's
valueprop. - UI to State: When the user types in the input, an
onChangeevent is triggered, which calls a function to update the React state.
This cycle ensures that the UI and the component's state are always in sync.

To see this concept in action, let's watch a short video that demonstrates how to create a controlled input field.
useState | React Hooks | React.js Tutorial #5
This video by Bruno Antunes clearly explains how to connect an input field to a state variable using the value and onChange attributes.
Watch from the beginning to 03:10. Focus on how the input's value is set to the state variable (description) and how the onChange event calls the setter function (setDescription).
2. Building a Complete Form: The Three Key Steps
Now that you understand the core principle, let's build a complete form that a user can submit. This involves three main steps:
- Create State: Use
useStateto store the input's value. - Control the Input: Link the state to the
<input>using thevalueandonChangeprops. - Handle Submission: Use the
<form>'sonSubmitevent to process the data and prevent the default browser refresh.
The following resource from the Mozilla Developer Network (MDN) provides a clear, step-by-step guide.
React interactivity: Events and state
The MDN docs are a fantastic, authoritative source for web development concepts. We'll use them to walk through the mechanics of building a React form.
Read the following sections in order: Handling form submission: Focus on using the onSubmit event on the <form> tag and the importance of event.preventDefault(). Reading user input: This reinforces how onChange and event.target.value work together. Updating state: This section ties everything together, showing how to update state on every keystroke and then use that state during submission.
After implementing these steps, you can capture the user's input as a JavaScript object when they submit the form.
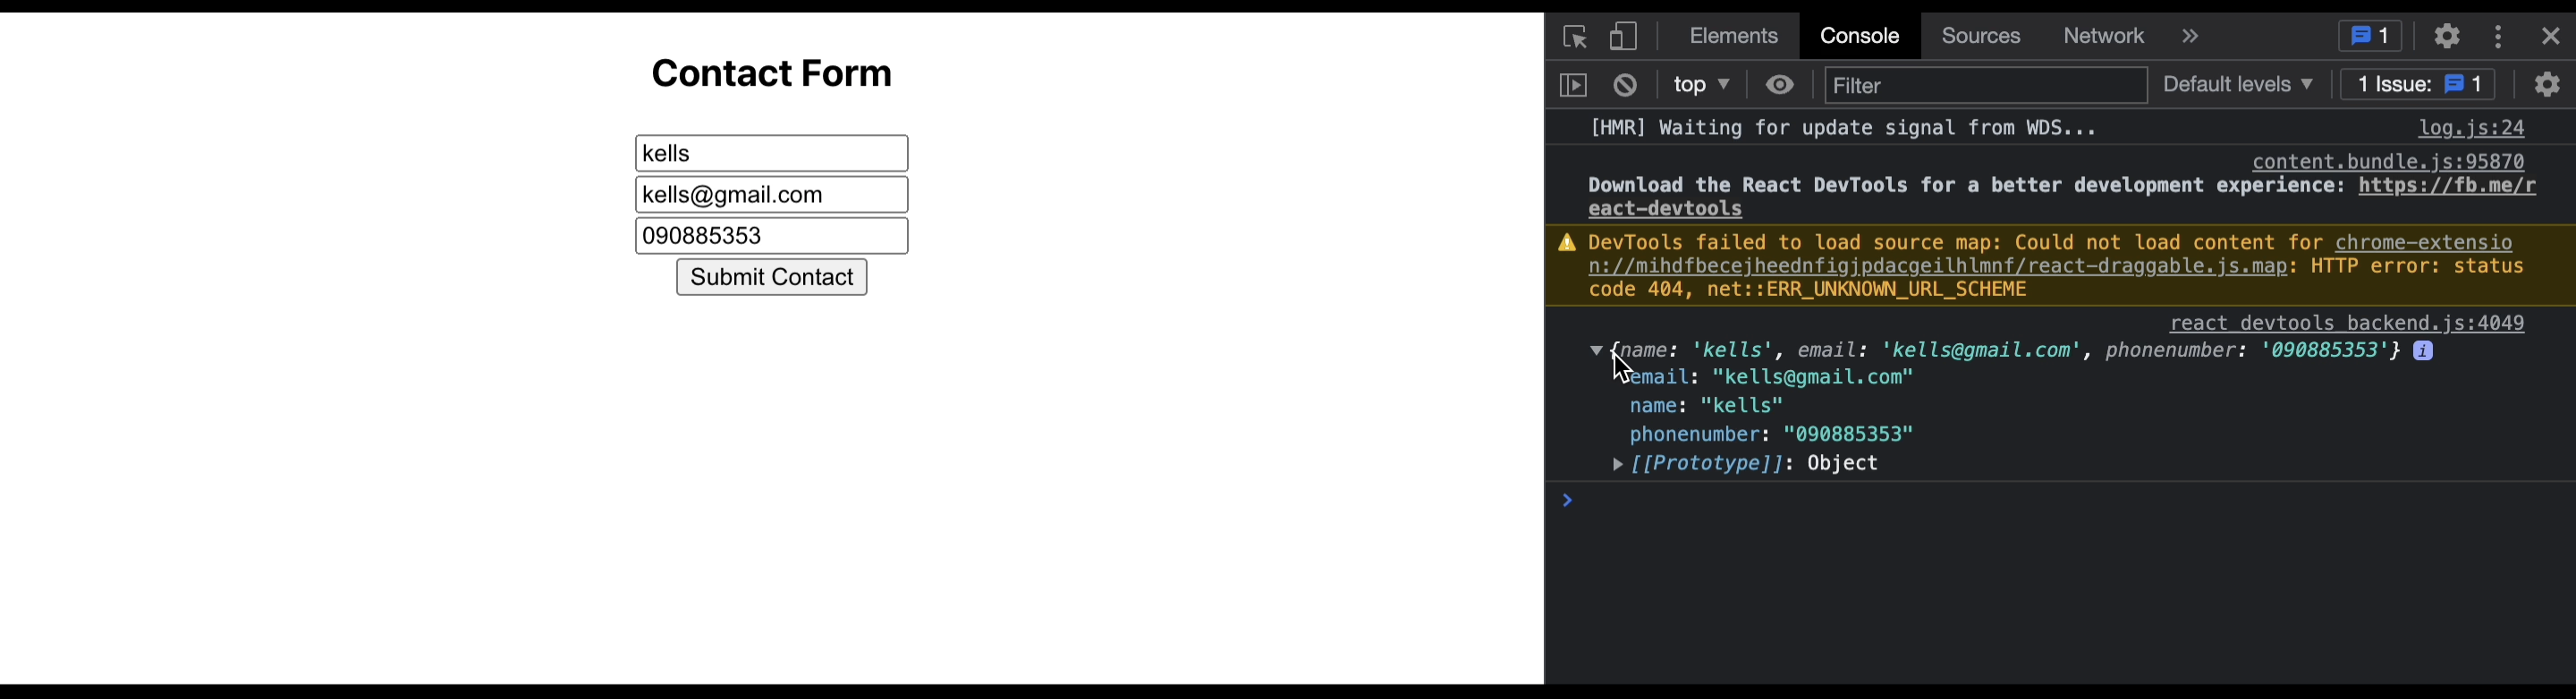
Test your understanding!
You have the following form component. When you type "Next.js" into the input field and click "Submit," what will be logged to the console?
import { useState } from 'react';

function MyForm() {
  const [inputValue, setInputValue] = useState('');

  const handleChange = (e) => {
    setInputValue(e.target.value);
  };

  const handleSubmit = (e) => {
    e.preventDefault();
    console.log(inputValue);
    setInputValue('');
  };

  return (
    <form onSubmit={handleSubmit}>
      <input type="text" value={inputValue} onChange={handleChange} />
      <button type="submit">Submit</button>
    </form>
  );
}
Show answer
The console will log "Next.js".
Here's the sequence of events:
- As you type,
handleChangeis called on every keystroke, updating theinputValuestate. - When the state holds "Next.js", you click submit.
handleSubmitis called. It first prevents the page from reloading.- It then logs the current value of the
inputValuestate, which is "Next.js". - Finally, it calls
setInputValue('')to clear the input field for the next entry.
3. Handling Multiple Inputs: A Scalable Pattern
What happens when your form has more than one field? A contact form might have fields for a name, email, and message.
The straightforward approach is to use a separate useState call for each input.
const [name, setName] = useState('');
const [email, setEmail] = useState('');
const [message, setMessage] = useState('');
This works, but it's not very efficient. As your forms grow, you'll have repetitive code and a lot of state variables to manage. This is a perfect opportunity to find a more elegant solution—a little puzzle to solve. A better pattern is to use a single state object to manage all form data.
This article provides an excellent breakdown of this more advanced, scalable pattern.
Mastering React Forms with useState — From Mess to Best
This article, 'Mastering React Forms with useState', contrasts the simple multi-state approach with a more robust single-state object pattern. It's a great example of writing cleaner, more maintainable code.
First, read 'Step 1: The Beginner Way' to see the basic approach and then 'Looks Fine? But Wait…' to understand its limitations. Then, carefully study 'Step 2: Cleaner Way — One useState Object for All Fields' and the crucial 'Filling the Knowledge Gaps' section. Pay close attention to how the [name] syntax (computed property names) and the spread operator (...prev) allow a single handleChange function to update any field in the form state dynamically.
This single-state object pattern is powerful. It leverages core JavaScript features to create a flexible and DRY (Don't Repeat Yourself) solution, which is a hallmark of good engineering. Given your data science background, you'll likely appreciate how this pattern cleanly structures form data into a single object, ready for processing or validation.
Conclusion
Great work! You've now mastered a fundamental skill for building interactive web applications. You can confidently capture user input and manage it within your React components.
Let's summarize the key takeaways:
- Controlled Forms: In React, we create controlled forms where component state is the single source of truth for input values.
- The Core Loop: This is achieved by binding an input's
valueto a state variable and itsonChangeevent to a function that updates that state. - Handling Submission: The
<form>element'sonSubmitevent is used to process the form data. Always callevent.preventDefault()to stop the default browser behavior of reloading the page. - Scalable Patterns: For forms with multiple fields, using a single state object with a dynamic handler function is a clean and efficient pattern.
You now have a solid grasp of props, state, and forms—the core building blocks of React. However, our components are still living in a bit of a bubble. What if a component needs to perform an action that isn't directly part of rendering the UI, like fetching data from an external API or setting a timer? These are known as "side effects."
In our next lesson, we'll dive into the useEffect hook, which allows us to manage these side effects gracefully. It's the final piece of the React puzzle we need before we can start building with Next.js.