Introduction
Welcome back! In our last lesson, you successfully configured srsRAN to act as a rogue base station by modifying its identity (PLMN-ID) and security settings in the enb.conf and epc.conf files. You created the digital equivalent of a disguised and unlocked back door.
Today, we'll put that configuration to use. This lesson focuses on the practical challenge of getting a target device to walk through that door. Our learning outcome is to induce a UE in the test lab to connect to the rogue base station. This involves understanding the logic a phone uses to select a network and then manipulating the radio environment to make our rogue cell the most attractive option available.
Think of it this way: you've already created the malicious server with a convincing domain name (paypal-secure.com). Now, you need to make sure the victim's traffic is actually routed to it, perhaps by being the strongest Wi-Fi signal in the coffee shop or by poisoning their DNS cache. In the cellular world, this means broadcasting a signal that the phone prefers over its legitimate provider.
1. How a Phone Chooses a Cell
A User Equipment (UE), like your smartphone, doesn't connect to a cell tower randomly. It follows a specific decision-making process defined in the 3GPP standards. For our purposes, this complex process can be simplified to two primary criteria:
- Network Identity (PLMN-ID): The UE will only consider connecting to cells that broadcast a PLMN-ID it trusts. This includes its home network and any roaming partners specified on the SIM card. Since we already configured our rogue cell with a specific
mccandmncin the last lesson, we have this covered. - Radio Link Quality: Among all the valid cells it can see, the UE will generally try to connect to the one providing the best signal. The goal is to ensure a stable, high-quality connection. This is our primary lever for attack.
The following paper discusses the theoretical basis for this.
[PDF] Practical Attacks Against Privacy and Availability in 4G/LTE Mobile ...
Please read the following section from the paper 'Practical Attacks Against Privacy and Availability in 4G/LTE Mobile Communication Systems'. It explains the fundamental principle we will be exploiting.
In the PDF, locate the subsection 'B. Active attack setup'. Read the paragraph titled 'Building rogue eNodeB'. Focus on the sentence: 'Generally, UE always scans for eNodeBs around it and prefers to attach to the eNodeB with the best signal power.' This is the core concept for our lesson.
By broadcasting a signal that is stronger at the UE's location than the signal from any legitimate cell towers, we can trick the UE into reselecting to our rogue cell. In srsRAN, we control this signal strength using a parameter called tx_gain.
2. Configuring the Lure
In the previous lesson, we edited enb.conf and epc.conf to set the identity and disable security. Now, we will revisit enb.conf to adjust the radio parameters that will make our cell attractive.
Key Radio Parameters in enb.conf
Two parameters are critical for this task:
dl_earfcn(Downlink E-UTRA Absolute Radio-Frequency Channel Number): This number specifies the exact frequency band your base station will broadcast on. You need to choose a channel that your SDR and the target UE both support. For lab work, it's best to use a band that is not licensed for commercial use in your region to avoid interference.tx_gain: This integer value controls the transmission power of your SDR. A higher value means a stronger signal.
Let's watch a video where these parameters are configured in a real-world example.
DragonOS FocalX Detecting Cell Simulators: DIY Kit & Proof of Concept with srsRAN and RayHunter
The following video from the cemaxecuter channel demonstrates setting up a rogue base station with srsRAN to attract a commercial hotspot. Pay close attention to the changes made in the eNB configuration file.
Watch the segment from 03:02 to 03:42. The presenter modifies enb.conf, uncommenting and setting the dl_earfcn to a specific value to attract the target device. This is the exact step you'll need to perform.
Putting it together: In your enb.conf file, you'll need to locate these parameters and set them. For example:
# ~/.config/srsran/enb.conf

[rf]


# Set the frequency channel. This value depends on the band you choose.
# For example, 2100 corresponds to Band 4.
dl_earfcn = 2100


# Set the transmission gain. Start low and increase if needed.
# This value is specific to your SDR. For a USRP, 70 is a moderate value.
tx_gain = 70
rx_gain = 40
A CRITICAL WARNING ON TRANSMITTING: Broadcasting on cellular frequencies is highly regulated. Transmitting with high power (
tx_gain) can interfere with commercial networks, which is illegal and can have serious consequences. For this exercise, you must either:
a) Use a Faraday cage or bag to contain the radio signals.
b) Keep thetx_gainvery low and place the UE's antenna physically close (a few inches) to the SDR's transmitting antenna.
Always operate responsibly and within a controlled lab environment.
3. Springing the Trap and Verifying the Connection
With your rogue enb.conf and epc.conf files ready, it's time to launch the network and see if the UE takes the bait.
Step 1: Launch the Core Network and Base Station
Open two separate terminal windows.
In Terminal 1, start the Evolved Packet Core (EPC):
# Make sure to point to the rogue epc.conf from the last lesson
sudo srsepc --epc.conf ~/.config/srsran/epc_rogue.conf
You should see the MME service starting up and waiting for a connection.
In Terminal 2, start the eNodeB:
# Point to the rogue enb.conf you just edited
sudo srsenb --enb.conf ~/.config/srsran/enb_rogue.conf
The eNB will start, synchronize with your SDR, and then connect to the EPC. You will see log messages in both terminals confirming the S1 setup is complete. The eNB is now broadcasting.
Step 2: Induce and Verify the Connection
Bring your test UE (a smartphone with a test SIM card) near the SDR's antenna.
How to check for a connection:
-
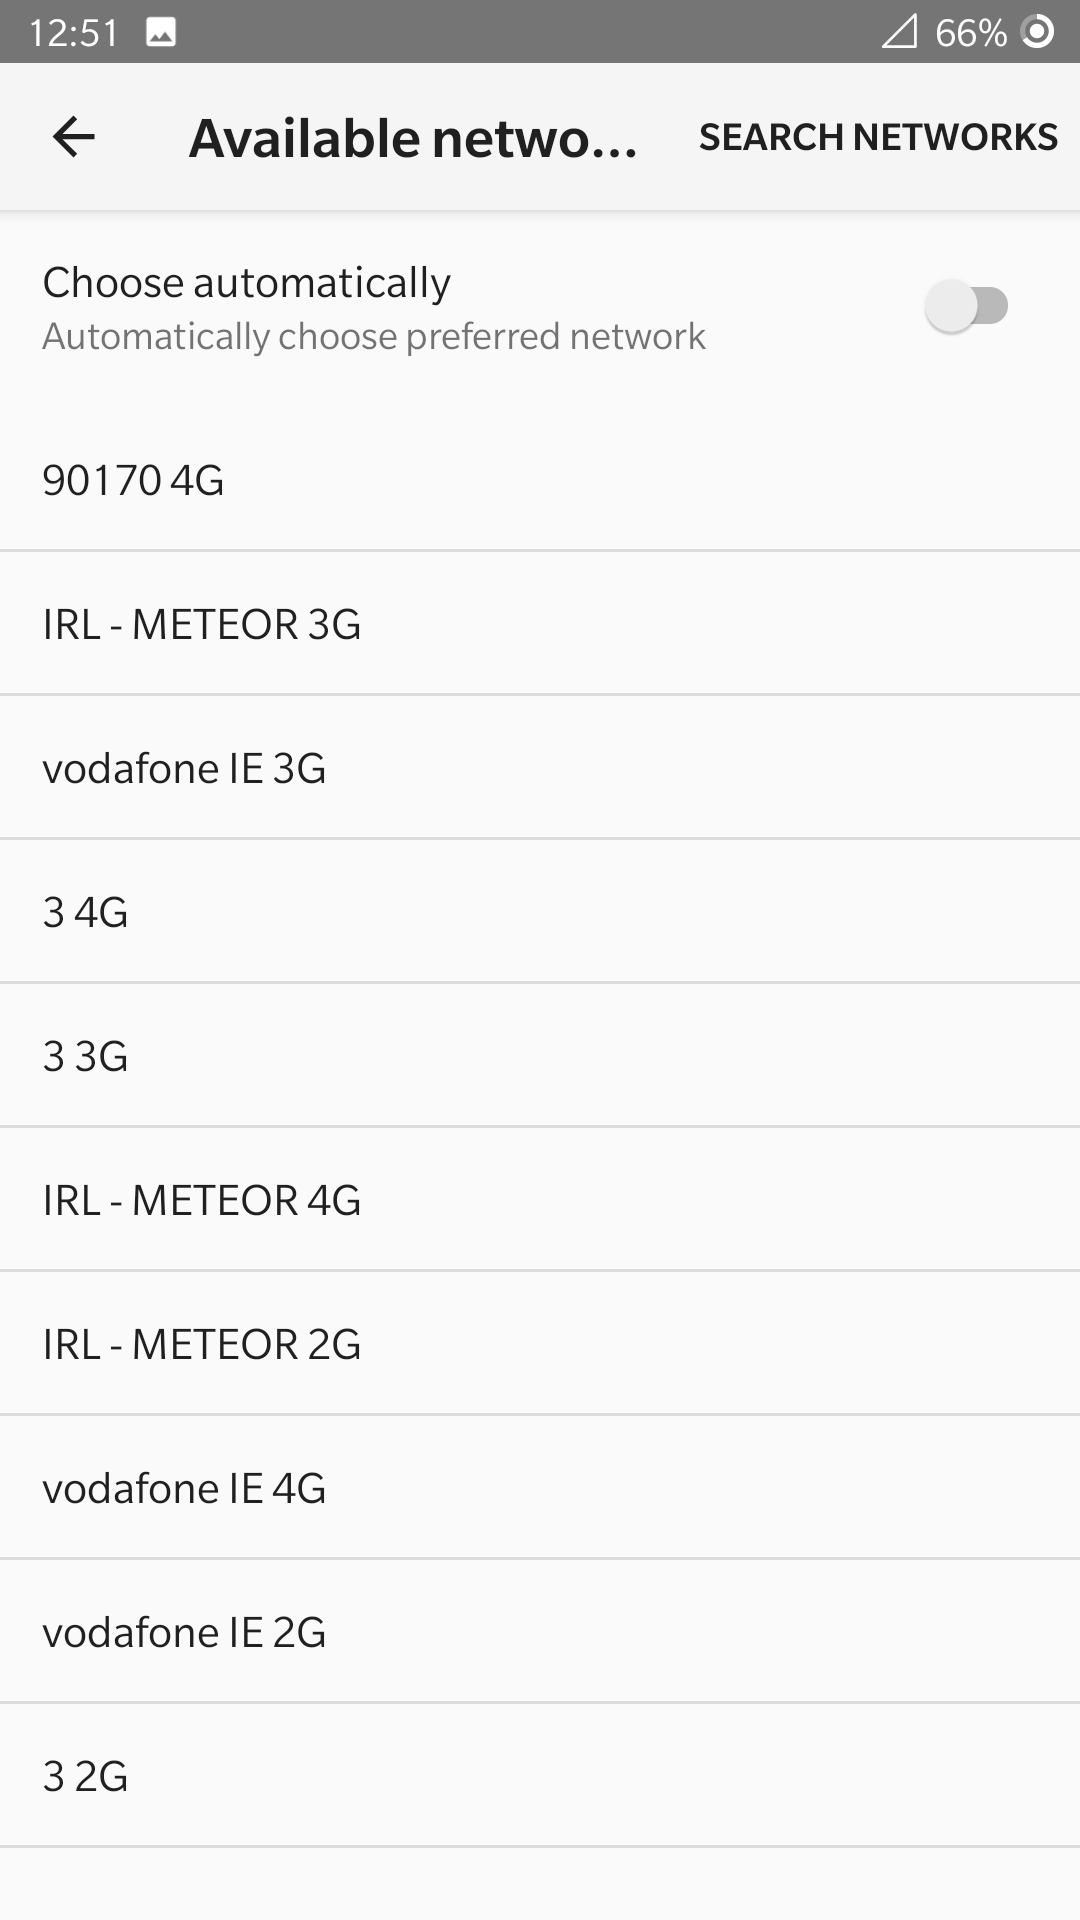
On the UE: The most straightforward way is to go to your phone's network settings and perform a manual network scan. You should see your rogue PLMN appear in the list. If your
tx_gainis high enough, the phone may automatically disconnect from the commercial network and connect to yours. The network status icon will likely show "Emergency Calls Only" or "No Service" but will be attached at a radio level. -
In the
srsenbTerminal: This is the definitive proof. When the UE attempts to connect, thesrsenblog will burst with activity. It will show the establishment of the RRC connection and the initial NAS (Non-Access Stratum) messages from the UE.
The following video demonstrates exactly what this looks like.
DragonOS FocalX Detecting Cell Simulators: DIY Kit & Proof of Concept with srsRAN and RayHunter
This clip shows the moment a UE connects to the srsRAN base station. Observe the terminal output in the background.
Watch the segment from 06:33 to 07:51. The presenter starts the EPC and eNB. Pay attention to the srsenb window when the UE (the Orbic hotspot) connects. You will see messages indicating a 'RACH opportunity' followed by an 'Initial RRC Setup Request' and the display of the UE's IMSI. This is the sign of a successful connection.
If the UE does not connect, the most likely reason is that your tx_gain is too low. Stop srsenb (Ctrl+C), increase the tx_gain value in enb.conf by 5-10, and restart it. Repeat this process until you achieve a connection.
Conclusion
In this lesson, you took your configured rogue base station and made it operational. You learned how to manipulate the radio environment to successfully lure a User Equipment into connecting to your malicious cell.
Key Takeaways:
- UE cell selection is primarily based on PLMN-ID match and signal strength.
- We can force a UE to connect to our rogue cell by making its signal stronger than nearby legitimate cells using the
tx_gainparameter inenb.conf. - The
dl_earfcnparameter must be set to a frequency channel supported by both the SDR and the UE. - A successful connection is confirmed by observing the RRC and NAS signaling messages in the
srsenblog file when the UE attaches. - Safety is paramount. Transmitting on licensed spectrum must be done with extreme care, using shielding or very low power in a controlled environment.
Preview of the Next Lesson:
In the video, you saw a crucial piece of information flash across the screen the moment the UE connected: the IMSI. This wasn't a coincidence. The initial attach procedure in LTE has a privacy weakness that allows this to happen. In our next lesson, "Perform an IMSI catch by capturing and analyzing the UE's initial attach signaling," we will formalize this into a proper attack, capture these messages, and analyze them in Wireshark to extract the subscriber's permanent identity.