Introduction
Welcome back! In the previous two lessons, you successfully configured your RTL-SDR to scan for cellular signals, pinpointed local GSM base station frequencies with kalibrate-rtl, and then captured and analyzed their broadcast channels using gr-gsm and Wireshark. You've established a solid workflow for passive reconnaissance of 2G networks.
Today, we transition to the main focus of your goal: 4G LTE. This lesson directly addresses the learning outcome: Use an LTE cell scanner tool to find and identify nearby LTE base stations. We will install and use a new tool specifically designed for this purpose, moving from the world of GSM's ARFCNs to LTE's EARFCNs and Physical Cell IDs.
This step is crucial. Before you can analyze, attack, or set up a test lab for 4G, you first need to be able to find and identify the active networks around you.
1. The LTE Landscape: Key Identifiers
As we move from 2G to 4G, the terminology and some of the underlying concepts evolve. While the goal remains the same—finding a base station—the identifiers we look for are different.
- In GSM, the base station is a Base Transceiver Station (BTS). We looked for its ARFCN (Absolute Radio Frequency Channel Number) to find its frequency.
- In LTE, the base station is an eNodeB (Evolved Node B). We will look for two primary identifiers:
- EARFCN (E-UTRA Absolute Radio Frequency Channel Number): This is the LTE equivalent of an ARFCN. It's an integer that maps to a specific pair of downlink and uplink frequencies used by the cell.
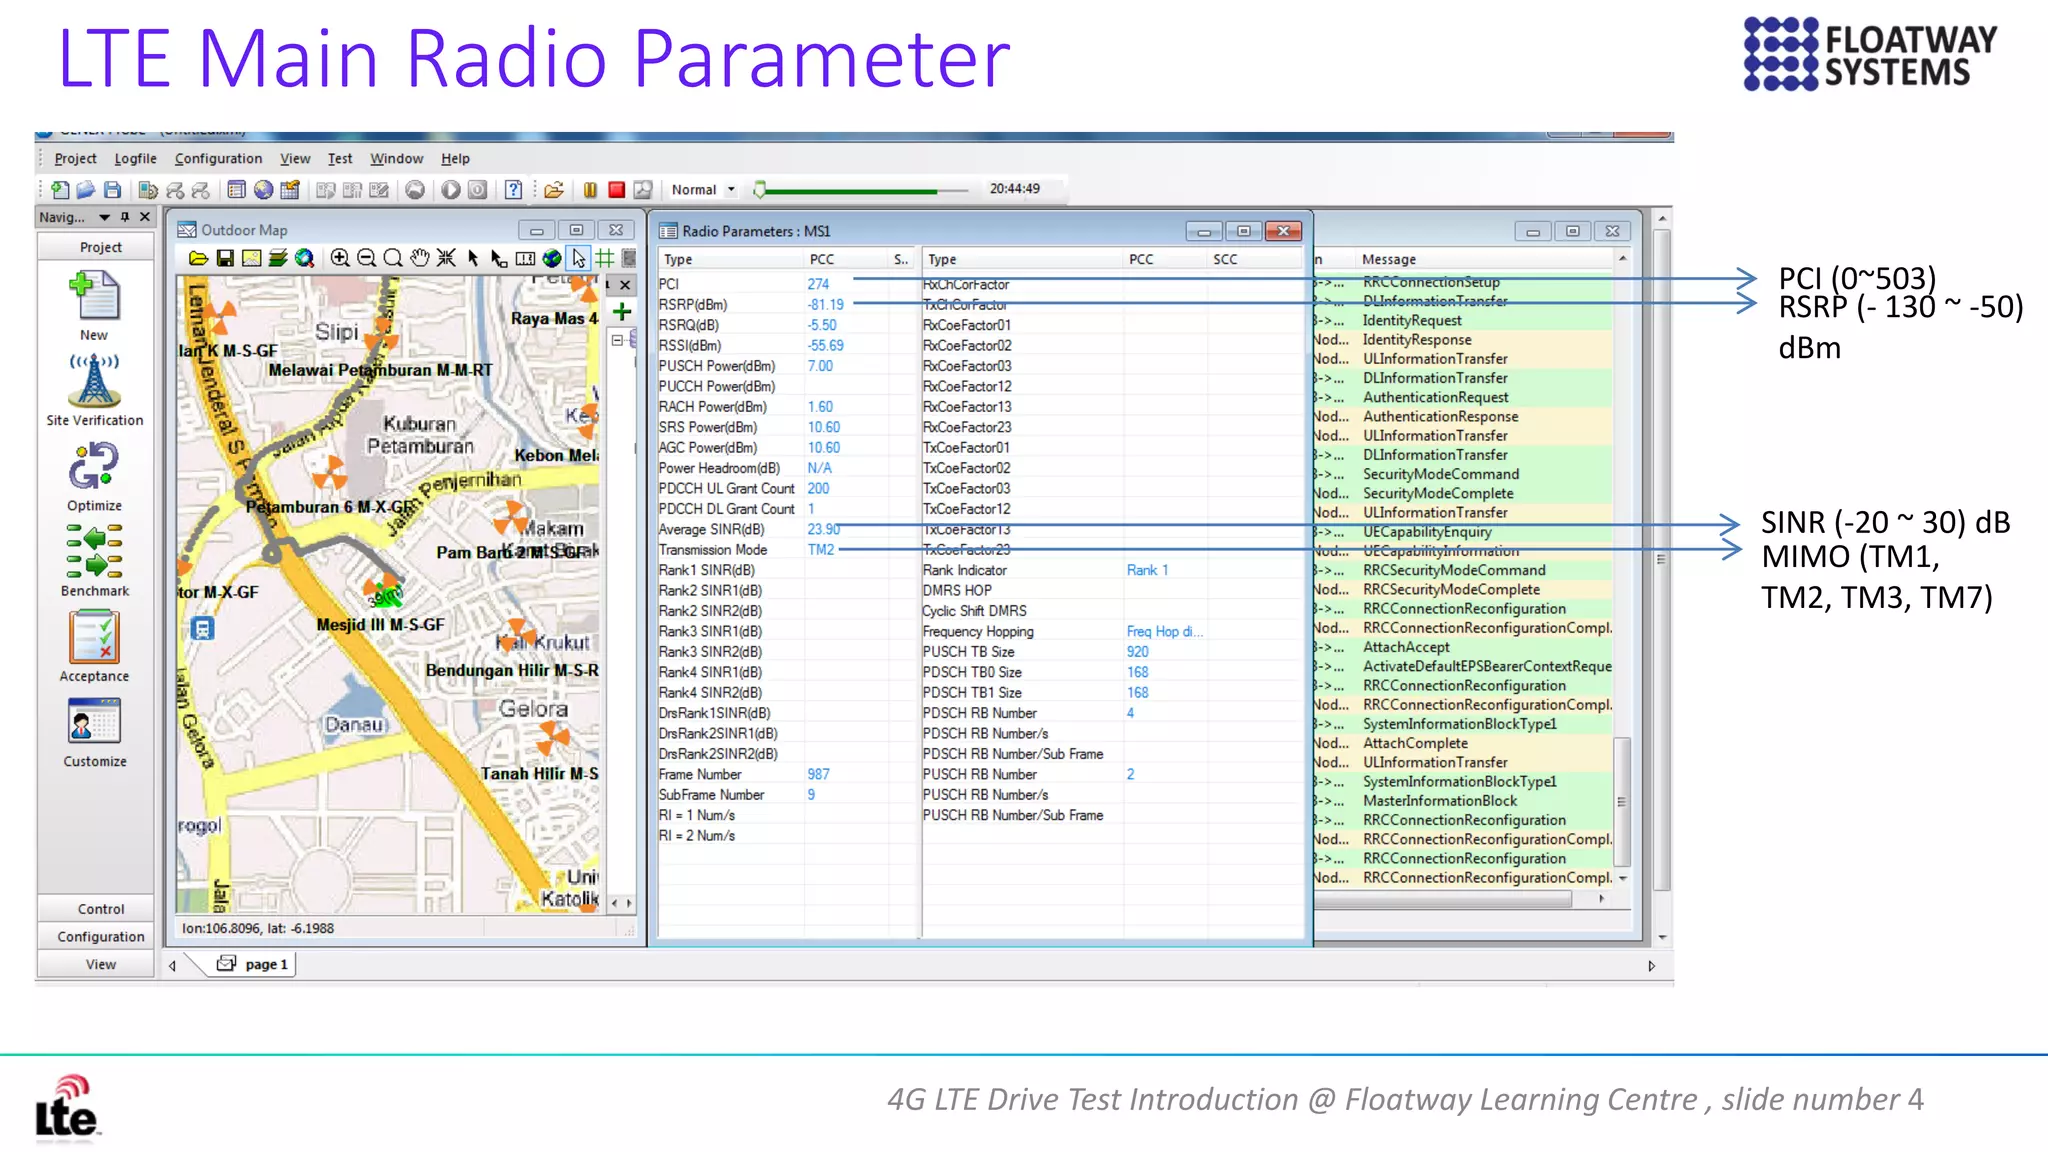
- PCI (Physical Cell ID): A number ranging from 0 to 503. Its primary purpose is to allow a phone to quickly distinguish between different cells transmitting on the same frequency. You can think of it as being conceptually similar to the BSSID in a Wi-Fi network, which differentiates access points that might be on the same channel.
The tools we'll use are designed to scan ranges of frequencies, lock onto potential LTE signals, and report back the EARFCN and PCI of any cells they find. The output of these tools often includes signal strength metrics like RSRP, similar to the data seen in professional drive-test software.
2. The Tool: LTE-Cell-Scanner
For this task, we'll use LTE-Cell-Scanner, a popular open-source tool designed to work with SDRs like your RTL-SDR to detect and identify eNodeBs. It consists of a program, CellSearch, which scans a given frequency range and reports any detected cells.
Since you are proficient with the Linux command line, we will install the tool from its source code. This involves cloning the repository, installing a few dependencies, and compiling the software—a standard workflow for many security tools.
The following guide outlines the complete process.
How to Install LTE-Cell-Scanner on Kali
This guide from Offensive Wireless provides a clear, step-by-step walkthrough for installing LTE-Cell-Scanner on a Debian-based system like Kali or Ubuntu. We will follow these instructions.
Follow the commands in the sections 'How to Install LTE-Cell-Scanner', 'Install LTE-Cell-Scanner dependencies', and 'Compile LTE-Cell-Scanner'. You only need to focus on the commands for the RTL-SDR. Specifically, you will be running git clone, apt-get install for the dependencies, mkdir build && cd build, cmake ../, and finally make. You can skip the sections for BladeRF and HackRF.
After following the steps, you should have an executable file named CellSearch inside the LTE-Cell-Scanner/build/src/ directory.
3. Hands-On Lab: Scanning for LTE Cells
Now that the tool is ready, let's find some local LTE signals.
Step 1: Determine Frequency Bands for Your Region
Unlike the relatively simple band plan of GSM in a given country, LTE is deployed across a wide and complex array of frequency bands that vary significantly by country and carrier. Before scanning, you need to know which frequency ranges to check.
A quick web search for "LTE frequency bands [your country]" (e.g., "LTE frequency bands United States") will give you a list of the bands used by carriers in your area. For example, in the US, common bands are around 700 MHz, 850 MHz, 1900 MHz (1.9 GHz), and 1700/2100 MHz (AWS).
For this exercise, pick one or two common bands to start your scan. Let's say a band in your region operates from 734 MHz to 746 MHz.
Step 2: Run the Scan
Navigate to the build directory you created during installation. The basic command for CellSearch requires a start and end frequency.
# First, navigate to the correct directory
cd LTE-Cell-Scanner/build/


# Then, run the scanner.
# This example scans from 734 MHz to 746 MHz.
# The tool expects the frequency in Hz.
./src/CellSearch --freq-start 734e6 --freq-end 746e6
Important: Just like with kalibrate-rtl and gr-gsm, you may need to specify your RTL-SDR's frequency correction value (PPM). If you don't get any results, add the --correction <ppm_value> argument to the command.
Step 3: Analyze the Output
If successful, the scanner will begin to sweep the frequency range. When it finds a cell, it will print output similar to this:
Found a cell!
earfcn=1850, freq=740.0MHz, pci=123,
This tells you:
- The EARFCN of the cell (1850 in this example).
- The corresponding downlink frequency (740.0 MHz).
- The Physical Cell ID (123).
Let the scan run for a few minutes across different bands to build a list of nearby eNodeBs.
The following video provides a practical demonstration of this entire process.
DragonOS 10/LTS Track LTE cells (LTE-Cell-Scanner)
This video from cemaxecuter shows the LTE-Cell-Scanner in action. Although the presenter uses DragonOS where the tool is pre-installed, the execution and output are identical to what you will see.
Watch from 2:04 to 5:18. The presenter demonstrates how to run CellSearch with start and end frequencies, how to specify the PPM correction, and what the output looks like when a cell is detected. This will reinforce what you are doing in the lab.
4. An Alternative Tool: srsUE
The LTE-Cell-Scanner is a simple, effective tool for finding cells. As we progress, you'll be using the more comprehensive srsRAN software suite to build your own 4G network. One of its components, srsUE, which emulates a phone, can also be used for cell scanning.
When srsUE starts, its very first job is to scan for a cell to connect to. Its log output shows a very similar discovery process.
Take a look at the srsRAN documentation. Notice in the example console output how it searches for and finds a cell.
The srsRAN documentation shows the startup sequence for srsUE. This is the same software you will install in a later module to build your test lab. This preview shows how fundamental cell searching is to any LTE device.
First, read the brief section 'Running the software' to see the example console output. Note the lines 'Searching cell in DL EARFCN...' and 'Found Cell: Mode=FDD, PCI=1...'. This shows srsUE performing the same task as LTE-Cell-Scanner. Then, scroll down to the 'Metrics' section and look at the '4G LTE console trace'. You'll see fields like pci, rsrp, and cfo—the same kind of data that professional tools and our simple scanner collect.
You don't need to install srsRAN today, but it's valuable to see that the information we're gathering with a simple scanner is the same foundational data used by more complex LTE systems.
Conclusion
Excellent work. You have now extended your passive reconnaissance skills from 2G into the 4G domain. By finding active LTE cells and identifying their core parameters, you've taken the first essential step toward analyzing and interacting with modern cellular networks.
Key Takeaways:
- LTE base stations (eNodeBs) are identified by their EARFCN (frequency channel) and PCI (Physical Cell ID).
- The
LTE-Cell-Scannertool allows you to use your RTL-SDR to scan frequency ranges and discover nearby eNodeBs. - Knowing the LTE frequency bands for your specific region is critical for conducting an effective scan.
- More advanced tools like
srsUEperform the same cell search procedure as a fundamental part of their operation.
Preview of the Next Lesson:
Finding the cell is only the first step. Just as we tuned to a GSM cell's BCCH to read its System Information messages, we must now do the same for LTE. In the next lesson, "Decode LTE Master Information Block (MIB) and System Information Block (SIB) messages," we will use a different tool to lock onto one of the cells you found today and start decoding the critical broadcast data that reveals its identity, capabilities, and security configuration.