Welcome back! In our previous lessons, you mastered the art of diagnosing model weaknesses through systematic error analysis and learned how to translate those insights into targeted improvements. You now have a robust, well-understood model. But a model sitting in a Jupyter Notebook isn't creating value yet. It's time to take it out of the lab and into the world.
This lesson marks your first step into MLOps and deployment. You will learn how to build a simple REST API to wrap your trained scikit-learn model using FastAPI. This makes your model accessible to other applications—be it a web front-end, a mobile app, or another backend service—allowing them to send data and receive predictions over the network.
Given your experience with web frameworks like Django and Flask, you'll find many concepts here familiar. We'll be defining routes and handling requests, but with a focus on the specific needs of serving a machine learning model.
What is a Model-Serving API?
At its core, an API (Application Programming Interface) is a set of rules that allows different software applications to communicate with each other. A REST API is a popular type that uses standard HTTP requests (like GET, POST, etc.) to manage resources.
When we "deploy" a model as a REST API, we are essentially creating a web server that:
- Listens for incoming HTTP requests containing new data.
- Processes that data using our trained model to generate a prediction.
- Sends the prediction back as an HTTP response, typically in a structured format like JSON.
FastAPI is a modern, high-performance Python web framework designed specifically for building APIs. It's incredibly fast, easy to learn, and comes with two killer features we'll use today:
- Automatic data validation using Pydantic, which prevents bad data from ever reaching your model.
- Interactive API documentation (Swagger UI), which creates a user-friendly web interface for testing your API right out of the box.

Let's get started.
1. The Core Workflow: Train, Save, and Serve
The process of creating a model API involves three main steps. A great tutorial that walks through this entire process is "Build a Machine Learning API Using FastAPI & Scikit-Learn" from the Data Science with Onur channel. We'll follow its structure.
Build a Machine Learning API Using FastAPI & Scikit-Learn (Step-by-Step Python Tutorial)
This first part of the video demonstrates the foundational step: training a simple model and serializing it for later use.
Watch the section on training and saving the model. The narrator trains a basic LinearRegression model and saves it using Python's pickle library.
The key idea here is serialization: converting our trained model object into a byte stream that can be saved to a file. This file can then be loaded by a separate application—our API—without needing to retrain the model.
While pickle works perfectly well, it's common in the scikit-learn ecosystem to use joblib. joblib is more efficient for objects that carry large NumPy arrays, which is often the case with scikit-learn estimators. The process is nearly identical:
# With pickle
import pickle
with open('model.pkl', 'wb') as f:
    pickle.dump(model, f)


# With joblib
import joblib
joblib.dump(model, 'model.joblib')
For this lesson, either is fine. The important part is that you have a saved model file ready for the next step.
2. Building the API with FastAPI
Now, let's build the API itself. We'll create a new Python file, let's call it main.py, and build our service piece by piece.
The article "The Machine Learning Practitioner's Guide to Model Deployment with FastAPI" provides an excellent, clear text-based walkthrough of these same steps.
The Machine Learning Practitioner's Guide to Model ...
This guide clearly breaks down the three essential components of our FastAPI application.
Read Step 2: Creating a FastAPI App, Step 3: Defining What Input Your Model Expects, and Step 4: Creating the Prediction Endpoint. Pay close attention to how Pydantic is used to define the HouseInput class and how the @app.post("/predict") decorator connects a URL to our prediction function.
Let's solidify those concepts from the video and article.
Step 2.1: Initialize the App and Load the Model
Every FastAPI application starts by creating an instance of the FastAPI class. Immediately after, you should load your serialized model into memory.
# main.py
from fastapi import FastAPI
import joblib # Or pickle


# Create the FastAPI app instance
app = FastAPI(title="ML Model API")


# Load the trained model from the file
model = joblib.load("house_price_model.joblib")
By loading the model at startup, it's kept in memory and ready to serve predictions instantly. This is far more efficient than loading the model from disk for every single request.
Step 2.2: Define the Input Schema with Pydantic
How do we tell our API what the incoming data should look like? This is where Pydantic comes in. We define a class that inherits from BaseModel and declare our expected input features as class attributes with type hints.
from pydantic import BaseModel


# Define the structure of a single data point for prediction
class PredictionInput(BaseModel):
    size_square_feet: float
    bedrooms: int
FastAPI uses this class to do four things automatically:
- Read the body of a
POSTrequest as JSON. - Validate that the JSON contains
size_square_feetandbedrooms. - Validate that the values have the correct types (a float and an int).
- Generate the "Schema" you see in the automatic API documentation.
This provides a strong contract for your API and prevents malformed data from crashing your model.
Step 2.3: Create the Prediction Endpoint
An endpoint is a specific URL in your API that performs an action. We'll create a /predict endpoint that accepts POST requests. In FastAPI, we use a function decorator to link a function to an endpoint.
import numpy as np


# Define the prediction endpoint
@app.post("/predict")
def predict(data: PredictionInput):


    # 1. Extract data in the correct order
    features = np.array([[data.size_square_feet, data.bedrooms]])


    # 2. Make a prediction
    prediction = model.predict(features)


    # 3. Return the result
    return {"predicted_price": prediction[0]}
Let's break down the predict function signature: def predict(data: PredictionInput):.
By type-hinting the data parameter with our Pydantic class PredictionInput, FastAPI automatically parses the incoming request body and validates it against that schema. If validation passes, the request data is available in the data object.
3. Running and Testing Your API
Your API code is written, but it's just a Python script. To bring it to life, you need a server. Uvicorn is the standard server for running FastAPI applications.
First, you'll need to install FastAPI and Uvicorn:pip install "fastapi[all]"
Now, you can run your API from the terminal in the same directory as your main.py file.
uvicorn main:app --reload
main: The Python filemain.py.app: TheFastAPIobject created insidemain.py(app = FastAPI()).--reload: A development flag that automatically restarts the server whenever you save changes to your code.
Once you run this command, you'll see output indicating the server is running, usually on http://127.0.0.1:8000.
Now for the best part. Open your web browser and navigate to http://127.0.0.1:8000/docs.
You will see an interactive API documentation page generated by Swagger UI.
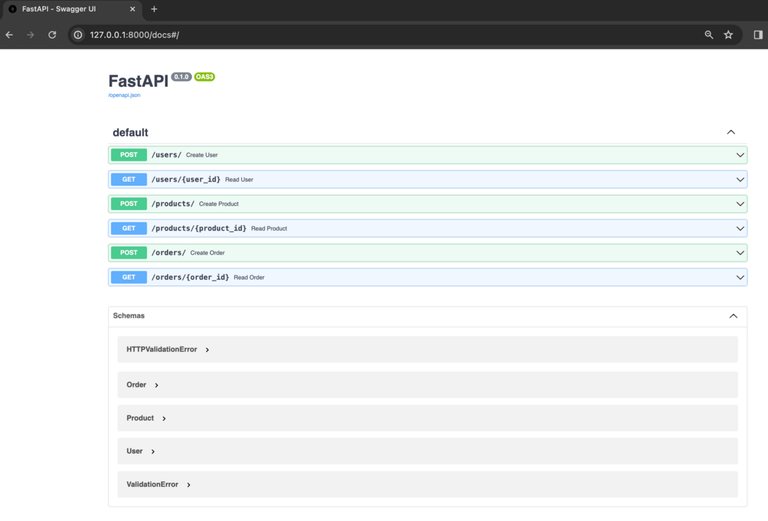
This interface allows you to test your /predict endpoint directly from your browser. The video below shows exactly how to do this.
Build a Machine Learning API Using FastAPI & Scikit-Learn (Step-by-Step Python Tutorial)
This part of the video shows how to launch the Uvicorn server and use the Swagger UI to perform a test prediction.
Watch the short sections on running the server and accessing the docs. Then, see how a test is performed using the interactive interface by watching from the prediction test.
Your Turn: Putting It All Together
Now it's your chance to build a simple API.
- Create a virtual environment and install the necessary packages:
fastapi,uvicorn,scikit-learn,numpy, andjoblib. - Train and save a model. You can use the simple linear regression example from the video or any other scikit-learn model you've worked with. Save the trained model to a
.joblibor.pklfile. - Write your
main.pyfile. Follow the steps outlined above:- Import necessary libraries (
FastAPI,Pydantic,joblib/pickle,numpy). - Create your
FastAPIapp instance. - Load your saved model.
- Define a Pydantic
BaseModelfor your model's input features. - Create a
@app.post("/predict")endpoint. - Inside the endpoint function, process the input data, make a prediction, and return it.
- Import necessary libraries (
- Run your API using
uvicorn main:app --reload. - Test it by going to
http://127.0.0.1:8000/docs, expanding the POST endpoint, clicking "Try it out," and filling in some sample data.
Conclusion
Congratulations! You've successfully taken a trained machine learning model and exposed its predictive power through a robust, validated REST API. You've bridged the gap between data science in a notebook and a functional service that can be integrated into larger systems.
Key Takeaways:
- Serialization (with
pickleorjoblib) is the process of saving a trained model to a file. - FastAPI is a modern Python framework for building APIs. It is run using a server like Uvicorn.
- Pydantic models are used to define a strict schema for your API's input data, providing automatic validation.
- Decorators (
@app.post()) are used to define API endpoints and link them to Python functions. - FastAPI automatically generates interactive Swagger UI documentation at the
/docsURL, which is invaluable for testing and sharing your API.
The Swagger UI is excellent for manual testing, but in a real-world workflow, you'd test your API programmatically. In our next lesson, we will do just that by writing a Python script with the requests library to send data to our new API and verify its responses.