Introduction
Hello! In our previous lessons, you've assembled a powerful toolkit of non-destructive modifiers. We've used the Mirror modifier for symmetry, Booleans for cutting and joining, Solidify for adding thickness, and most recently, the Bevel modifier to create realistic, light-catching edges. We even had a sneak peek at how stacking two Bevel modifiers could create more complex edge details.
Today, we will dive deep into that concept. This lesson is dedicated entirely to understanding one of the most fundamental principles of this workflow: the modifier stack. Your work with physical sculpture has taught you that process and the order of operations are critical—you block out the large form before detailing, for instance. Digital modeling is no different. Our goal for this lesson is to explain precisely how the order of modifiers in the stack dramatically affects the final mesh result. Mastering this will give you the control to troubleshoot issues and build truly intricate hard-surface forms.
1. The Modifier Stack: A Sequence of Operations
Before we look at specific examples, let's clarify what the "modifier stack" is. When you add modifiers to an object, they appear in the Properties panel as a list. This list isn't just for organization; it's a step-by-step instruction manual for Blender. Blender reads this list from top to bottom, applying each effect in sequence. The output of one modifier becomes the input for the next one down the line.
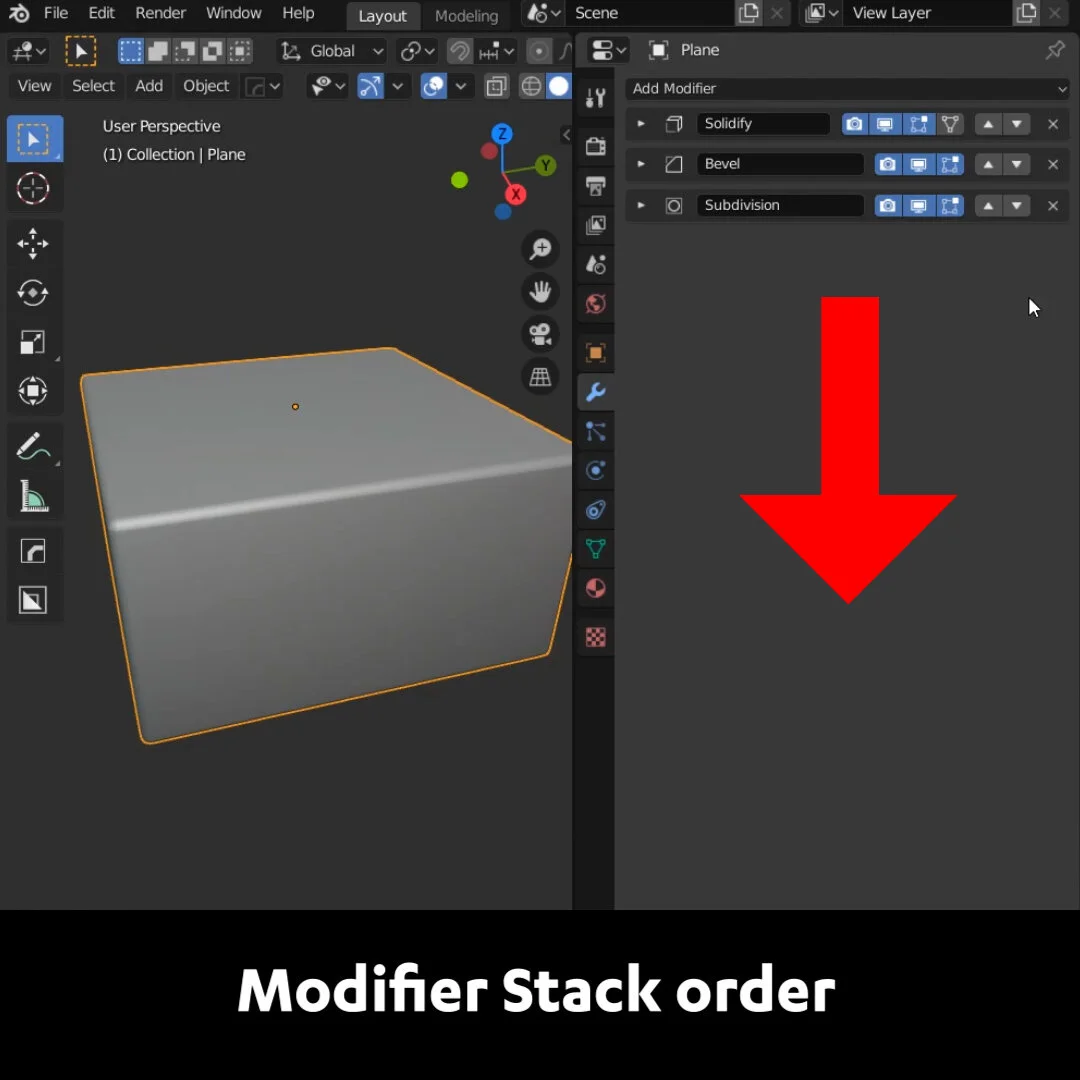
This sequential, non-destructive process is the heart of the modeling style we're learning. It allows for incredible flexibility, as you can re-order, change, or remove any step at any time without permanently altering your original base mesh.
To get a better sense of the philosophy behind this, let's read a quick introduction to non-destructive workflows.
The following excerpt from 'The Hard-Surface E-book' contrasts the 'destructive' workflow (like permanently editing geometry in Edit Mode) with the 'non-destructive' workflow we're focusing on. This will help solidify why managing the modifier stack is so important.
Please read the section titled 'Non-Destructive vs. Destructive Modeling' (starts around page 46). Focus on the example of cutting a circle into a cube and how the non-destructive Boolean approach allows for easy repositioning.
2. Order in Action: Mirroring and Smoothing
Let's look at our first and perhaps most classic example of why order matters: combining the Mirror and Subdivision Surface modifiers. You've used the Mirror modifier, and the Subdivision Surface modifier is used to smooth out geometry—a concept you'll see often.
Depending on their order, you can end up with two completely different results.
The official Blender Manual provides a perfect, concise explanation of this exact scenario. The diagrams make the difference immediately obvious.
Please read the section titled 'The Modifier Stack'. Pay close attention to the table comparing the two images where the Mirror and Subdivision Surface modifiers have switched places.
As the manual shows:
- Subdivision then Mirror: Blender first smooths your half-object into a rounded shape, and then mirrors that result, creating two separate rounded shapes.
- Mirror then Subdivision: Blender first mirrors the half-object to create a complete, symmetrical base mesh, and then applies the smoothing to the whole thing, resulting in a single, continuous, smoothed form.
Now, let's see this in a live demonstration.
Modifiers for Beginners (Blender Tutorial)
This video clip by Ryan King Art will walk you through this exact Mirror and Subdivision Surface interaction, explaining the logic as he goes.
Watch from 00:44:03 to 00:45:34. The presenter demonstrates how placing the subdivision before the mirror results in a gap, and how swapping their order fixes the issue.
Mini-Challenge: Test it Yourself
Now it's your turn to see this firsthand. This will take just a few minutes but will lock in the concept.
- Open a new Blender file and delete the default Cube.
- Add a Plane (
Shift + A> Mesh > Plane). - Enter Edit Mode (
Tab). - Move the plane off to one side on the X-axis (e.g., press
G, thenX, and move it). - Return to Object Mode (
Tab). - Add a Subdivision Surface modifier. Notice the plane becomes a rounded square.
- Now, add a Mirror modifier. You should see two separate shapes.
- In the modifier stack, find the Mirror modifier. Click and drag it by the dotted area (
::::) on its top-right corner and move it above the Subdivision Surface modifier.
Look at the result. The two shapes should now be fused into a single, smooth object. You have just directly controlled the outcome by changing the modifier order.
3. More Examples: Stacking for Hard-Surface Models
This principle applies to all modifiers. The combination and order you choose are key to achieving your desired shape. Let's look at two more examples highly relevant to hard-surface modeling.
Example 2: Solidify and Subdivision
What happens when you combine giving an object thickness (Solidify) and smoothing it (Subdivision Surface)? The order determines whether you get a sharp rim or a soft one.
In this clip, Darrin Lile is modeling a chair and runs into this exact situation. He wants to add thickness but maintain a smooth curve.
Watch from 03:13 to 05:05. First, he adds the Solidify modifier after the Subdivision, resulting in a pinched, sharp edge. Then, he drags the Solidify modifier before the Subdivision, which produces a much cleaner, rounded edge.
Example 3: Boolean and Bevel
This is the most critical combination for our hard-surface workflow. The order of Boolean and Bevel modifiers dictates whether the edges of your cuts are sharp or beveled.
- Order A: Boolean -> Bevel
This is the most common workflow. You make your cut first with the Boolean. Then, the Bevel modifier comes second and is able to "see" the new edges created by the cut, applying a bevel to them.

- Order B: Bevel -> Boolean
In this case, you bevel your base shape first. The Boolean then comes second and cuts through the already-beveled object. The new edges created by this cut will remain perfectly sharp.
This second approach isn't a mistake; it's a technique! It allows you to create different-sized bevels on the same object. You can have one Bevel modifier for the main body and a separate Bevel modifier just for the edges of your cuts.
This is a more advanced concept, but you're ready for it. The 'Hard-Surface E-book' has an excellent section that explains how to use stack order to create multiple bevel sizes on one model.
Read the section titled 'Multi-Level Bevels' (starts around page 59). Don't worry if the details about the 'Angle' limit method seem complex; focus on the core idea: he places one Bevel before the Boolean and another Bevel after the Boolean to affect different parts of the mesh independently.
Conclusion
You've now seen that the modifier stack is not just a list, but a recipe. By understanding that Blender executes these operations from top to bottom, you've unlocked the ability to create far more complex shapes and, just as importantly, to diagnose problems when your model isn't looking the way you expect.
Key Takeaways:
- The modifier stack is processed sequentially from top to bottom.
- Changing the order of modifiers can drastically alter the final geometry.
- Mirror -> Subdiv creates a single, symmetrical smooth object.
- Solidify -> Subdiv creates a thick object with soft, rounded rims.
- Boolean -> Bevel is the standard way to bevel the edges of your cuts.
- Intentionally manipulating the stack order is a powerful technique for achieving advanced hard-surface effects, like multi-level bevels.
Next Steps
So far, we have reveled in the flexibility of the non-destructive workflow. But at some point, you need to commit to a form to take the next step, like sculpting fine details. In our next lesson, we will cover how and when to apply modifiers, turning their procedural effect into permanent geometry to create a final base mesh suitable for hard-surface sculpting.