Welcome to the next lesson in our cloud deployment module. In our previous session, you successfully configured your Django application on EC2 to communicate with managed AWS services—RDS for your database and S3 for file storage. You accomplished this by placing credentials in a .env file on the server. While this was a major step forward, in a professional production environment, storing secrets in a plain-text file presents significant security risks.
This lesson addresses that final piece of the configuration puzzle: professional-grade secret management. We will replace the vulnerable .env file with AWS Secrets Manager, a service designed for securely storing, managing, and retrieving credentials. Mastering this practice is essential for building secure and scalable cloud applications, directly aligning with the Infilect job description's emphasis on experience with cloud services and building robust backend systems.
By the end of this 60-minute lesson, you will be able to:
- Explain the limitations of using
.envfiles for secrets in production. - Store database and service credentials securely in AWS Secrets Manager.
- Grant your EC2 instance controlled access to secrets using IAM Roles.
- Modify your Django application to fetch credentials from Secrets Manager at runtime.
Why .env Files Are Not Enough for Production
Using environment variables is a good practice, but loading them from a plain-text .env file on a production server has several drawbacks. Anyone who gains access to the server can read all your credentials, there's no audit trail of who accesses them, and rotating credentials becomes a manual and error-prone process.
A dedicated secrets manager solves these problems by providing a centralized, encrypted, and access-controlled vault for your application's secrets.
To understand this problem more deeply, watch this short segment.
Manage secrets with AWS Secrets Manager with Python - Tech Tip Tuesday
The GitGuardian channel explains the concept of "secret sprawl" and the risks associated with distributing secrets in plain text.
Watch the beginning of the video, from the problem we face, which clearly articulates why simply having secrets on developer machines or in text files on servers is a poor practice.
AWS provides two main services for this purpose: Parameter Store and Secrets Manager. For our use case, which involves sensitive database credentials and potential future needs like automatic rotation, Secrets Manager is the ideal choice.
Secrets Manager vs Parameter Store: Which Should You Use?
The Cloudmancer channel provides a concise comparison of AWS Secrets Manager and Parameter Store.
Watch the overview from the introduction to understand the primary use cases for each service. This will give you the context to know when to choose one over the other in future projects.
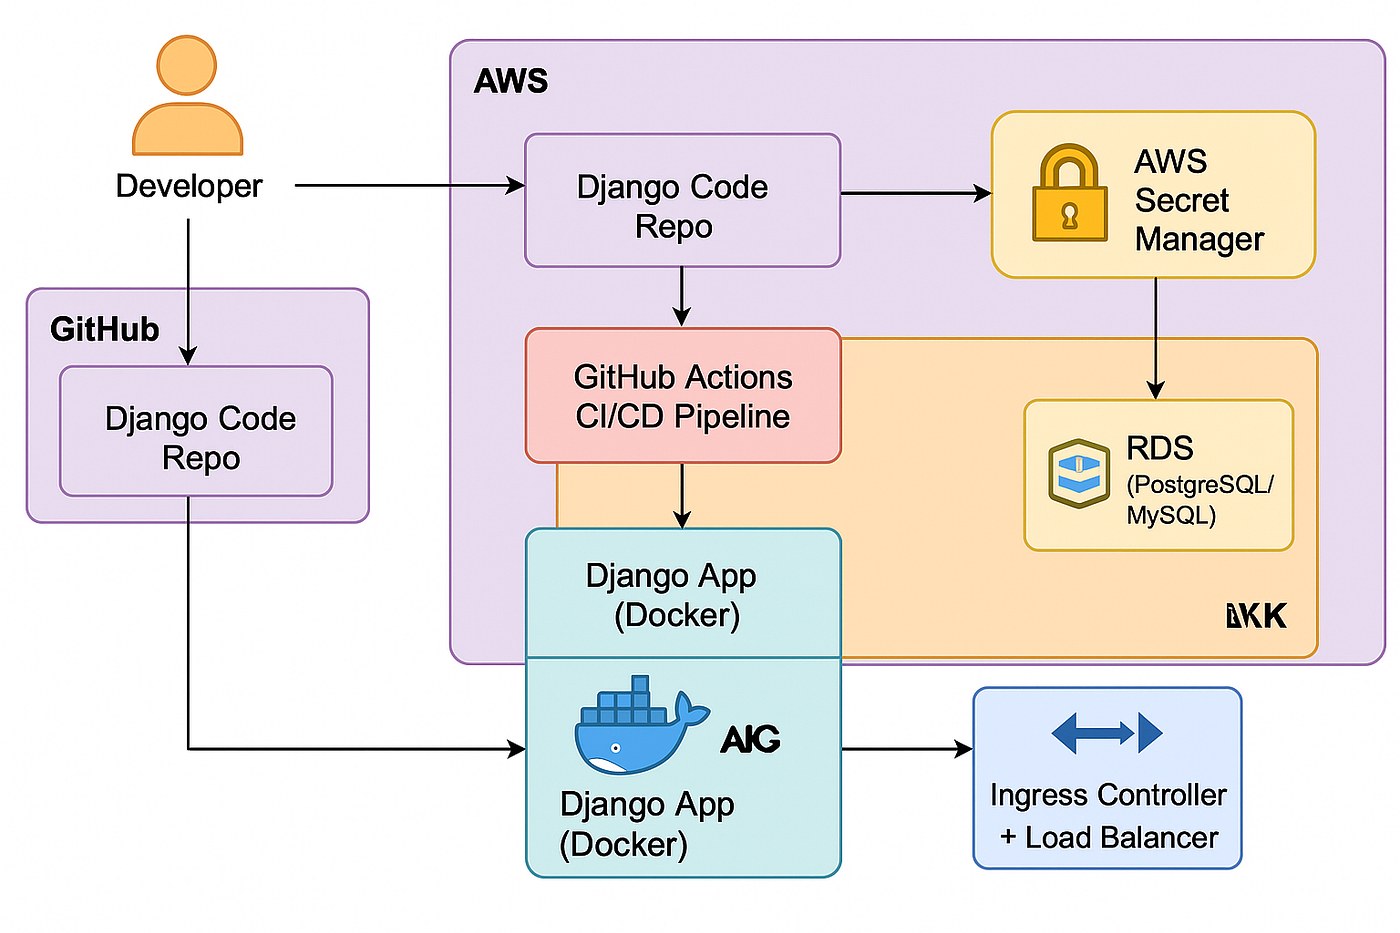
Our goal is to evolve your architecture to securely inject these secrets at runtime, as illustrated in the diagram below.
Part 1: Storing Credentials in AWS Secrets Manager
Your first step is to move the credentials from your .env file into Secrets Manager. We will create two separate secrets: one for the RDS database and one for the IAM user credentials used for S3 access.
Your Task: Create the Secrets
- Navigate to AWS Secrets Manager: In the AWS Management Console, search for and go to the "Secrets Manager" service.
- Create the Database Secret:
- Click "Store a new secret".
- For "Secret type", choose "Other type of secret".
- Under "Key/value pairs", create entries for your database credentials. Use the exact keys from your previous
.envfile for consistency (e.g.,SQL_USER,SQL_PASSWORD,SQL_DATABASE,SQL_HOST,SQL_PORT). - Click "Next".
- Give the secret a descriptive name, like
infilytics/rds. Using a prefix helps organize secrets by project. - Click "Next" through the rotation options (we will not configure automatic rotation for now) and finally click "Store".
- Create the S3 Secret:
- Repeat the process to store another secret.
- Choose "Other type of secret".
- Add key/value pairs for
AWS_ACCESS_KEY_IDandAWS_SECRET_ACCESS_KEY. - Click "Next".
- Name this secret
infilytics/s3. - Click through and store the secret.
For a visual guide on creating a secret in the console, you can refer to the following video segment.
Manage secrets with AWS Secrets Manager with Python - Tech Tip Tuesday
This video demonstrates the process of creating a new secret in the AWS console.
Watch the section from Store new secret. While the video creates a secret for an OpenAI key, the process for creating a key/value pair secret is identical to what you need to do.
Part 2: Granting Your Application Secure Access with an IAM Role
Now that your secrets are stored, you must grant your EC2 instance permission to read them. You will do this by creating an IAM Role, which your EC2 instance will "assume" to gain temporary, secure permissions. This is vastly more secure than storing long-lived access keys on the instance itself.
Your Task: Create and Attach the IAM Role
-
Create an IAM Policy:
- Go to the IAM service in the AWS Console.
- Navigate to "Policies" and click "Create policy".
- Switch to the "JSON" tab and paste the following policy. You must replace
<account-id>,<region>, and the secret names with your specific values. You can find the full ARN of your secrets on their respective pages in Secrets Manager.
{ "Version": "2012-10-17", "Statement": [ { "Effect": "Allow", "Action": "secretsmanager:GetSecretValue", "Resource": [ "arn:aws:secretsmanager:<region>:<account-id>:secret:infilytics/rds-*", "arn:aws:secretsmanager:<region>:<account-id>:secret:infilytics/s3-*" ] } ] }- Click "Next", give the policy a name like
InfilyticsSecretsReadAccess, and create it.
-
Create an IAM Role:
- In IAM, navigate to "Roles" and click "Create role".
- For the trusted entity type, select "AWS service".
- For the use case, select "EC2" and click "Next".
- Search for and select the
InfilyticsSecretsReadAccesspolicy you just created. - Click "Next", give the role a name like
InfilyticsEC2Role, and create it.
-
Attach the Role to Your EC2 Instance:
- Go to the EC2 service in the console.
- Select your running
infilytics-appinstance. - Click "Actions" -> "Security" -> "Modify IAM role".
- Select the
InfilyticsEC2Rolefrom the dropdown and click "Update IAM role".
Your EC2 instance now has the necessary permissions to fetch the secrets you created.
Part 3: Accessing Secrets from Your Django Application
The final step is to modify your Django code to use these new permissions. You will use boto3, the AWS SDK for Python, to fetch the secrets at application startup.
Your Task: Update the Django Code
-
Add
boto3to your requirements:
Open yourrequirements.txtfile and add the following line:boto3 -
Create a
secrets.pyhelper:
Inside your Django project's main configuration directory (wheresettings.pyis), create a new file namedsecrets.py. Paste the following code into it:import boto3 import json from botocore.exceptions import ClientError def get_secret(secret_name, region_name="us-east-1"): """ Retrieves a secret from AWS Secrets Manager. """ # Create a Secrets Manager client session = boto3.session.Session() client = session.client( service_name='secretsmanager', region_name=region_name ) try: get_secret_value_response = client.get_secret_value( SecretId=secret_name ) except ClientError as e: # Handle exceptions here raise e # Decrypts secret using the associated KMS key. secret = get_secret_value_response['SecretString'] return json.loads(secret)This function connects to Secrets Manager, retrieves a named secret, and parses its JSON content into a Python dictionary.
-
Update
settings.py:
Now, modify yoursettings.pyto use this helper function instead ofos.environ.get()for your database and S3 configurations.# At the top of your settings.py from .secrets import get_secret # ... other imports ... # Fetch secrets # IMPORTANT: Replace 'infilytics/rds' and 'infilytics/s3' with your actual secret names db_credentials = get_secret("infilytics/rds") s3_credentials = get_secret("infilytics/s3") # ... keep your existing settings like BASE_DIR, SECRET_KEY, DEBUG ... # Database Configuration DATABASES = { 'default': { 'ENGINE': 'django.db.backends.postgresql', 'NAME': db_credentials['SQL_DATABASE'], 'USER': db_credentials['SQL_USER'], 'PASSWORD': db_credentials['SQL_PASSWORD'], 'HOST': db_credentials['SQL_HOST'], 'PORT': db_credentials['SQL_PORT'], } } # AWS S3 Configuration AWS_ACCESS_KEY_ID = s3_credentials['AWS_ACCESS_KEY_ID'] AWS_SECRET_ACCESS_KEY = s3_credentials['AWS_SECRET_ACCESS_KEY'] AWS_STORAGE_BUCKET_NAME = 'your-s3-bucket-name' # You can also put this in secrets if you want AWS_S3_REGION_NAME = 'your-bucket-region' AWS_S3_CUSTOM_DOMAIN = f'{AWS_STORAGE_BUCKET_NAME}.s3.amazonaws.com' # ... keep your other S3 settings like DEFAULT_FILE_STORAGE etc. ...
The logic for this Python code is explained very well in the following video walkthrough.
Manage secrets with AWS Secrets Manager with Python - Tech Tip Tuesday
This segment shows the complete Python code for connecting to Secrets Manager with Boto3, retrieving a secret, parsing the JSON, and using the values.
Follow the code demonstration from connecting to AWS. The code creates a session, gets the client, retrieves the secret value, and parses the JSON string, which is exactly what our secrets.py helper does.
- Deploy and Verify:
- Commit and push your code changes to your GitHub repository.
- SSH into your EC2 instance.
- Navigate to your project directory.
- Pull the latest changes:
git pull. - Crucially, remove the old
.envfile to prove your application is no longer using it:rm .env. - Rebuild your Docker image to include
boto3and restart the services:docker-compose down docker-compose up -d --build - Check the logs for your web container to ensure there are no startup errors:
docker-compose logs web - Visit your application's URL. If it loads correctly, and you can still log in and upload files, you have successfully integrated AWS Secrets Manager!
Conclusion
You have now implemented a professional, secure strategy for managing credentials in a cloud environment. This is a significant improvement over using plain-text files and is a core competency for any backend engineer working with cloud infrastructure.
In this lesson, you learned to:
- Identify the security risks of using
.envfiles in production. - Create and manage secrets for your database and AWS services in AWS Secrets Manager.
- Use the principle of least privilege by creating a specific IAM Role for your EC2 instance to access only the secrets it needs.
- Integrate the
boto3SDK into your Django application to fetch these secrets dynamically at runtime.
Your deployment is now more secure, manageable, and aligned with industry best practices.
In the next lesson, we will refine our use of S3. While your files are stored on S3, you might not always want them to be publicly accessible. We will explore how to configure secure, direct-from-S3 file access using features like presigned URLs, giving you granular control over who can access your stored data.