Welcome to the first lesson of Module 5. In the previous module, you built a fully functional web application, TaskMaster, using Django's core features. You created models, used the ORM, built views to render HTML templates, and managed user input with Django Forms.
Now, we're making a fundamental shift. Instead of building applications that serve web pages directly to a browser, we will start building a web API. An API (Application Programming Interface) doesn't serve HTML; it serves raw data, typically in a format called JSON. This is the backbone of modern web development, allowing a single backend to provide data to many different clients, such as a web frontend (built with a framework like React), a mobile app, or even another server.
This transition is central to your goal of becoming a backend engineer, as the Infilect job description explicitly requires you to "Design and develop REST APIs for frontend and backend."
Today, we'll take the first and most crucial step: learning how to convert the data from our Django models into this JSON format. This process is called serialization, and we'll use the most popular library for this in the Django ecosystem: the Django REST Framework (DRF).
By the end of this lesson, you will be able to:
- Explain the role of serialization in a web API.
- Install and configure Django REST Framework in your project.
- Create a
ModelSerializerto map a Django model to a data representation. - Use the serializer to convert single model instances and querysets into JSON-compatible data.
1. What is Serialization?
At its core, serialization is the process of translating a complex data structure, like a Python object representing one of your Task model instances, into a format that can be easily stored or transmitted and then reconstructed later. For web APIs, this format is almost always JSON (JavaScript Object Notation).
Imagine you have a Task object in your database. It has a title, a description, and a boolean completed status. In Python, this is an object with attributes. A frontend application written in JavaScript, however, cannot directly understand a Python object. It needs the data in a simple, universal text format. A serializer acts as this translator.
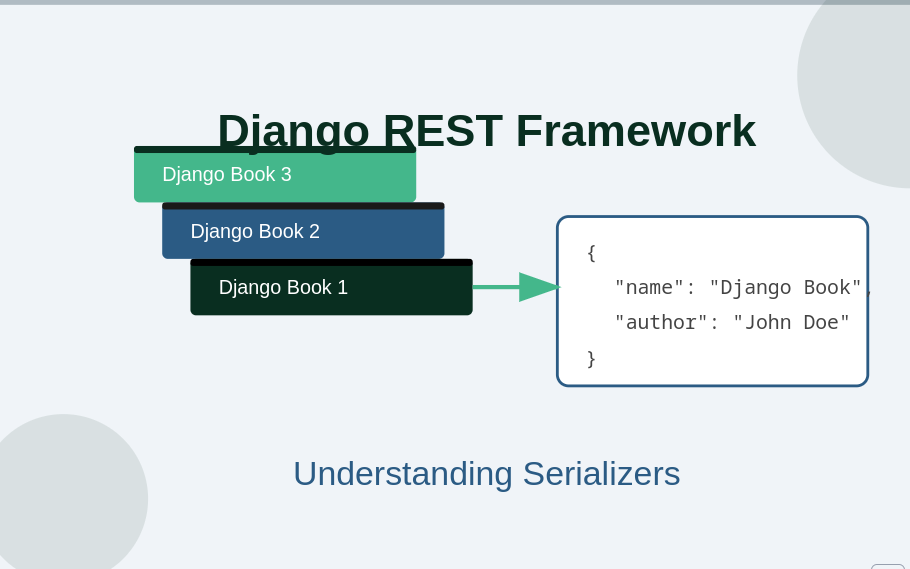
The reverse process, taking JSON data from a request and converting it back into a complex type like a Django model instance, is called deserialization. We will touch on this briefly but focus on it in the next lesson.
2. Setting Up Django REST Framework
First, let's get DRF installed and configured in your TaskMaster project.
-
Make sure your virtual environment is activated.
-
Install the package using pip:
pip install djangorestframework -
Next, add
rest_frameworkto yourINSTALLED_APPSinmyproject/settings.py.# myproject/settings.py INSTALLED_APPS = [ 'django.contrib.admin', 'django.contrib.auth', 'django.contrib.contenttypes', 'django.contrib.sessions', 'django.contrib.messages', 'django.contrib.staticfiles', # Our app 'tasks.apps.TasksConfig', # 3rd Party Apps 'rest_framework', # Add this line ]
That's it! DRF is now ready to be used in your project.
3. The ModelSerializer: The ModelForm for APIs
In the last lesson, you became familiar with ModelForm, a powerful class that automatically builds a web form from a Django model. Django REST Framework provides a wonderfully similar concept for APIs: the ModelSerializer.
Just as ModelForm maps model fields to HTML form inputs, ModelSerializer maps model fields to JSON fields. It's an intelligent shortcut that inspects your model and automatically creates the fields and basic validation rules for you. This powerful parallel makes DRF feel very natural after working with Django's forms.
Let's dive into the official DRF tutorial to see how this works.
The official DRF documentation provides the definitive explanation for ModelSerializer. It's concise and perfectly illustrates how it simplifies serializer creation.
Focus on the section Using ModelSerializers. Notice the structure: you define an inner Meta class, specify the model, and list the fields you want to include. This should feel very familiar from your work with ModelForm.
4. Hands-On: Serializing Your Tasks
Now, let's create a serializer for our Task model. The following video provides a clear, practical demonstration. It uses a Task model, just like our project, making it easy to follow along.
Django Rest Framework | Serializers & CRUD
In this video, Dennis Ivy walks through creating a ModelSerializer from scratch.
Watch the segment from on creating the serializer. Follow these steps in your own project: Create a new file in your tasks app directory named serializers.py. Import serializers from rest_framework and your Task model. Define the TaskSerializer class, inheriting from serializers.ModelSerializer. Create the inner Meta class, specifying the model as Task and the fields you want to expose.
Your tasks/serializers.py file should now look like this:
# tasks/serializers.py

from rest_framework import serializers
from .models import Task

class TaskSerializer(serializers.ModelSerializer):
    class Meta:
        model = Task


        # You can specify fields like this:
        # fields = ['id', 'title', 'description', 'completed']


        # Or include all fields:
        fields = '__all__'
For the fields attribute, you can list the exact fields you want to expose. Using '__all__' is a convenient shortcut to include every field from the model, which is fine for now.
5. Using the Serializer in the Django Shell
You've created the serializer, but how do you use it? Before we build an API view, the Django shell is the perfect place to see your TaskSerializer in action. This isolates the serialization process so you can understand exactly what it does.
The official DRF tutorial has a great section on this.
This part of the DRF tutorial shows you the mechanics of both serialization (object to data) and deserialization (data to object) using the Django shell.
Read the section titled Working with Serializers. Follow the steps in your own shell, but adapt them for your Task model and TaskSerializer. Don't worry about deserialization for now; focus on the first part where an existing object is turned into data.
Let's walk through it together. Open the Django shell:
python manage.py shell
Now, let's serialize a single task.
# 1. Import your model and serializer
>>> from tasks.models import Task
>>> from tasks.serializers import TaskSerializer


# 2. Get a task object to work with (assuming you have tasks in your DB)
>>> task = Task.objects.first()


# 3. Instantiate the serializer with the task object
>>> serializer = TaskSerializer(task)


# 4. Access the serialized data!
>>> serializer.data
{'id': 1, 'title': 'My First Task', 'description': 'Complete the DRF tutorial.', 'completed': False, 'user': 1, 'created': '2023-10-27T10:30:00.123456Z'}
The .data property gives you a Python OrderedDict containing the model's data, converted into native Python datatypes. This dictionary can be effortlessly rendered into JSON.
Serializing a QuerySet
What if you want to serialize a list of tasks? You can't just pass a queryset directly to the serializer. You need to give it a hint that you're serializing multiple objects by adding the many=True argument.
# Continue in the Django shell


# 1. Get a queryset of all tasks
>>> tasks = Task.objects.all()


# 2. Instantiate the serializer with the queryset and many=True
>>> serializer = TaskSerializer(tasks, many=True)


# 3. Access the data
>>> serializer.data
[
    {'id': 1, 'title': 'My First Task', ...},
    {'id': 2, 'title': 'Another Task', ...},
    ...
]
As you can see, serializer.data is now a list of dictionaries—a perfect representation for a list of objects in JSON.
Conclusion
Congratulations on taking your first step into API development! You've learned the fundamental concept of serialization and seen how Django REST Framework provides an elegant and familiar way to handle it with ModelSerializer. This is the essential bridge between your Django backend logic and the outside world.
Key Takeaways:
- Serialization is the process of converting complex data types (like model instances) into a simple format (like JSON) for transmission.
- Django REST Framework (DRF) is a powerful toolkit for building web APIs in Django.
ModelSerializerworks just likeModelForm, automatically generating data fields and validation from a Django model.- You can serialize a single object by passing it to the serializer:
serializer = TaskSerializer(task). - You can serialize a queryset (multiple objects) by adding the
many=Trueflag:serializer = TaskSerializer(tasks, many=True). - The final, JSON-compatible data is accessed via the
serializer.dataattribute.
In our next lesson, we will put this TaskSerializer to work. You'll learn how to create your first API "view" that uses the serializer to respond to web requests with JSON data, making your tasks accessible over a real HTTP endpoint.