Welcome back! In our last lesson, you equipped your API with robust filtering, searching, and ordering capabilities. Your TaskMaster API is now not just functional, but also flexible and efficient, allowing clients to query for precisely the data they need.
However, a powerful API that no one knows how to use is like a library with no catalog. For other developers—be they on the frontend team, building a mobile app, or even another backend service—your API is a black box. This is where documentation becomes essential.
Today, you'll learn how to automatically generate professional, interactive API documentation using the OpenAPI specification and a powerful library called drf-spectacular. This is the final and crucial step in making your API truly ready for collaboration, directly addressing the professional expectation that you can "design and develop REST APIs for frontend and backend" and work effectively with other engineers.
By the end of this lesson, you will be able to:
- Explain the role of OpenAPI/Swagger in modern API development.
- Integrate
drf-spectacularinto your Django project to generate an OpenAPI schema. - Expose interactive documentation UIs (Swagger and ReDoc).
- Use the documentation to test authenticated endpoints.
- Enhance the generated documentation with custom descriptions and summaries.
1. What are OpenAPI and Swagger?
Before we dive into the code, let's clarify some terms.
-
OpenAPI Specification: This is a standard, language-agnostic format for describing RESTful APIs. It defines a formal way to detail your API's endpoints, the operations available on each endpoint (GET, POST, etc.), the parameters they accept, and the structure of the data they send and receive. Think of it as a blueprint for your API.
-
Swagger: This is a set of open-source tools built around the OpenAPI Specification. The most famous of these is Swagger UI, which takes an OpenAPI document and generates a beautiful, interactive web interface. This interface allows developers to not only read about your API but also to try it out live in their browser.
We will use the drf-spectacular library, which is the current standard in the Django community for generating OpenAPI 3 schemas. It intelligently inspects your ViewSets, Serializers, and URL configurations to build the API blueprint automatically.
2. Setting Up drf-spectacular
Let's integrate drf-spectacular into your TaskMaster project. The process involves three simple steps: installing the package, updating your settings, and adding new URL patterns.
The article "DRF API Documentation Using drf-spectacular" provides a clear, step-by-step guide that we will follow.
This guide provides a complete walkthrough for setting up drf-spectacular, from installation to viewing the final documentation.
Read from the beginning, following the instructions in Step 1 and Step 2 to install the package and configure your settings.py. Then, follow Step 3 to add the necessary URL patterns. You can stop when you reach the "Test the Documentation" section, as we will do that together.
Let's perform those steps on your TaskMaster project.
Your Task: Integrate drf-spectacular
-
Install the package. Stop your development server and run the following command in your virtual environment. We're including the extras for both Swagger and ReDoc UIs.
pip install drf-spectacular[swagger,redoc]Don't forget to add
drf-spectacularto yourrequirements.txtfile.pip freeze > requirements.txt -
Configure
settings.py. Open yourmyproject/settings.pyfile and make two changes:- Add
'drf_spectacular'to yourINSTALLED_APPS. - Add
'DEFAULT_SCHEMA_CLASS': 'drf_spectacular.openapi.AutoSchema'to yourREST_FRAMEWORKdictionary.
# myproject/settings.py INSTALLED_APPS = [ # ... 'rest_framework', 'rest_framework_simplejwt', 'tasks', 'django_filters', 'drf_spectacular', # Add this line ] REST_FRAMEWORK = { 'DEFAULT_AUTHENTICATION_CLASSES': ( 'rest_framework_simplejwt.authentication.JWTAuthentication', ), 'DEFAULT_SCHEMA_CLASS': 'drf_spectacular.openapi.AutoSchema', # Add this line } - Add
-
Add project metadata (Optional but Recommended). Still in
settings.py, let's add some metadata to make our documentation more descriptive.# myproject/settings.py (at the end of the file) SPECTACULAR_SETTINGS = { 'TITLE': 'TaskMaster API', 'DESCRIPTION': 'A simple API for managing tasks and projects, built with Django REST Framework.', 'VERSION': '1.0.0', 'SERVE_INCLUDE_SCHEMA': False, # We will not serve the raw schema file } -
Configure
urls.py. Open your mainmyproject/urls.pyfile and add the paths for the documentation.# myproject/urls.py from django.contrib import admin from django.urls import path, include from drf_spectacular.views import SpectacularAPIView, SpectacularSwaggerView, SpectacularRedocView urlpatterns = [ path('admin/', admin.site.urls), path('api/', include('tasks.urls')), path('api/token/', include('authentication.urls')), # Assuming you have this from previous lessons # API Documentation URLs path('api/schema/', SpectacularAPIView.as_view(), name='schema'), # Optional UI: path('api/schema/swagger-ui/', SpectacularSwaggerView.as_view(url_name='schema'), name='swagger-ui'), path('api/schema/redoc/', SpectacularRedocView.as_view(url_name='schema'), name='redoc'), ]
That's it! With these few configuration changes, you are ready to see the magic.
3. Exploring the Interactive Documentation
Now, run your development server and see what you've created.
python manage.py runserver
Open your browser and navigate to http://127.0.0.1:8000/api/schema/swagger-ui/.
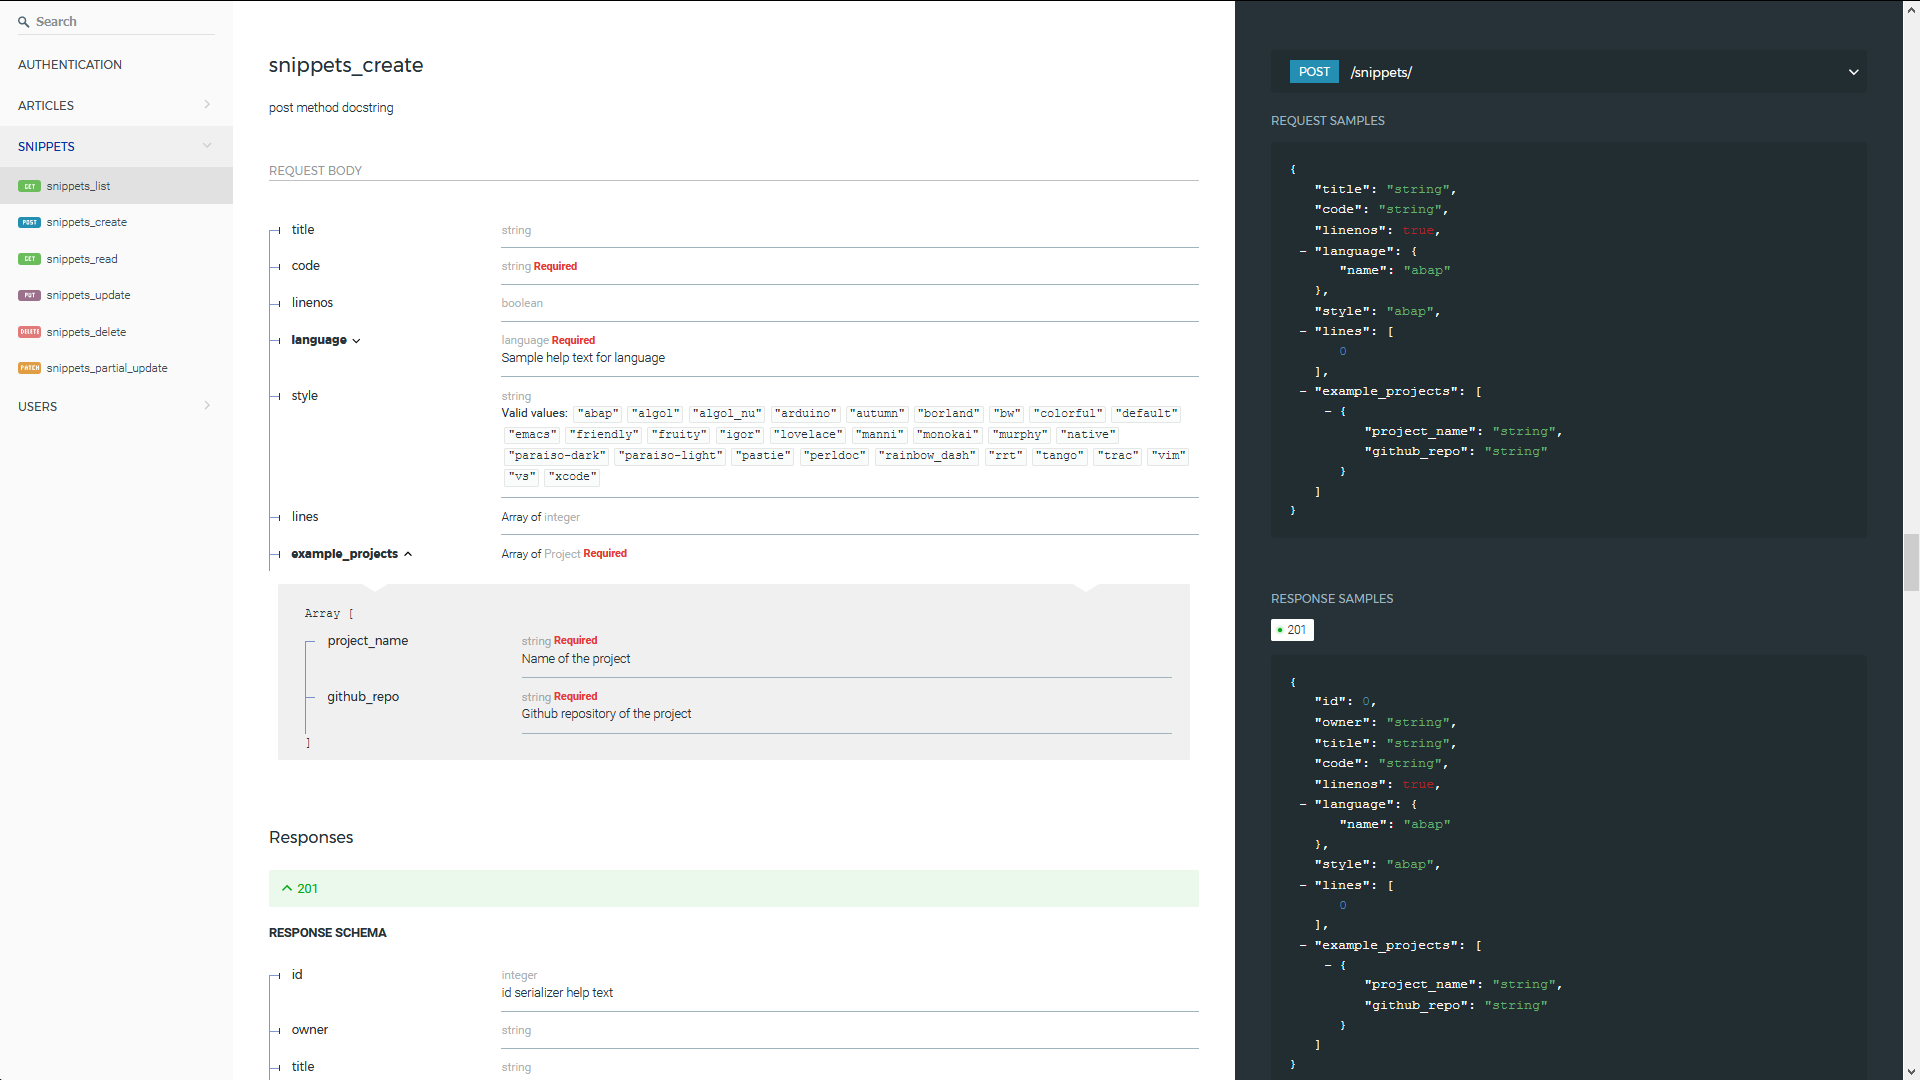
You should see a well-structured page that looks something like this:

Take a moment to explore. You'll notice:
- The title and description you set in
SPECTACULAR_SETTINGS. - All your API endpoints (
/api/tasks/,/api/token/, etc.) are listed and grouped. - For each endpoint, all the available HTTP methods (
GET,POST,PUT, etc.) are shown. - If you expand an endpoint, like
GET /api/tasks/, you can see the parameters it accepts (thanks to our previous lesson on filtering!) and the expected response schema. The schema is automatically derived from yourTaskSerializer!
4. Authenticating and Making Test Requests
Our Task endpoints are protected and require authentication. Let's see how Swagger UI handles this.
You'll see a green "Authorize" button at the top right. Click it. drf-spectacular is smart enough to detect our JWT authentication and provides a dialog.
To use it:
- Go to your command line and get a new access token just like you did in the authentication lessons.
- Copy the
accesstoken. - In the Swagger UI authorization modal, paste
Bearer <your_access_token>into the value field. Make sure to include the word "Bearer" followed by a space. - Click "Authorize" and then "Close".
Now, the lock icons next to the protected endpoints should appear closed. You can now use the "Try it out" feature to make live API calls from your browser!
Your Task: Test an Endpoint
- Navigate to the
GET /api/tasks/endpoint in the Swagger UI. - Click "Try it out".
- Click the "Execute" button.
You should see a 200 response with the JSON body containing your list of tasks, right there in the browser. This is an incredibly powerful tool for both developing and demonstrating your API.
5. Enhancing Documentation with Annotations
The auto-generated documentation is fantastic, but we can make it even better by adding our own descriptions. drf-spectacular provides decorators to "annotate" our views with extra information.
The @extend_schema decorator is perfect for this. Let's add a helpful description to our TaskViewSet.
The video "Django DRF Project | API Documentation" demonstrates exactly how to do this to resolve warnings and improve documentation clarity.
Django DRF Project | API Documentation with Swagger UI | 18
This video shows how to use the @extend_schema decorator to explicitly provide information about a view's serializer, which improves the generated documentation.
Watch the section from . The presenter encounters an "unable to guess serializer" warning and resolves it by decorating the view method with @extend_schema(responses=CategorySerializer). We will use the same principle to add descriptive text.
Your Task: Add a Description to your TaskViewSet
- Open your
tasks/views.pyfile. - Import
extend_schemafromdrf_spectacular.utils. - Decorate the
listmethod of yourTaskViewSet. While we are using aModelViewSetwhich provides thelistmethod implicitly, we can override it to add our decorator without changing its behavior.
# tasks/views.py
from rest_framework import viewsets, filters
from rest_framework.permissions import IsAuthenticated
from django_filters.rest_framework import DjangoFilterBackend
from drf_spectacular.utils import extend_schema # Import this

from .models import Task
from .serializers import TaskSerializer
from .pagination import CustomTaskPagination
from .filters import TaskFilter

class TaskViewSet(viewsets.ModelViewSet):


    # ... (queryset, serializer_class, etc. remain the same)

    filter_backends = [
        DjangoFilterBackend,
        filters.SearchFilter,
        filters.OrderingFilter,
    ]
    filterset_class = TaskFilter
    search_fields = ['title', 'description']
    ordering_fields = ['created_at', 'priority']

    def get_queryset(self):
        """
        This view should return a list of all the tasks
        for the currently authenticated user.
        """
        return Task.objects.filter(owner=self.request.user)

    @extend_schema(
        summary="List all tasks for the current user",
        description="Retrieve a paginated list of tasks owned by the authenticated user. "
                    "Supports filtering, searching, and ordering."
    )
    def list(self, request, *args, **kwargs):
        return super().list(request, *args, **kwargs)


    # You can also decorate create, retrieve, update, etc.
    @extend_schema(summary="Create a new task")
    def create(self, request, *args, **kwargs):
        return super().create(request, *args, **kwargs)


    # We also need to override perform_create to set the owner automatically
    def perform_create(self, serializer):
        serializer.save(owner=self.request.user)
Note: I've also re-included the get_queryset and perform_create methods from our authentication lessons to ensure everything works together correctly. We've overridden the list and create methods just to attach our @extend_schema decorator.
Now, refresh your Swagger UI page. You will see your custom summary and description appearing for the GET and POST methods on /api/tasks/, making the API's purpose much clearer.
Conclusion
You've just added a professional, maintainable, and interactive documentation layer to your API with minimal effort. This is a massive productivity boost for any team and a hallmark of a proficient backend developer. You've closed the loop on API development, going from idea to a fully functional, secure, and now well-documented service.
Key Takeaways:
- API documentation is non-negotiable for collaboration and maintainability.
- OpenAPI is the industry standard for describing REST APIs. Swagger UI is a tool that turns an OpenAPI schema into interactive documentation.
drf-spectacularis the modern, recommended library for auto-generating OpenAPI 3 schemas from your DRF project.- Setup involves a
pip install, and minor changes tosettings.pyandurls.py. - The generated UI can be used to make authenticated test calls directly, speeding up development and testing.
- You can enhance the auto-generated docs with custom summaries and descriptions using the
@extend_schemadecorator.
This lesson completes Module 5. You are now capable of building robust, production-ready REST APIs with Django REST Framework.
In the next module, Data Modeling and Database Optimization with PostgreSQL, we will shift our focus from the API layer to the data layer. Our current Task model is simple. To build systems like Infilect's, which handle complex retail analytics and ML data, you need to master advanced data modeling and database performance. We will start by designing a proper relational schema for a more complex application.