Welcome to the first lesson of your sound design course. Your goal is to produce a studio album, blending genres like dark-pop and hyperpop with Brazilian Funk rhythms. To do that, you first need to master your primary tool: Logic Pro. Think of it as an artist getting to know their new studio. Before you can create, you need to know where everything is—the canvas, the paints, the detailed brushes, and the space to step back and see the whole picture.
This lesson is your orientation. We will focus on navigating the four most fundamental parts of the Logic Pro interface: the Tracks Area, the Library, the Inspector, and the Mixer. By the end of our 60 minutes, you'll understand the purpose of each of these areas and how to access them, setting a solid foundation for every production task that follows.
The Anatomy of a Digital Studio
When you first open Logic Pro, the main window can seem complex. However, it's organized logically around the process of making music. Your background in design thinking is relevant here; we're essentially mapping out a workspace to understand its flow and function before we begin the creative work.
Let's start with a high-level overview.

These areas work together seamlessly:
- Tracks Area: This is your main timeline or canvas. It's where you'll arrange audio and MIDI clips to build your song from beginning to end.
- Inspector: This is your magnifying glass. It shows you detailed information and settings for any single track or region you have selected.
- Library: This is your palette of sounds. It’s where you browse and load instruments, effects, and presets to use in your project.
- Mixer: This is your control room. It gives you a "bird's-eye view" of all your tracks, like a traditional mixing console, allowing you to adjust volume and panning for everything at once.
Most of these windows can be shown or hidden using a set of buttons in the Control Bar, located at the top of the screen.
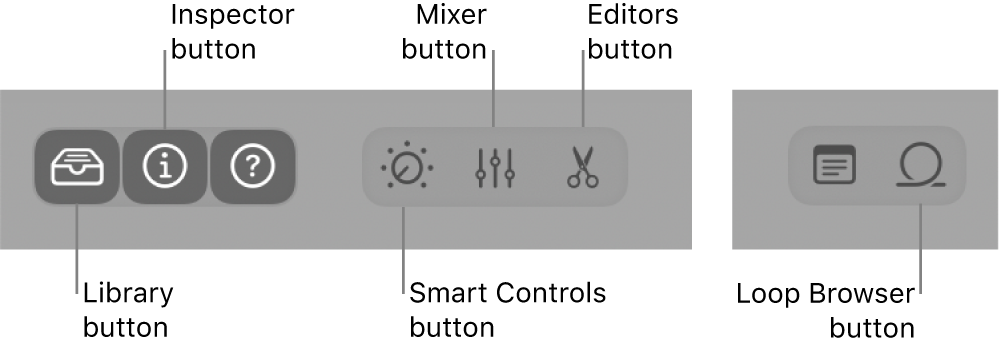
Now, let's explore each of the core components in more detail.
The Tracks Area: Your Creative Canvas
The Tracks Area is where the story of your song unfolds visually, from left to right. It contains horizontal lanes called "tracks," which hold the building blocks of your music—audio recordings, software instrument parts, and loops.
To get a dynamic look at how this area works, the following video provides an excellent tour. Pay close attention to the distinction between audio and MIDI regions and the essential zoom functions, which you will use constantly.
Logic Pro 11 - #03 User Interface & Zoom Controls
Watch this segment from the "Logic Pro 11 - User Interface & Zoom Controls" video by MusicTechHelpGuy. It provides a clear, practical demonstration of the Tracks Area.
Focus on two key parts: First, watch the overview of the Tracks Area to understand its role as the main workspace and the concept of "regions." Next, watch the detailed walkthrough of the zoom controls. Mastering these shortcuts (like pressing Z to zoom to fit) will dramatically speed up your workflow.
For a written reference you can return to, the official Logic Pro User Guide provides a concise description.
Logic Pro User Guide for Mac - Apple Support
This section of the user guide from Apple offers a static, detailed breakdown of the Tracks Area.
Read the page on the Tracks area interface. Notice the descriptions of the track header, the ruler, and the playhead. These are all fundamental elements you'll interact with in every session.
The Library: Your Sound Palette
Your journey into sound design begins in the Library. This is where you can quickly find and audition sounds, whether it's a synth lead for a hyperpop track or an atmospheric pad for a dark-pop intro. Logic Pro comes with a vast collection of "patches," which are pre-designed combinations of instruments and effects. For someone who wants to start creating immediately, the Library is your most powerful starting point.
Logic Pro X Tutorial - Interface Basics
This video from Mitchel Pigsley provides a quick but effective look at the Library.
Watch the section on the library. The presenter demonstrates how the Library's contents change depending on whether you've selected an audio track or a software instrument track. This is a key concept.
The Library is your gateway to the sounds that will define your album. As you develop your signature style, you'll learn to modify these starting points, but for now, think of it as an infinite collection of sonic inspiration.
The Inspector: A Detailed Look
If the Tracks Area is the big picture, the Inspector is the close-up. It's a contextual window that displays detailed settings for whatever you currently have selected. Select a track, and it shows you the channel strip—volume fader, pan knob, and slots for audio effects. Select a specific audio region, and it shows you parameters for that specific clip, like timing and pitch settings.
You'll spend a huge amount of time in the Inspector, making precise adjustments to your sounds.
Logic Pro 11 - #03 User Interface & Zoom Controls
Let's return to the MusicTechHelpGuy video for a thorough explanation of the Inspector.
Watch the segment from explaining the Inspector. Pay attention to how it shows the channel strip for the selected track, including the slots for audio effects, the sends, and the output routing. Also, note the "Quick Help" feature, which is incredibly useful for beginners.
The Inspector is your primary tool for sonic surgery. Whether you're adding an effect, changing a track's volume, or fine-tuning a recording, this is where you'll do it. Its compact, focused view is designed for efficiency.
The Mixer: Balancing the Entire Project
While the Inspector shows you one channel strip at a time, the Mixer shows you all of them, side-by-side, just like a physical mixing desk in a recording studio. This view is essential for the mixing stage, where you need to balance the levels, stereo placement (panning), and effects of all your tracks to ensure they work together as a cohesive whole.
Logic Pro 11 - #03 User Interface & Zoom Controls
The MusicTechHelpGuy video also provides a great introduction to the Mixer and how it relates to the other parts of the interface.
Watch the part of the video that covers the Smart Controls, Mixer, and Editors, specifically focusing on the mixer section. The presenter clearly explains how it displays all channel strips at once and highlights its importance for controlling the overall balance of your project.
The ability to see and adjust every track's volume and pan position in one window is what makes the Mixer indispensable for creating a balanced, professional-sounding song.
Your Turn: A Quick Exploration
To solidify your understanding, take a few minutes to explore these areas yourself.
- Open Logic Pro and create a new, empty project with a few default tracks.
- Press the
Ykey to show/hide the Library. - Press the
Ikey to show/hide the Inspector. - Press the
Xkey to show/hide the Mixer in the bottom pane. - Click on different tracks in the Tracks Area and watch how the Inspector changes to reflect your selection.
This simple, hands-on exercise will start building muscle memory for navigating the interface.
Conclusion
In this lesson, we've taken our first crucial step into Logic Pro. You now have a mental map of its four most important sections and understand their distinct roles in the production process:
- Tracks Area: The timeline where you build your song.
- Library: The palette where you choose your sounds.
- Inspector: The detailed view for modifying a single track or region.
- Mixer: The console view for balancing all your tracks together.
You've learned how to access each area and have started to build a practical familiarity with the software.
In our next lesson, we'll put this knowledge to immediate use. We'll move from exploring the interface to actively starting a project, where you will learn how to create a new project with appropriate settings for tempo, sample rate, and time signature. This is the formal first step in turning a blank slate into a finished song.