Introduction
In our previous lesson, we designed the architectural blueprint for your case tracking system—a comprehensive database schema that structures the data you'll collect throughout the client lifecycle. Today, we move from architecture to construction. Our learning outcome is to select and implement a tool to manage this case tracking database. This involves choosing the right software for the job and taking the first practical steps to bring your schema to life.
This decision is foundational. The tool you select will become the central nervous system of your data-driven practice, housing the information that enables both sophisticated single-client analysis and practice-level strategic insights. We will evaluate the most common options and then walk through the initial implementation, transforming your conceptual schema into a functional, working database.
From Spreadsheet to Relational Database
The two primary contenders for this task are traditional spreadsheets, like Google Sheets, and spreadsheet-database hybrids, like Airtable. Given your background in statistics, you're intimately familiar with organizing data for analysis. The choice between these tools hinges on principles you already value: data integrity, scalability, and the importance of structured, non-redundant information.
A traditional spreadsheet is essentially a single, large, two-dimensional table. While excellent for numerical calculations and simple lists, it becomes unwieldy and error-prone when managing complex, interconnected data. For instance, to track multiple engagements for one client, you would have to re-enter that client's information on multiple rows, opening the door to inconsistencies.
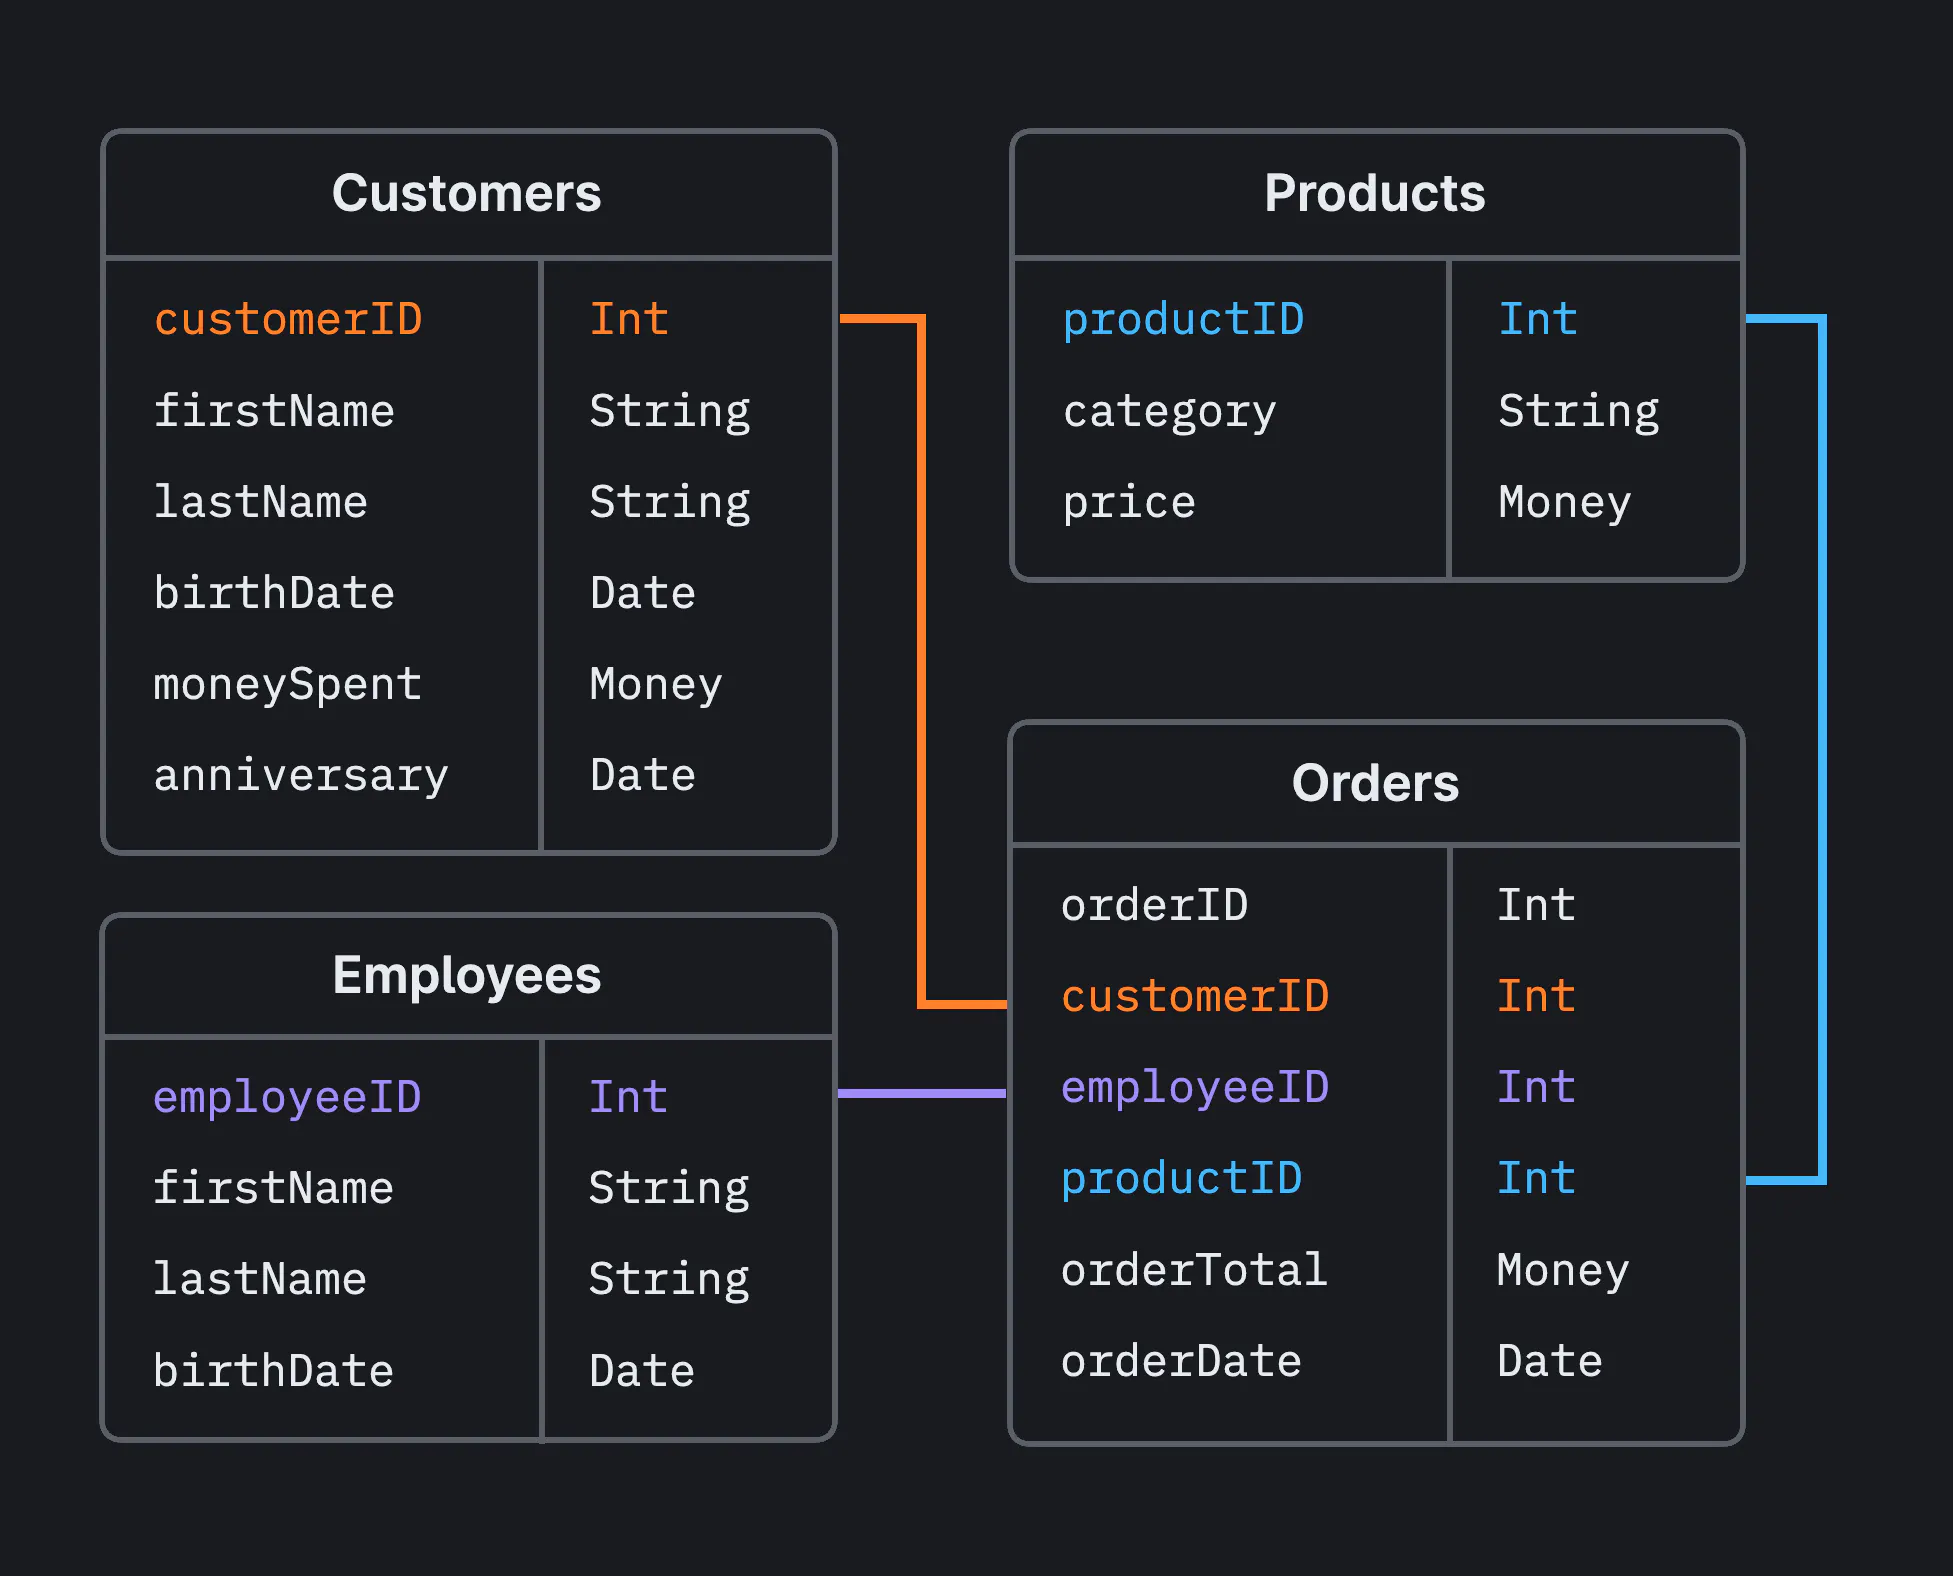
A relational database, by contrast, is designed to manage this complexity by storing different types of information in separate but linked tables. This is precisely the structure we designed in the last lesson.
The following video and article provide an excellent breakdown of the key differences.
Airtable vs Google Sheets: Which Spreadsheet-Database is Right for You?
This video from Softr offers a concise overview of the spreadsheet-versus-database paradigm, using Google Sheets and Airtable as the primary examples.
Please watch from the beginning to the end of the video. As you watch, pay attention to the discussion of pros and cons, particularly around data types, scalability, and use cases. This will help frame our decision.
Airtable vs. Google Sheets: Which is best? - Zapier
This Zapier article provides a more detailed, feature-by-feature comparison. It delves into the practical implications of the database-hybrid model.
Please read the article from the beginning through the section titled "Airtable vs. Google Sheets: Which is best for you?". Focus on these key sections: The fundamental distinction between a database hybrid and a traditional spreadsheet. The comparison of data types and limits, where Airtable's strength in handling diverse, structured data becomes clear. The section on doing more with data, which highlights Airtable's ability to define relationships between records. The discussion on varied data views, like Kanban boards and forms, which are directly applicable to managing a client workflow.
The Verdict: Why Airtable is the Right Tool
For the schema we designed, a relational tool is not just preferable—it's essential. Airtable is the clear choice for implementing your case tracking system for several key reasons:
- Relational Structure: It is built to handle the exact one-to-many relationships we defined (e.g., one
Clientcan have manyEngagements). You can link records instead of duplicating data, which preserves data integrity—a cornerstone of reliable analysis. - Rich Field Types: Our schema requires storing varied data: dates, text, Likert scale scores (numbers), single-select categories (
ClientArchetypeID), and potentially even client-signed documents (attachments). Airtable supports these rich data types natively, whereas a spreadsheet treats most data as simple text or numbers. - Integrated Workflow Views: Airtable is more than a data repository; it's a workflow tool. You can create different "views" of your data without altering the underlying structure. For example, you can view your
Engagementstable as a Kanban board to track their status from "Intake" to "Completed."
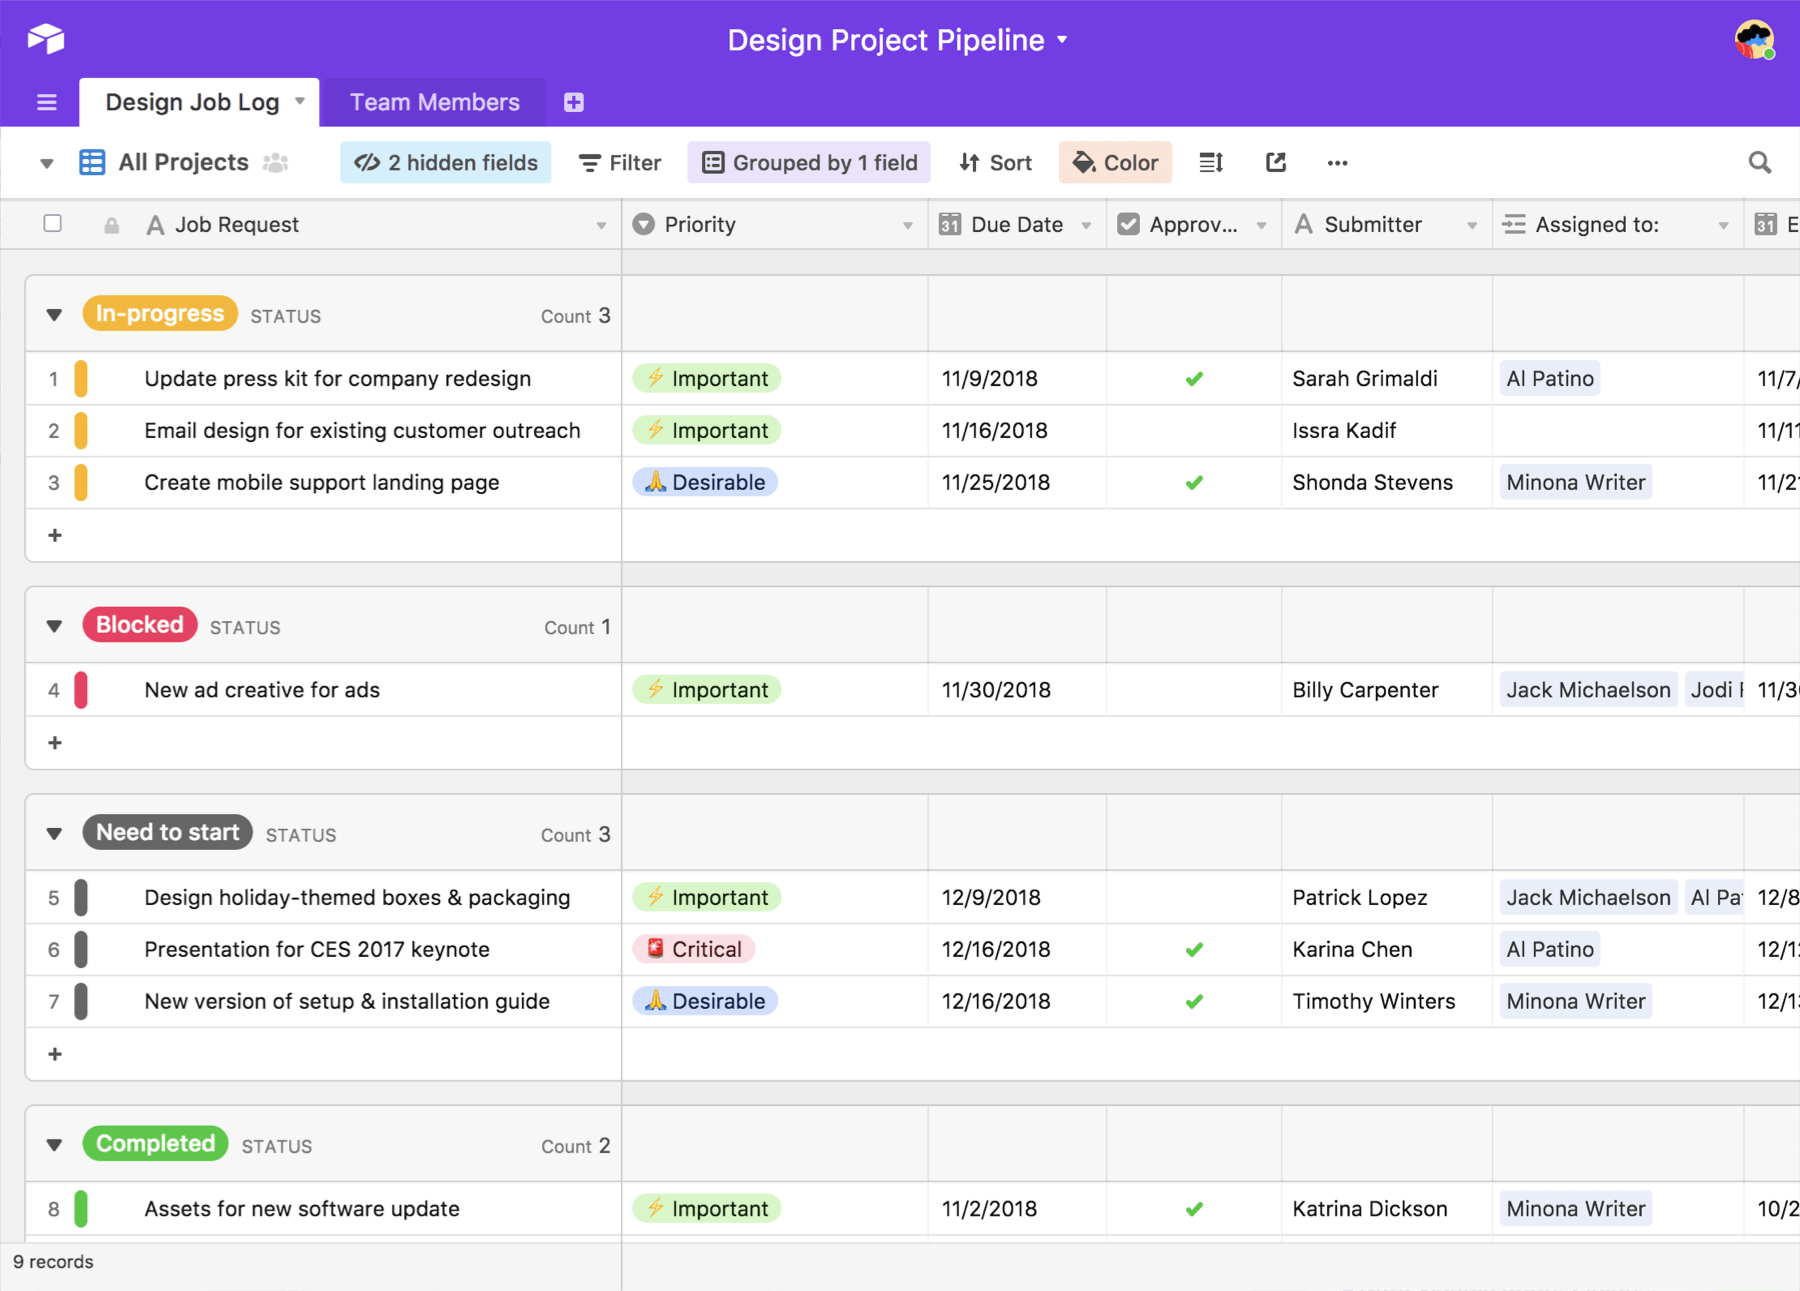
This functionality transforms your database from a static file into an active, dynamic dashboard for managing your entire consulting practice.
Building Your Database in Airtable: A Practical Start
Let's begin translating your schema into a functional Airtable base. We'll follow a process similar to the one demonstrated in the following comprehensive tutorial, which uses the analogous example of building a Customer Relationship Manager (CRM).
The best way to learn is by doing. I recommend opening Airtable in another window and following these steps to build alongside the lesson.
Airtable Basics: Build a simple CRM to store client data - tools.dev
This step-by-step guide from tools.dev walks through creating a multi-table database in Airtable. We will adapt its steps to implement the schema we designed.
First, read the section on setting up your account and creating your first app, Step 1. Then, follow the logic in Step 3 and Step 4 as we build our Clients and Engagements tables. Focus on the mechanics of creating tables, adding fields with specific types, and linking records.
Step 1: Create Your Base and First Table (Clients)
- After signing up for Airtable, create a new "base" from scratch. Name it something like "Consulting Practice Tracker." A base is Airtable's term for a single database.
- Your base will start with a default table. Rename this table to
Clients. - Delete the default fields (
Notes,Assignee,Status). - Rename the primary
Namefield toClientID. Customize this field by changing its type to Autonumber. This will automatically generate a unique ID for each new client record, serving as our Primary Key (PK). - Now, add the other fields from our
Clientstable schema. Click the+button to add new fields:ClientArchetype: Use aSingle selectfield type. You can pre-populate the options with the archetypes you defined in Module 2.DateOfFirstContact: Use aDatefield type.ReferralSource: Use aSingle selectfield or aSingle line textfield.
This process of defining fields and their data types is the practical implementation of creating the attributes for your Clients entity.
Step 2: Create and Link the Second Table (Engagements)
Now, we'll create the Engagements table and establish the crucial link back to the Clients table.
- Click the
+sign next to yourClientstable tab and create a new blank table. Name itEngagements. - As before, customize the primary field. Rename it to
EngagementIDand set the type toAutonumber. - Now, create the relationship. Add a new field and select the
Link to another recordfield type. - A prompt will ask which table to link to. Select
Clients. Airtable will automatically name this fieldClients. You can rename it toClientIDfor consistency with our schema. Crucially, do not toggle on "Allow linking to multiple records." An engagement belongs to only one client unit. - Airtable will then create a corresponding field in the
Clientstable, showing the linked engagements for each client. This establishes the one-to-many relationship. - Continue adding the other fields to your
Engagementstable:StartDate,EndDate:Datefield types.ServicePackage: ASingle selectfield with your tiered packages as options.PrimaryGoal: ALong textfield.
This video provides a great visual walkthrough of the process we've just described, including creating tables, defining fields, and linking records.
Airtable - Full Course for Beginners
This tutorial by Julian Post clearly demonstrates the core actions in Airtable: creating a base, building tables, defining fields, and, most importantly, linking records.
Watch the segments covering the creation of tables (creating tables), the definition of fields and formulas (fields and formulas), and the process of establishing relationships (linking records). This will reinforce the steps we've just outlined.
Expanding Your Database's Functionality
You have now built the core of your relational database. From here, you can continue creating the other tables from your schema (Intake_Data, Sessions, Progress_Data, etc.) and linking them all back to the Engagements table.
The true power of Airtable, however, lies in using this structured data to streamline your workflows. As you build out your base, consider these features:
- Form Views: For your
Intake_Datatable, you can create aFormview. Airtable automatically generates a web form that clients can fill out. Their responses will populate theIntake_Datatable directly, creating a seamless and automated intake process. - Kanban Views: As shown earlier, you can create a
Kanbanview for yourEngagementstable, stacked by aStatusfield (Single Selectwith options like "Screening," "Intake," "Active," "Paused," "Completed"). This gives you a visual pipeline of your entire client load. - Automations: You can create simple "if-this-then-that" automations. For example: "When an engagement's
Statusfield is updated to 'Completed', automatically send a standardized closing email with a link to theOutcome_Datasurvey form." This directly supports the systematization goal of your practice.
Airtable Basics: Build a simple CRM to store client data - tools.dev
Returning to the CRM tutorial, these last sections demonstrate the workflow capabilities we've just discussed.
Quickly review Step 6 to see how a Kanban view is created to visualize a pipeline. Then, read Step 7 to understand the concept of trigger-based automations.
Conclusion
In this lesson, we made the critical transition from theory to practice. We evaluated the tools for the job and selected Airtable as the platform best suited to implement the relational database schema you need for a scalable, data-driven consulting practice. You've taken the first concrete steps in building this system by creating and linking your core tables.
Key Takeaways:
- For managing complex, interconnected client data, a relational database hybrid like Airtable is superior to a traditional spreadsheet.
- Airtable directly supports the implementation of a relational schema through linked records, which ensures data integrity and eliminates redundancy.
- The process of building your database involves creating a "base," adding "tables" for each entity (e.g.,
Clients,Engagements), and defining "fields" with specific data types for each attribute. - Beyond data storage, Airtable provides powerful workflow features like customizable views (Kanban, Forms) and automations that can systematize your practice.
You have now laid the digital foundation for your practice. In our next lesson, we will begin to explore how to leverage this system for analysis by learning to define practice-level Key Performance Indicators (KPIs) based on aggregated client data. The database you are building will be the very engine that computes and tracks these vital metrics.