Welcome back! In our last session, you brought your project into Vercel and configured it, stopping just shy of the final step. Your project is on the launchpad, and the countdown is at T-minus one click.
Today is the day we launch.
1. What We Are Learning
This lesson is all about taking your project live. The learning outcome is to trigger the first deployment and obtain the public URL for your live site. We will press that "Deploy" button, watch Vercel build your site, and find the link that you can share with anyone in the world.
2. Why This Matters
This is the moment of truth—the transition from a private file to a public product. As a designer, you're familiar with the feeling of sending a final design to print or sharing a final prototype with stakeholders. This is the web development equivalent.
By deploying, you are turning your code—an abstract set of instructions—into a tangible, accessible website. This step closes the loop on our workflow so far: from a design concept to local files, to a GitHub repository, and now, to the live internet.
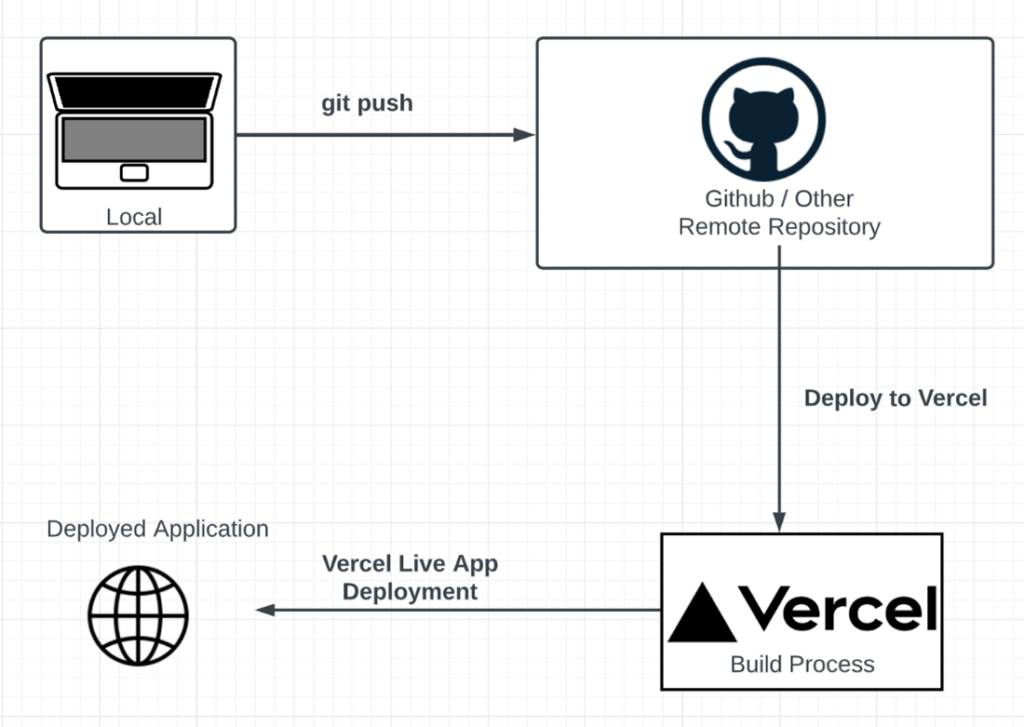
3. Step-by-Step Instructions
Let's pick up exactly where we left off: on the "Configure Project" screen in Vercel.
Step 1: Trigger the Deployment
You've already done the hard part of importing and configuring. Now for the simple, satisfying click.
- Find the blue "Deploy" button on the "Configure Project" screen.
- Click it.
That's it. You've initiated the deployment.
Step 2: Watch Vercel Work
Once you click "Deploy," Vercel will take you to a new dashboard for this project. You'll see a build log with status updates. It might look a bit technical, but it's Vercel showing you its work.
To understand what's happening, let's read a short explanation.
From Zero to Your First Live Website: A Cursor + Vercel Adventure ...
This article, 'From Zero to Your First Live Website', has a fantastic explanation of what Vercel is doing for you right now. It demystifies the process.
Please read the section titled 'Step 3.3: Deploy with Vercel (The Magic Moment)', focusing on the box that starts with '🔮 What Vercel is doing behind the scenes for you'. This explains the automated process that is turning your code into a website.
This whole process should take less than a minute. You'll know it's done when you see a celebration screen with confetti!
To see this process in action, you can watch this short video clip.
How To Deploy GitHub Project on Vercel (Step By Step)
This clip from KnowledgeBase demonstrates clicking 'Deploy' and waiting for the build to finish before continuing to the project dashboard.
Watch from 01:49 to 02:22. Notice how the user clicks 'Deploy', the screen changes to show the build process, and then it confirms the deployment is complete.
Step 3: Visit Your Live Site
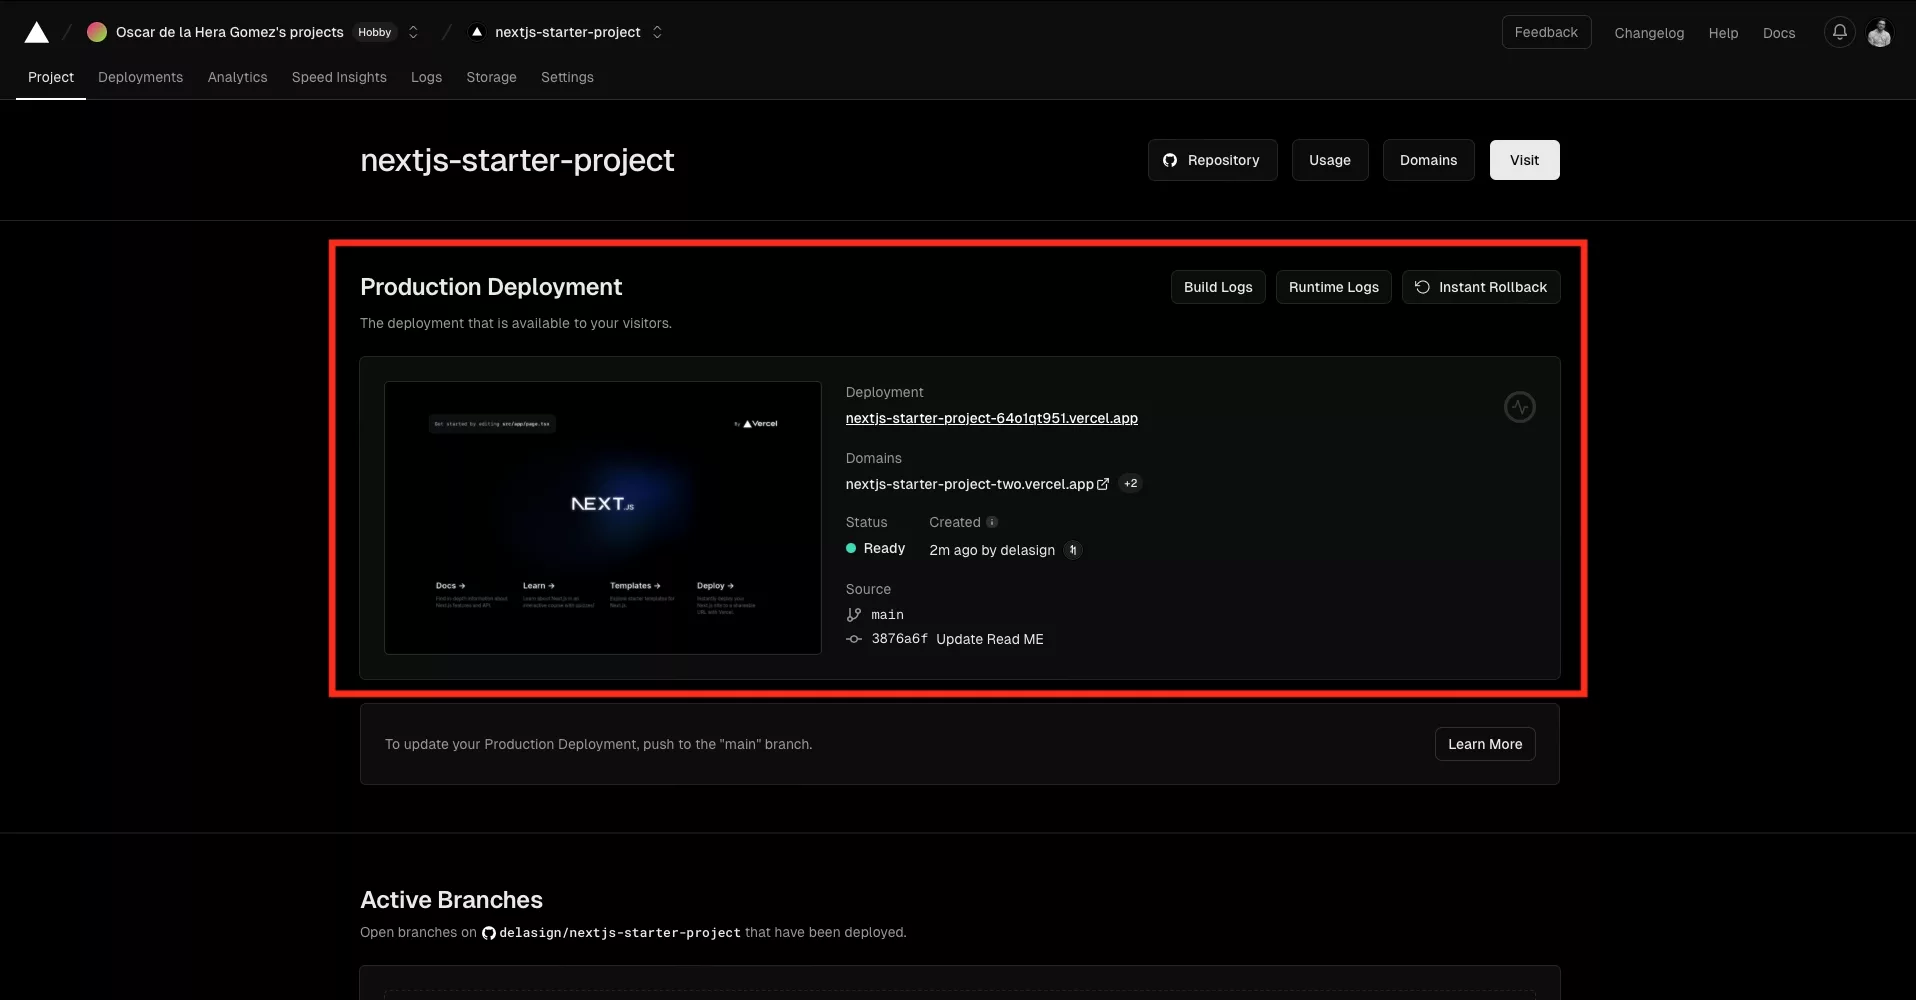
Once the deployment is finished, Vercel will present you with a beautiful success screen. The most important things here are the preview of your site and its public URL.
- On the success screen, look for a screenshot of your webpage.
- Just above or below it, you will see the public URL. It will look something like
your-project-name.vercel.app. - Click on the screenshot or the URL.
Congratulations! Your website is now live on the internet.
4. What Could Go Wrong
-
The deployment fails.
- Reason: For a simple project, this is rare. It could be due to a file that didn't upload correctly to GitHub or an unusual character in the code.
- Fix: Vercel will show you an error message. Don't worry about understanding it deeply right now. Often, the best first step is to simply try deploying again. If it fails a second time, a good practice (which we will cover more later) is to copy the error message and ask an AI tool like ChatGPT or Copilot to explain it in simple terms.
-
The site is live, but it looks broken (e.g., no styles).
- Reason: This almost always means a file is missing from your GitHub repository. The most common cause is forgetting to save, commit, and push your
style.cssfile. Vercel can only build what's in GitHub. - Fix: Open your repository on GitHub.com and check if all your files are there (
index.htmland yourstyles/style.cssfile inside thestylesfolder). If a file is missing, go back to VS Code, use the Source Control panel to commit and push your latest changes, and Vercel will automatically start a new deployment for you.
- Reason: This almost always means a file is missing from your GitHub repository. The most common cause is forgetting to save, commit, and push your
5. Mini Exercise
This is a milestone worth celebrating. The following exercise, adapted from the article we read, is a small ritual to mark the occasion.
- Go to your Vercel tab and click the "Deploy" button.
- Wait for the confetti.
- Click the public URL to open your live website in a new tab.
- The Phone Test: Grab your phone. Type the new URL into its browser.
- Take a screenshot of your live website on your phone. Save it. This is your proof, your first "shipped" project.
6. Checklist Before Moving Ahead
- I have clicked the "Deploy" button on Vercel.
- I have seen the successful deployment screen.
- I have found and copied the public URL for my site.
- I have visited the URL on my computer and my phone to confirm it works.
- I have my "first ship" screenshot saved.
You did it. You took a project from your local computer and published it for the entire world to see. This is a huge step. That URL is real, and the process you just followed is the foundation of modern web development.
A Look Ahead
Now that your site is live, what happens when you want to change something? Do you have to repeat this entire process? Thankfully, no. In the next lesson, we will explore one of Vercel's most powerful features: automatic deployments. You'll see how making a simple change in your code and pushing it to GitHub is all it takes to update your live site.