Welcome back! In our last lesson, we completed the final command-line setup by telling Git who you are. With your name and email configured, every change you make from now on will be correctly attributed to you.
Our developer's toolkit is now almost complete. We have the editor (VS Code), the terminal, a runtime for tools (Node.js), and a version control system (Git). Now, let's add one last piece that will dramatically speed up your workflow.
1. What We Are Learning
This is the final lesson in Module 2: The Developer's Toolkit. Our goal is to install the 'Live Server' VS Code extension for real-time browser previews.
We will cover:
- What a "local server" is and why it's useful.
- How to find and install a VS Code extension.
- How to verify that the Live Server extension is ready to use.
This is the last tool we need to install before we start building our first webpage.
2. Why This Matters
Imagine you're working in Figma, but every time you move an element or change a color, you have to manually export a new PNG, find it in your file system, and open it just to see the result. It would be incredibly slow and frustrating, right? The beauty of a design tool is the immediate visual feedback.
When you're writing code for a website, the traditional workflow can feel a lot like that slow, manual process:
- Write some code in your editor.
- Save the file.
- Switch to your web browser.
- Hit the refresh button to see your changes.
- Repeat.
Live Server eliminates this entire cycle. It's a tool that creates an instant, live connection between your code editor and your browser. The moment you save a file, the browser preview updates automatically.
This creates a tight, real-time feedback loop, much like the one you're used to in Figma. You can have your code on one half of the screen and the live website on the other, watching it change as you work. This isn't just a convenience; it's a fundamental boost to productivity and makes the process of turning code into a visual product much more intuitive.
To understand the concept behind this, let's look at what a "server" is in this context.
The article 'Spinning Up A Local Server' from Codecademy gives a concise explanation of what a web server is and introduces the idea of localhost—your own personal server for development. Please read the first section to understand the 'why' behind this tool.
Read the introductory section, starting from 'A server is a computer...' and stopping just before the section titled 'Spinning Up a Local Server Using Live Server and VS Code'. This will explain why we need a tool like Live Server to mimic how a real website works.
3. Step-by-Step Instructions
We're going to install Live Server from the VS Code Extensions Marketplace, which is like an app store for your code editor.
For a great video walkthrough of the process we're about to follow, you can watch this short tutorial.
Live Server Extension for Visual Studio Code | Full Tutorial
This video from the Coding with Estefania channel provides a full tutorial on the Live Server extension. It will show you exactly how to find, install, and activate it, and you'll get a preview of how it works (which we'll do ourselves in the next lesson).
Watch from the beginning until the 1:08 mark. The first 45 seconds explain the benefits, and the next part shows the installation process we're following below.
Here are the steps to follow:
Step 1: Open the Extensions View
In VS Code, look at the Activity Bar on the far left side of the window. Click on the icon that looks like four squares, with one flying off to the side. This is the Extensions view.
- Keyboard Shortcut:
Ctrl+Shift+X(orCmd+Shift+Xon Mac).
Step 2: Search for the Live Server Extension
A search bar will appear at the top of the side panel. Type live server into the search bar.
You will see a list of results. The one we want is the most popular one, created by Ritwick Dey. It has millions of downloads and is the standard for this purpose.
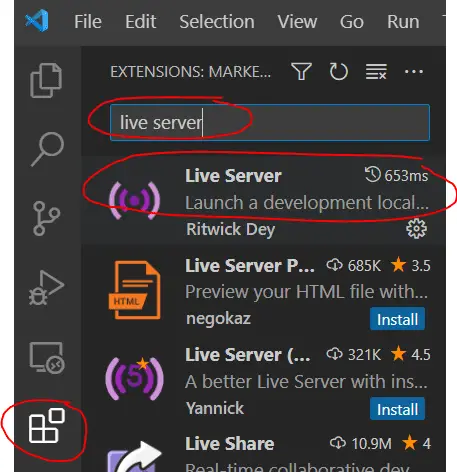
Step 3: Install the Extension
Click the blue Install button next to the "Live Server" extension. The installation should only take a few seconds.
Step 4: Verify the Installation
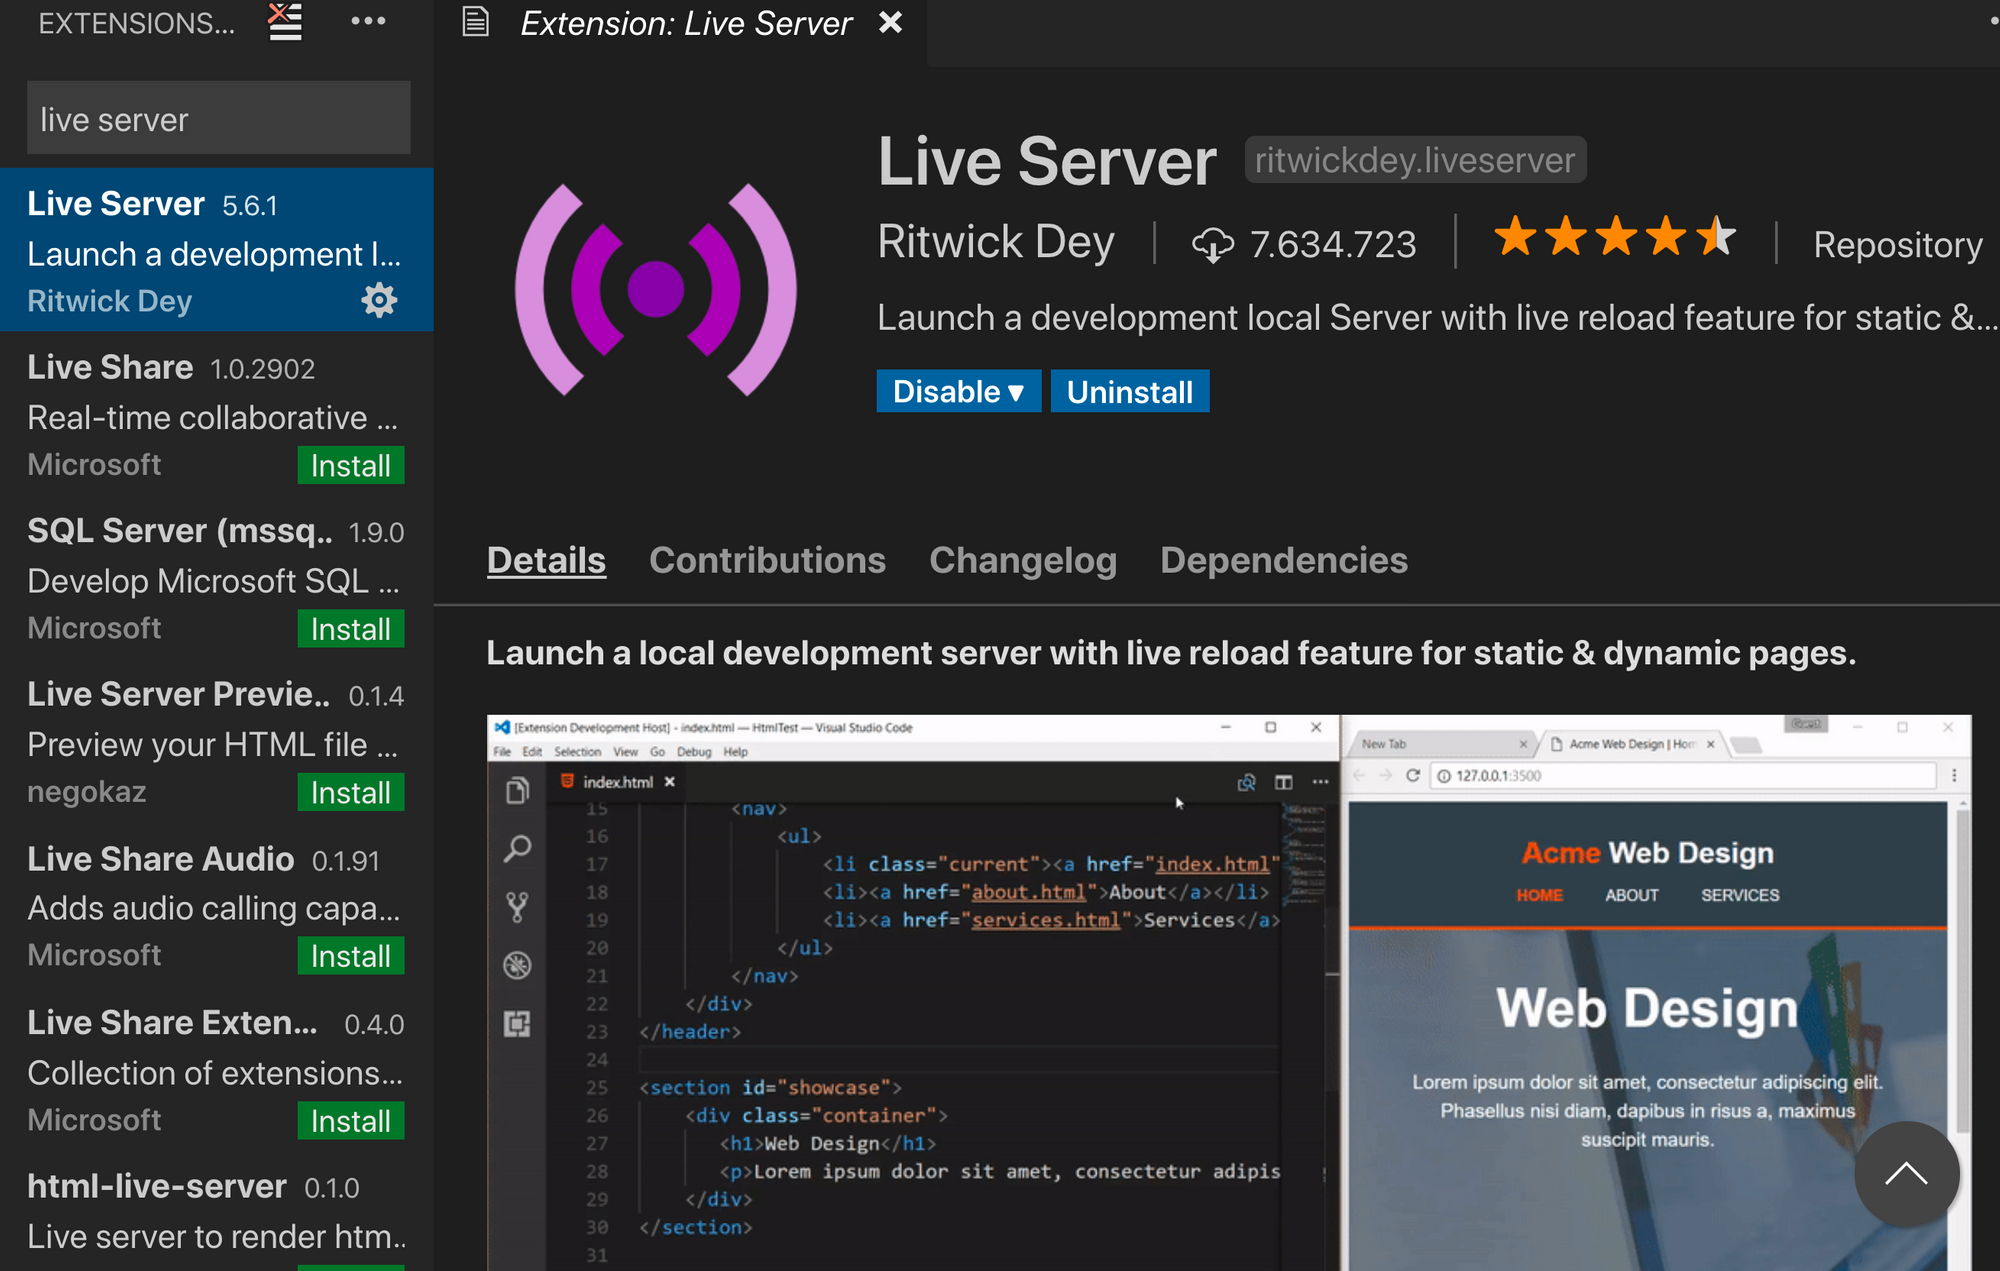
Once the installation is complete, look at the bottom-right corner of your VS Code window, in the blue status bar. You should see a new button that says Go Live.
If you see that button, the extension is installed and ready to go! We'll click it in our next lesson when we have an actual HTML file to view.
4. What Could Go Wrong
-
I can't find the "Go Live" button.
- Why it happens: Sometimes, the UI needs a moment to update after an installation.
- How to fix it: Try closing and reopening VS Code. This simple restart forces it to load all extensions and UI elements fresh.
-
I installed a different "Live Server" extension.
- Why it happens: The marketplace has multiple extensions with similar names.
- How to fix it: Go back to the Extensions view, find the one you installed, and click "Uninstall". Then, search again and make sure to install the one by Ritwick Dey.
-
(Future Issue) When I click "Go Live," my browser doesn't open or I get a security warning.
- Why it happens: Live Server needs to act as a mini-server on your computer. Your operating system's firewall or antivirus software might see this network activity and ask for permission.
- How to fix it: If you see a pop-up from Windows Defender or macOS security asking if you want to allow "Node.js" or "Code" to accept incoming network connections, select Allow. This is a safe and necessary step for local development tools.
5. Mini Exercise
Let's confirm you have the tool installed and ready for our next module.
- Open VS Code.
- Navigate to the Extensions view.
- Search for
live server. - Find the extension by Ritwick Dey and click Install.
- After it finishes, look at the status bar at the bottom of the VS Code window.
- Confirm that you see a button labeled Go Live.
That's it! Finding that button means you've successfully completed this lesson.
6. Checklist Before Moving Ahead
- I understand that Live Server provides a real-time preview of my webpage.
- I have opened the Extensions view in VS Code.
- I have successfully installed the "Live Server" extension by Ritwick Dey.
- I have located the "Go Live" button in the VS Code status bar.
Conclusion
Excellent! You have now installed the final piece of your developer's toolkit. We have everything we need: an editor, a terminal, core development technologies, and now a live preview server. You have successfully completed the entire "Local Setup" phase of our plan.
A Look Ahead: With our toolkit fully assembled, we are ready to leave the setup phase and move into the building phase. In our very next lesson, we'll kick off Module 3: Quick Win: Your First Manual Web Page. You'll create your first project folder, write a few lines of HTML, and use the "Go Live" button for the first time to see your creation appear in a web browser.