Welcome back! In our last lesson, you installed Node.js and successfully used the integrated terminal in VS Code to run your first commands: node -v and npm -v. This was a crucial first step into the developer's command-line world.
Today, we're going to get much more comfortable in that world.
1. What We Are Learning
This lesson is the third part of Module 2: The Developer's Toolkit. Our learning outcome is to use the integrated terminal in VS Code to run basic commands (ls, cd, mkdir).
We'll cover:
- How the terminal relates to the folders on your computer.
- How to check your current location (
pwd). - How to see what's in a folder (
ls). - How to move between folders (
cd). - How to create new folders (
mkdir).
2. Why This Matters
As a designer, you navigate your computer using a visual interface like macOS Finder or Windows File Explorer. You click on folders to open them and right-click to create new ones.
The terminal is a text-based way of doing the exact same thing. Instead of clicking, you type commands.
Why learn this? Because many web development tools—including the AI tools we'll use later—are designed to be run from the command line. Mastering these basic navigation commands is like learning the fundamental keyboard shortcuts in Figma; it's a core skill that makes everything else faster and more efficient. It gives you direct control over your project's structure from within your code editor.
3. Step-by-Step Instructions
Let's dive in. The terminal can feel intimidating, but it's just a conversation with your computer. You type a command (a request), and it gives you a response.
Step 1: Open and Understand the Terminal
First, let's make sure you can comfortably open the terminal inside VS Code. It lives in the panel at the bottom of the editor.
- Open VS Code.
- Use the top menu: View > Terminal.
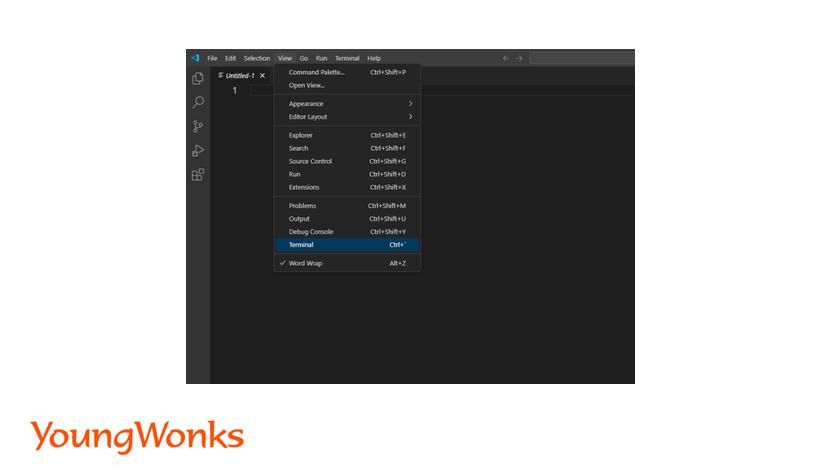
You can also use the keyboard shortcut Ctrl+ ` (the backtick key, usually next to the number 1 key). This shortcut toggles the terminal panel, so you can use it to open and close it quickly.
To understand how the command line relates to your familiar file system, take a few minutes to read the introduction of this excellent tutorial.
This article from LaunchCode uses a great map-like analogy to explain how the terminal lets you navigate your computer's file system.
Read just the introductory section, down to the heading 'Current Directory (.)'. Focus on the idea of your computer being a 'file storage system' and how the terminal is a tool to move around inside it.
Step 2: The Three Most Important Commands
We're going to learn three commands that form the basis of file system navigation. The video below from Design Champs gives a friendly and clear demonstration of each one.
How to use the Command Line | Terminal Basics for Beginners
This video provides a great walkthrough of the basic commands. The presenter does a nice job of relating the commands back to actions you'd take in a visual file explorer.
Watch the following segments to see each command in action: pwd (Print Working Directory): Watch from 02:10 to 03:19. This is your 'You are here' command. ls (List): Watch from 03:19 to 04:24. This shows you the contents of your current folder. cd (Change Directory): Watch from 04:24 to 05:30. This is how you move between folders. mkdir (Make Directory): Watch from 05:40 to 07:16. This is how you create new folders.
Let's break down each command with our designer analogy in mind.
-
pwd(Print Working Directory)- What it does: Shows you the full path to the folder you are currently "in."
- Analogy: This is the glowing "You Are Here" pin on a mall map. It's your anchor point. It's always safe to run
pwdif you feel lost.
-
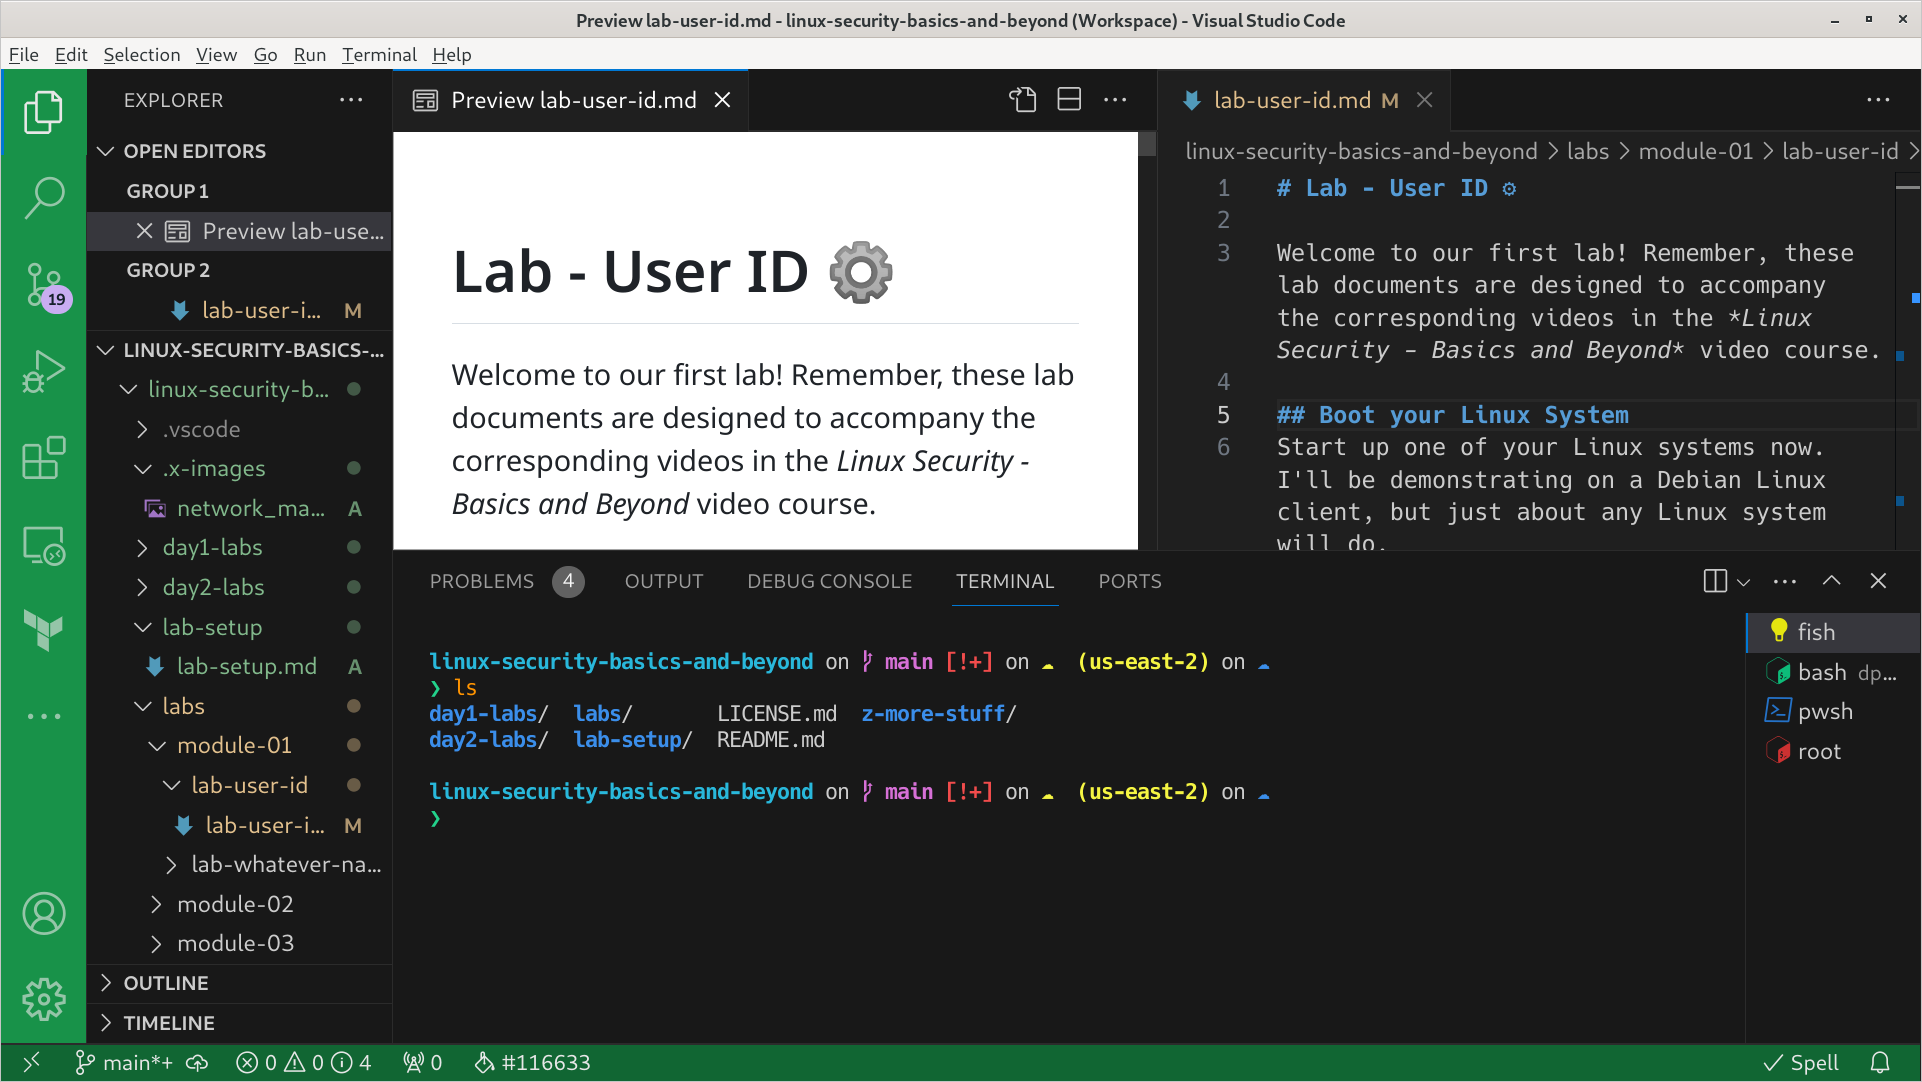
ls(List)- What it does: Lists all the files and sub-folders within your current directory.
- Analogy: This is like double-clicking a folder to see what's inside.
-
cd(Change Directory)- What it does: Moves you from one directory to another.
- Analogy: This is the act of double-clicking a sub-folder to go into it, or clicking the "back" button to go up to the parent folder.
- To move into a folder you see with
ls, you typecd folder_name. - To move up one level to the parent folder, you type
cd ..(the two dots are a universal shortcut for "parent directory"). This is extremely useful!
-
mkdir(Make Directory)- What it does: Creates a new, empty folder inside your current directory.
- Analogy: This is the same as right-clicking and choosing "New Folder."
4. What Could Go Wrong
As you start using these commands, you'll inevitably run into a few common errors. Don't worry—this is normal.
-
Error:
No such file or directory- Why it happens: This is the most common error. It means you tried to
cdinto a directory that doesn't exist where you currently are. It's usually caused by a typo or forgetting which folder you're in. - How to fix it:
- Check your spelling and capitalization (most terminals are case-sensitive!).
- Run
lsto see the exact names of the folders available to you. - Run
pwdto make sure you're in the folder you think you're in.
- Why it happens: This is the most common error. It means you tried to
-
Handling folder names with spaces
- Why it's a problem: The terminal uses spaces to separate parts of a command. If you type
cd My Documents, it thinksMyis the folder name andDocumentsis a separate, invalid argument. - How to fix it: Wrap the folder name in quotes:
cd "My Documents". - Best Practice: As a developer, it's a very good habit to avoid spaces in your project folder and file names. Use hyphens (
-) instead (e.g.,my-first-website).
- Why it's a problem: The terminal uses spaces to separate parts of a command. If you type
5. Mini Exercise
Time to put this all into practice. This exercise will walk you through creating the main folder for our landing page project, all from the terminal.
- Open a new terminal in VS Code (
View > Terminal). - Your terminal likely starts in your main "user" folder. Let's navigate to your Desktop, which is a common place to store projects. Type
cd Desktopand press Enter.- If you get an error, use
lsto see ifDesktopis listed. The name might be different depending on your system's language.
- If you get an error, use
- Once you're on the Desktop, confirm it by typing
pwdand pressing Enter. You should see a path ending in/Desktop. - Now, create the main folder for our project. Type
mkdir my-first-websiteand press Enter.- You should see a new folder appear on your actual desktop!
- Let's move into our new project folder. Type
cd my-first-websiteand press Enter. - Use
pwdagain to confirm you are now inside themy-first-websitefolder. - Let's create the standard sub-folders for our styles and images.
- Type
mkdir stylesand press Enter. - Type
mkdir imagesand press Enter.
- Type
- Finally, type
lsand press Enter. You should see your two new folders listed:imagesandstyles.
You have just created a professional project folder structure without ever touching your mouse!
6. Checklist Before Moving Ahead
- I can open and close the integrated terminal in VS Code.
- I can explain what the
pwd,ls,cd, andmkdircommands are used for. - I know that
cd ..moves me up to the parent directory. - I successfully completed the exercise and now have a
my-first-websitefolder on my Desktop containingstylesandimagessub-folders.
Conclusion
Fantastic work. You've just learned the fundamental language for navigating your computer like a developer. These commands—pwd, ls, cd, mkdir—will become second nature. You've also created the very first tangible piece of our project: its folder structure.
A Look Ahead: In the next lesson, we'll install Git, the version control system. Think of it as a super-powered "version history" for your code, much like you have in Figma. It's the standard tool developers use to track changes and collaborate, and it will be essential for our workflow.