Welcome back! In our last lesson, we explored the fundamental blueprint of a webpage—the <!DOCTYPE>, <html>, <head>, and <body>. You learned that the <head> is for hidden metadata, and the <body> is where all the visible content lives.
Now, we're going to open up that <body> and learn to identify the most common building blocks used to structure the content inside it.
1. What We Are Learning
In this lesson, you will learn to recognize common HTML elements and their purpose. Specifically, we will focus on five essential tags:
<h1>: The main heading.<p>: A paragraph of text.<div>: A generic container for grouping elements.<img>: An image.<a>: A link.
These are the absolute workhorses of the web. Almost everything you see on a page is made from some combination of these elements.
2. Why This Matters
As a designer, you instinctively think in terms of text, images, and grouped components. These HTML tags are the code-level equivalents of those concepts.
h1andpare your text blocks.imgis your image frame.ais your interactive hotspot or link.divis your "Group" or "Frame" command in Figma.
When an AI generates code from your design, it will be a sea of these tags. Being able to read them allows you to verify the AI's work, give it better instructions ("Put the <img> and the <p> inside a <div>"), and understand why the layout looks the way it does. This is the core of code literacy.
3. Step-by-Step Instructions
Let's start by identifying these tags and understanding what they do.

Text Elements: Headings and Paragraphs (<h1>, <p>)
First, let's look at the most basic content: text. On the web, we primarily structure text using headings and paragraphs.
Introduction to Web Development Concepts for Designers - Coding for Product and Web Designers
This video clip from Ari Pxl's "Introduction to Web Development Concepts for Designers" explains how headings (<h1>) and paragraphs (<p>) are used.
Watch from 22:30 to 23:23. Notice how he uses <h1> for the most important title and <p> for the regular body text. This directly maps to your design's text hierarchy.
<h1>(Heading 1): This is for the main, top-level heading on a page. Think of it as yourdisplayorheadline 1text style. While there are also<h2>through<h6>for subheadings,<h1>is the most important for page structure and search engines. Best practice is to use only one<h1>per page.<p>(Paragraph): This is for a standard block of text. Any time you have a sentence or a paragraph, you'll wrap it in<p>tags.
The Universal Container: The <div>
What if you want to group a heading and a paragraph together so you can style them as a single unit? In Figma, you'd select both and press Cmd+G to group them. In HTML, you use a <div>.
Introduction to Web Development Concepts for Designers - Coding for Product and Web Designers
This next clip from the same video explains the <div> tag. The analogy to grouping elements in your design software is spot-on.
Watch from 12:15 to 13:36. The key takeaway is that a <div> is an 'invisible box' used to group other elements together for layout purposes.
<div>(Division): This is the most common tag on the web. It's a generic container with no inherent meaning. Its only job is to group other elements, creating the "boxes inside of boxes" structure of a webpage. You'll use<div>s to create sections, columns, cards, and any other layout component.
Media and Links: Images (<img>) and Anchors (<a>)
Webpages aren't just text. Let's see how to add images and links. These elements are a little different because they require extra information called attributes.
Introduction to Web Development Concepts for Designers - Coding for Product and Web Designers
This clip introduces the <img> tag and its two most important attributes: src (source) and alt (alternative text). Pay attention to how the alt text is used for accessibility.
Watch from 16:15 to 18:00. Note that <img> is a 'self-closing' tag; it doesn't need a separate closing tag like </p>.
<img>(Image): Used to embed an image.srcattribute: This tells the browser where to find the image file. It's the "source."altattribute: This provides a text description of the image. It's crucial for accessibility (screen readers for visually impaired users) and will be displayed if the image fails to load.
Now for links, which make the web a "web."
Introduction to Web Development Concepts for Designers - Coding for Product and Web Designers
Finally, let's look at the <a> (anchor) tag, which creates hyperlinks. This clip explains the href attribute.
Watch from 19:01 to 20:11. The href attribute tells the browser where the link should go.
<a>(Anchor): Used to create a hyperlink. The text you put between the opening<a>and closing</a>tags becomes the clickable link text.hrefattribute: This stands for "hypertext reference" and tells the browser the destination URL of the link.
Bonus Concept: Block vs. Inline
Why do headings and paragraphs stack on top of each other, but links can sit right inside a line of text? It's because of their default display behavior.
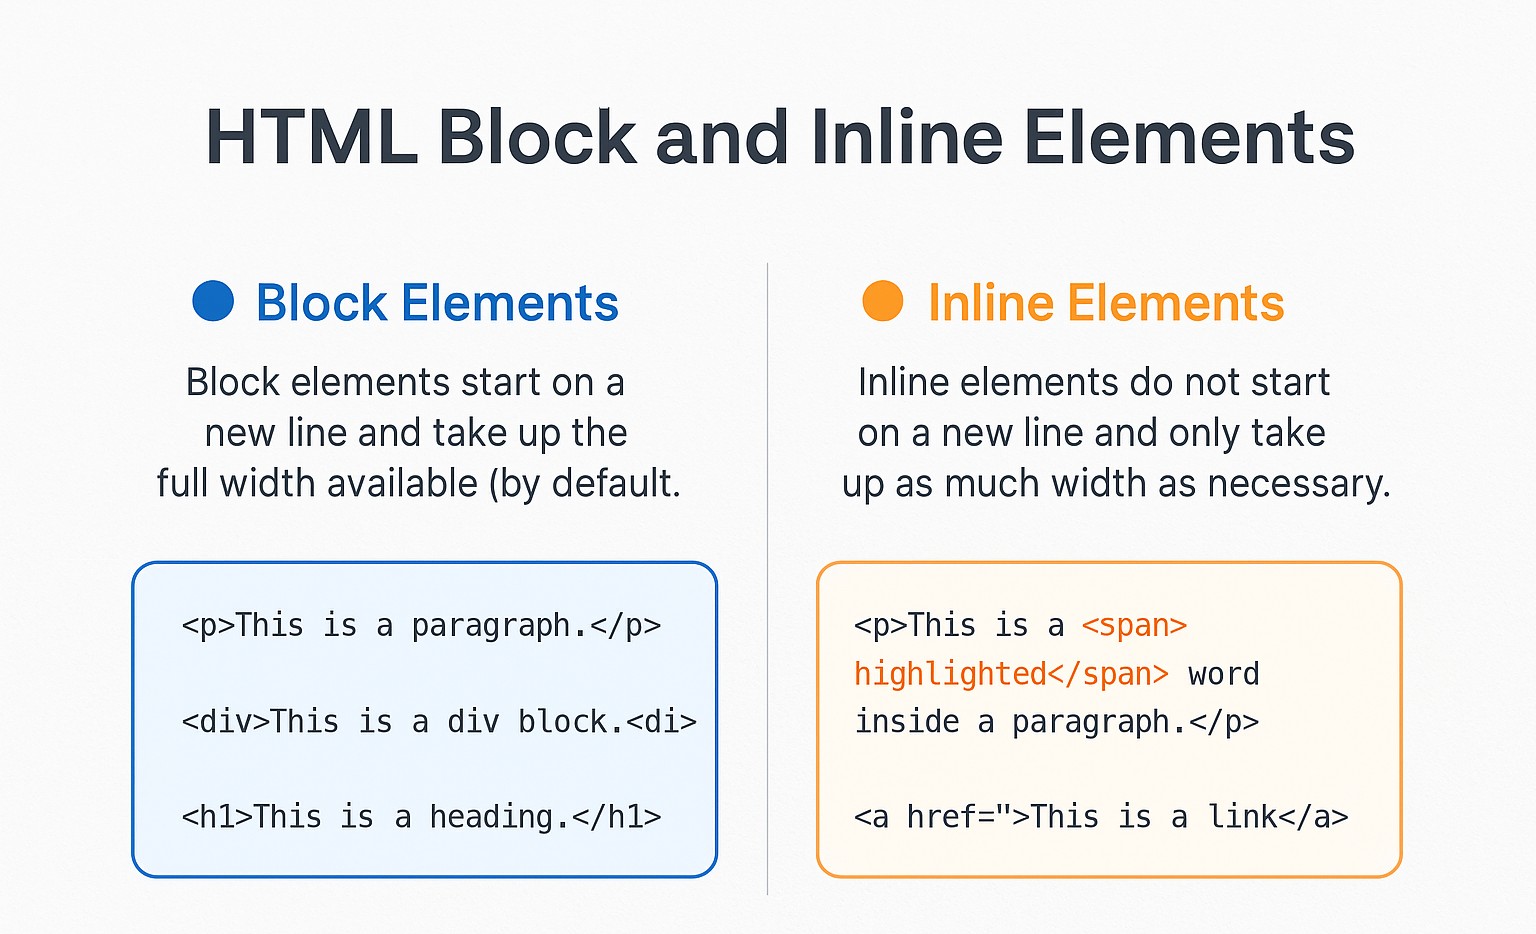
Understanding this is key to understanding layout. When you look at your index.html page in the browser, you'll see your <h1> takes up the full width and the <p> starts on a new line below it. This is because they are block-level elements.
4. What Could Go Wrong
-
Problem: My image is showing a broken icon.
- Reason: The URL in your
srcattribute is likely incorrect or broken. Also, make sure the URL is wrapped in quotes, likesrc="http://...". - Solution: Double-check the image URL. In this situation, the
alttext you provided will be displayed, which shows why it's so important!
- Reason: The URL in your
-
Problem: My link doesn't go anywhere when I click it.
- Reason: You either forgot the
hrefattribute, or the URL inside it is not valid. - Solution: Make sure you have
href="..."with a full, valid web address inside the quotes (e.g.,href="https://www.figma.com").
- Reason: You either forgot the
-
Problem: All my text is jumbled together on the page.
- Reason: You probably forgot a closing tag, like
</p>or</h1>. When the browser doesn't see a closing tag, it gets confused about where one element ends and the next begins. - Solution: Scan your code. Every
<p>needs a</p>, and every<h1>needs an</h1>. VS Code's color-coding can help you spot missing tags.
- Reason: You probably forgot a closing tag, like
5. Mini Exercise
Time to apply what you've learned. Let's add these new elements to your index.html file.
-
Open your
my-landing-pageproject in VS Code. -
Inside the
<body>, below your<h1>Hello World</h1>line, add the following elements one by one.a. Add a paragraph:
<p>I am a product designer learning to build for the web.</p>b. Add a link:
<a href="https://www.figma.com">This is my favorite design tool.</a>c. Add an image: We'll use a placeholder service for now.
<img src="https://via.placeholder.com/200x100" alt="A 200 by 100 pixel placeholder image">d. (Optional) Group them in a
<div>: To practice, try wrapping the new paragraph, link, and image inside a<div>.<div> <p>I am a product designer learning to build for the web.</p> <a href="https://www.figma.com">This is my favorite design tool.</a> <img src="https://via.placeholder.com/200x100" alt="A 200 by 100 pixel placeholder image"> </div> -
Save your
index.htmlfile (Cmd+SorCtrl+S). -
Look at your browser window where Live Server is running. You should see your new paragraph, link, and image appear below the heading. Notice how they stack vertically because
pandimg(by default in this context) behave like block-level elements.
6. Checklist Before Moving Ahead
- I can identify an
<h1>tag and explain that it's for a main page title. - I can identify a
<p>tag and explain that it's for a paragraph of text. - I can identify a
<div>tag and explain its purpose as a generic container, similar to a "group" in Figma. - I can identify an
<img>tag and explain the purpose of itssrcandaltattributes. - I can identify an
<a>tag and explain the purpose of itshrefattribute. - I successfully added a paragraph, link, and image to my
index.htmlpage.
Excellent work. You can now read and understand the most fundamental building blocks of a webpage. This vocabulary is the foundation for everything that follows.
A Look Ahead: Now that you know about generic containers (<div>), the next lesson will introduce semantic HTML. We'll learn about more descriptive container tags like <header>, <section>, and <footer>. These give more meaning to our content, which is great for accessibility and search engines, and helps us write cleaner, more understandable code.