Hello! In our last lesson, we built a reusable <SEO /> component to control how individual pages appear to search engines and on social media. This was a crucial first step in making your accounting website discoverable.
Today, we'll take the next step in our SEO and Web Accessibility module. While the <SEO /> component describes individual pages, we now need to provide search engines with a complete map of your entire site. This lesson will guide you through how to generate an XML sitemap automatically during the build process for better search engine indexing. This is a fundamental SEO practice that ensures all your content—from service pages to future blog posts—can be efficiently found and indexed by crawlers like Googlebot.
Part 1: What is an XML Sitemap and Why Do You Need One?
Before we generate one, let's clarify what a sitemap is. In simple terms, a sitemap is an XML file that lists all the important URLs on your website. It acts as a roadmap for search engine crawlers, telling them which pages are available for crawling.
While search engines can discover pages by following links within your site, a sitemap provides an explicit list, which is especially useful for:
- Large websites: Ensuring all pages are found, even deeply nested ones.
- New websites: Helping crawlers discover your content faster since there are few external links pointing to it yet.
- Websites with dynamic content: Informing crawlers about new pages (like new blog posts or case studies) as soon as they are published.
Your goal is to build a content-driven site with blogs and services, so a sitemap is not just a best practice; it's essential for your SEO strategy.
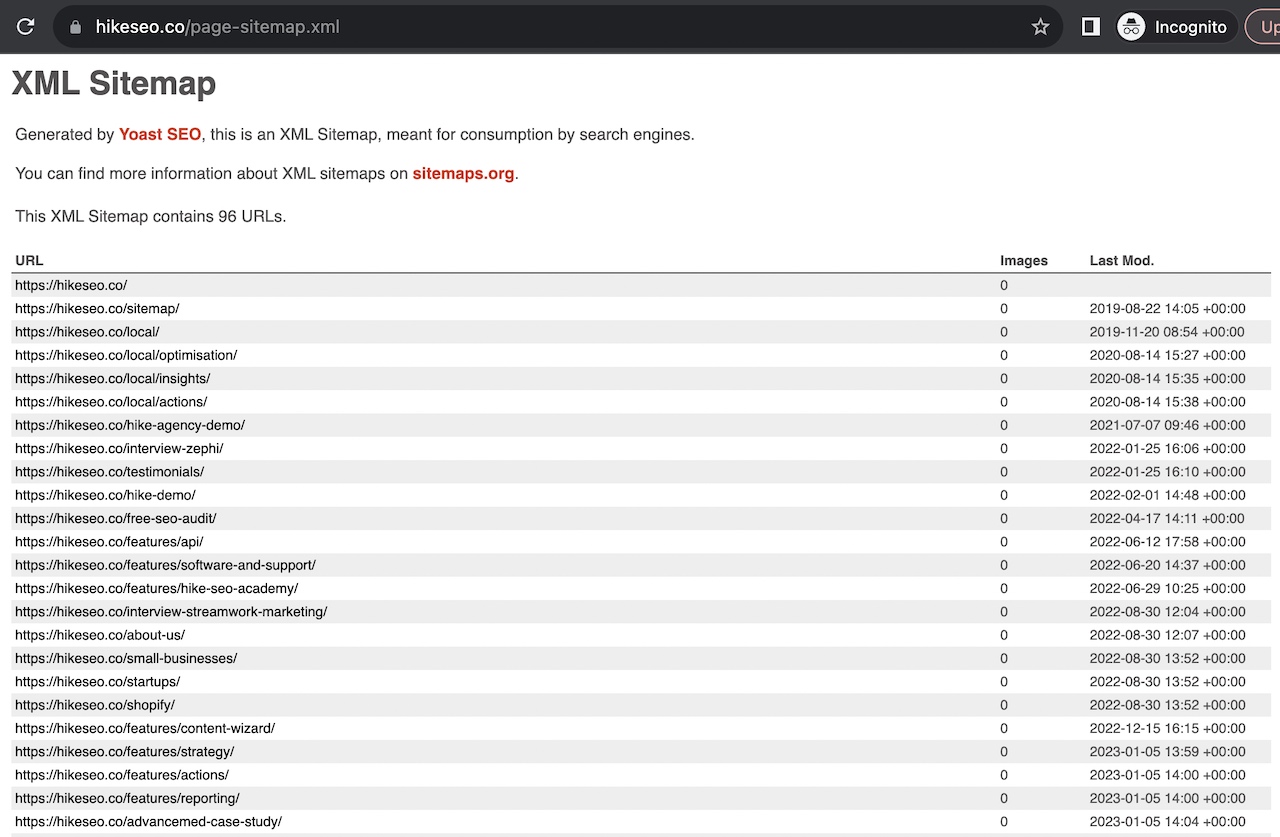
The sitemap works alongside another file, robots.txt, which gives crawlers rules about what they can and cannot access. The crawler typically checks robots.txt first, which can point it to the sitemap's location.

Now, let's get practical and create one for your project.
Part 2: Generating Your Sitemap with Astro
Manually creating and updating an XML file would be a tedious task, prone to error. Fortunately, Astro has an official integration that automates this entire process.
To understand how simple this is, start by reading the introduction from the official Astro documentation.
The official documentation for @astrojs/sitemap introduces the integration and explains its benefits for SEO.
Read the section '# @astrojs/sitemap' to understand why this integration is recommended and how it handles both static and dynamic routes.
Step 1: Install the Sitemap Integration
Astro’s command-line interface makes adding integrations like this a one-step process. In your project's terminal, run the following command:
npx astro add sitemap
Astro will install the necessary package (@astrojs/sitemap) and automatically update your astro.config.mjs file to include the sitemap integration. This process is demonstrated perfectly in the following video.
Astro Blog Course #14 - Build a sitemap
This clip from Coding in Public shows the installation process in action. It's a great visual confirmation of how simple it is.
Watch from 00:15 to 00:47. Notice how the command installs the package and adds the sitemap() integration to the config file automatically.
Step 2: Configure and Build
After running the command, your astro.config.mjs should look something like this:
// astro.config.mjs
import { defineConfig } from 'astro/config';
import sitemap from '@astrojs/sitemap';
// ... other integrations

export default defineConfig({
  site: 'https://your-production-domain.com', // You set this in the last lesson!
  integrations: [
    sitemap(),
    // ... other integrations
  ]
});
The sitemap integration requires the site property to be set in your config. We already did this in the last lesson when building the <SEO /> component, so you're all set! This property is crucial because sitemaps must contain absolute URLs (e.g., https://your-site.com/about) not relative ones (/about).
Now, let's generate the sitemap. It's created during the build process, not while running the dev server. Run the build command in your terminal:
npm run build
Once the build completes, you'll find a new dist/ directory in your project. Inside it, you will see two new files:
sitemap-index.xml: This is the main sitemap file that search engines look for. It points to other sitemap files.sitemap-0.xml: This file contains the actual list of your page URLs. For very large sites, Astro might split URLs across multiple files (sitemap-1.xml, etc.), and the index will link to all of them.
Part 3: Customizing the Sitemap
By default, the integration includes every page Astro generates. However, you might have pages you want to exclude from the sitemap, such as a "Thank You" page after a form submission or a private admin area.
You can achieve this using the filter option in the sitemap configuration. The filter function receives the URL of each page, and you can return false to exclude it.
For example, to exclude a page at /thank-you, you would update your astro.config.mjs:
// astro.config.mjs
import { defineConfig } from 'astro/config';
import sitemap from '@astrojs/sitemap';

export default defineConfig({
  site: 'https://your-production-domain.com',
  integrations: [
    sitemap({
      filter: (page) => page !== 'https://your-production-domain.com/thank-you/',
    }),
  ],
});
The official documentation covers this and many other advanced options you might need in the future, such as adding external pages or setting change frequencies.
To see the full range of customization, it's worth scanning the configuration options in the official docs. We'll focus on filter, but it's good to know what else is possible.
Skim the 'Configuration' section, paying close attention to the filter option. Notice other options like customPages, changefreq, and priority that offer more granular control.
Test your understanding!
Imagine your accounting website will have a public-facing blog but also a private "drafts" section where you write posts before they are published (e.g., any URL containing /drafts/). How would you configure the sitemap to include all pages except those in the drafts section?
Show answer
You would use the filter option with a string method like includes(). The page argument is a full URL string.
// astro.config.mjs
import { defineConfig } from 'astro/config';
import sitemap from '@astrojs/sitemap';

export default defineConfig({
  site: 'https://your-production-domain.com',
  integrations: [
    sitemap({
      filter: (page) => !page.includes('/drafts/'),
    }),
  ],
});
This configuration checks if the page URL string contains /drafts/. If it does, the expression !page.includes('/drafts/') evaluates to false, and the page is excluded from the sitemap.
Part 4: Making Your Sitemap Discoverable
Generating the sitemap file is the first step. The second is telling search engines where to find it. There are two primary ways to do this.
-
Via
robots.txt
You can create apublic/robots.txtfile and add a line pointing to your sitemap index. Search engines will automatically look for this file.# public/robots.txt User-agent: * Allow: / Sitemap: https://your-production-domain.com/sitemap-index.xml -
Via a
<link>Tag in your HTML<head>
You can also add a<link>tag to the<head>of your pages. Since this should be on every page, the perfect place to add it is inside the reusable<SEO />component we built in the last lesson.Open
src/components/SEO.astroand add the following line:// src/components/SEO.astro --- // ... all of your existing frontmatter logic --- <!-- Primary Meta Tags --> <title>{effectiveTitle}</title> <meta name="description" content={effectiveDescription} /> <!-- Sitemap --> <link rel="sitemap" href="/sitemap-index.xml" /> <!-- Canonical URL --> <link rel="canonical" href={canonicalURL} /> <!-- ... rest of your meta tags (Robots, Open Graph, etc.) -->By adding it here, you ensure this discovery hint is present on every single page of your site without any extra effort. Both methods are good practice, and you can use both.
This concise blog post summarizes the entire process, including installation, configuration, and discoverability, serving as a great final review.
Adding Automatic Sitemap Generation to an AstroJS Website
This article from Friedrich Kurz provides a clean, end-to-end summary of everything we've just done.
Read through this short post to reinforce your understanding. Notice how it covers installation, adding the site property, verifying the build output, and making the sitemap discoverable via both robots.txt and a <link> tag.
Conclusion
Excellent work! You've now automated a critical piece of your site's technical SEO. By adding the sitemap integration, you've ensured that as your accounting website grows with new services, blog posts, and case studies, search engines will be able to discover and index your content quickly and reliably.
Key Takeaways:
- An XML sitemap is a roadmap for search engines, listing all the URLs you want them to crawl.
- Astro's
@astrojs/sitemapintegration automates the creation and updating of your sitemap. - Installation is simple with
npx astro add sitemap, which handles setup in yourastro.config.mjs. - The sitemap is generated during the
npm run buildcommand and requires thesiteproperty to be set. - You can customize which pages are included by using the
filterconfiguration option. - To make your sitemap discoverable, you should add a reference to it in your
robots.txtfile and/or add a<link rel="sitemap">tag to your site's<head>.
Up Next:
We've told search engines where to find our pages. In the next lesson, we'll learn how to tell them what our pages are about in a structured, machine-readable way. We will implement structured data (JSON-LD) for blog posts and services, which can lead to rich results (like star ratings or FAQs) appearing directly in search engine listings, further enhancing your site's visibility.