Hello! Welcome back.
In our last lesson, we explored the "why" of MDX, understanding it as a powerful fusion of Markdown's simplicity and JSX's interactivity. We saw how it's the perfect tool for creating rich, engaging content for the accounting website you're planning to build.
Today, we're moving from theory to practice. It's time to integrate this powerful tool into our Astro project. Our learning outcome is to set up MDX and Content Collections integration in an Astro project. This is a crucial step that lays the foundation for managing all your site's content—from blog posts to service descriptions—in a structured, scalable, and error-free way.
1. Enabling MDX in Your Astro Project
Out of the box, a new Astro project understands .astro and .md files. To make it understand the .mdx syntax (which combines Markdown with JSX), we need to add the official @astrojs/mdx integration.
Astro has a handy command-line tool for this. The process is straightforward.
The official Astro documentation provides a quick guide on how to add integrations. We'll use the automated astro add command.
Please review the "Installation" section. You only need to look at the astro add mdx command. We'll use this command to automatically install and configure the integration.
To get started, open your terminal in the root of your Astro project and run:
npx astro add mdx
This command does two things for you:
- It installs the necessary
@astrojs/mdxpackage from npm. - It automatically updates your
astro.config.mjsfile to include the MDX integration.
After running the command, your astro.config.mjs file will look something like this. Notice the addition of mdx() to the integrations array:
// astro.config.mjs
import { defineConfig } from 'astro/config';
import mdx from '@astrojs/mdx';
import react from '@astrojs/react'; // Assuming you added React earlier

// https://astro.build/config
export default defineConfig({
  integrations: [
    react(),
    mdx() // The MDX integration is now active!
  ]
});
With this simple step, your Astro project is now fully equipped to process .mdx files.
2. Organizing Content with Content Collections
Now that Astro can handle MDX, where do we put our content files? We could place them in the src/pages/ directory to create pages, but for content like blog posts, services, or testimonials, we need a more organized system. We want to be able to query this content, list it on an index page, and manage its metadata easily.
This is exactly what Content Collections are for. They are Astro's built-in system for organizing and managing your content.
Here’s the core idea:
- All your content lives in a special, reserved directory:
src/content/. - Inside
src/content/, you create subdirectories for each type of content. Each subdirectory is a "collection."
For the accounting website, your structure might eventually look like this:
src/
└── content/
    ├── blog/
    │   ├── post-one.mdx
    │   └── post-two.mdx
    ├── services/
    │   ├── tax-planning.mdx
    │   └── bookkeeping.mdx
    └── testimonials/
        ├── client-a.mdx
        └── client-b.mdx
This structure is clean, intuitive, and separates your content from your page layouts (which live in src/pages/ and src/layouts/).

3. Defining Collections and Schemas
Just creating folders isn't enough. The real power of Content Collections comes from defining a schema for each collection. A schema is a set of rules that every content file in that collection must follow.
This is where Astro brings type-safety to your content. By defining a schema, you guarantee that every blog post, for example, will have a title, a publishDate, and a description. If you or someone else forgets to add one of these required fields to a file's frontmatter, Astro will give you a clear error during development, preventing broken pages in production.
We define these schemas in a single configuration file at the root of your src/ directory: src/content/config.ts. Astro automatically finds and uses this file.
Let's see how to set this up.
Getting Started With Astro's Content Collection API
The article "Getting Started With Astro's Content Collection API" provides a great overview of this process. We'll walk through the key steps together.
Please read the sections "What is Content Collection?" and "Defining New Content Collection". This will introduce you to the content.config.ts file and the use of Zod for schema definition. Note: The article uses a loader property which is no longer required for file-based collections in modern Astro, so you can ignore that specific line of code.
As the article explains, you define your collections using the defineCollection function and a schema library called Zod. Let's create our first collection for the blog.
Step 1: Create the config file
First, create a new file: src/content/config.ts.
Step 2: Define the blog collection
Inside this file, you'll import helpers from astro:content and define your collections. For our blog, we want to ensure every post has a title, a short description, and a publication date.
// src/content/config.ts
import { defineCollection, z } from 'astro:content';

// 1. Define a `type` and `schema` for each collection
const blogCollection = defineCollection({
  type: 'content', // 'content' for MD/MDX, 'data' for JSON/YAML
  schema: z.object({
    title: z.string(),
    description: z.string(),
    publishDate: z.coerce.date(), // z.coerce.date() transforms a string like "2024-01-01" into a JavaScript Date object
  }),
});

// 2. Export a single `collections` object
export const collections = {
  'blog': blogCollection,
};
This configuration tells Astro:
- There is a content collection named
blog. - Every entry in the
blogcollection must have frontmatter containing atitle(string),description(string), andpublishDate(a string that can be converted to a date).
4. Authoring Your First Content Entry
With the schema defined, you can now create your first blog post. Based on our setup, this file should go into a new blog folder inside src/content.
Step 1: Create the content file
Create the file: src/content/blog/first-post.mdx.
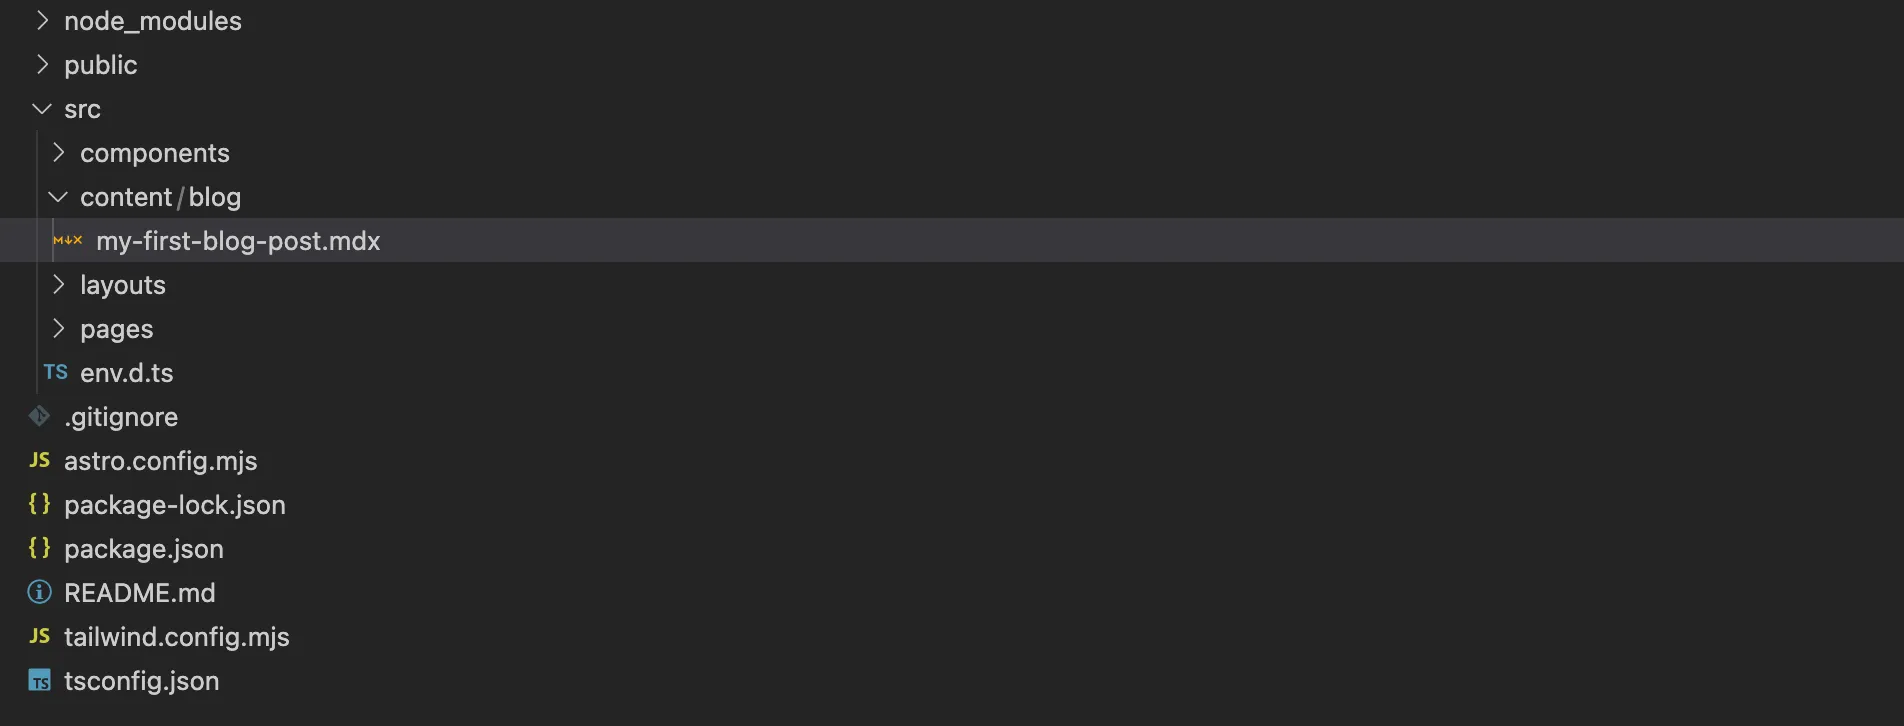
Step 2: Add frontmatter and content
Now, open first-post.mdx and add the frontmatter, making sure it matches the schema we just defined.
---
title: "My First Blog Post"
description: "This is a short description of my very first post using Astro Content Collections."
publishDate: "2024-07-26"
---

# Welcome to my blog!

This is my first post, written in MDX. Thanks to Content Collections, Astro knows that my `title`, `description`, and `publishDate` are all present and correctly formatted.
If you were to change title to postTitle or forget the description field, Astro's dev server would immediately throw an error, telling you exactly what's wrong. This is the power of type-safe content management!
Test your understanding!
Your accounting website will have a "Services" section. You need to create a new content collection for it.
In your src/content/config.ts file, how would you define a services collection that requires each service to have:
- A
namefor the service (e.g., "Tax Planning"). - A
tagline(a short, descriptive sentence). - An optional
isFeaturedboolean flag to mark important services.
Show answer
You would add a new collection definition to your src/content/config.ts file and export it alongside the blog collection.
// src/content/config.ts
import { defineCollection, z } from 'astro:content';

const blogCollection = defineCollection({
  type: 'content',
  schema: z.object({
    title: z.string(),
    description: z.string(),
    publishDate: z.coerce.date(),
  }),
});

// New services collection
const servicesCollection = defineCollection({
  type: 'content',
  schema: z.object({
    name: z.string(),
    tagline: z.string(),
    isFeatured: z.boolean().optional(), // .optional() makes the field not required
  }),
});

export const collections = {
  'blog': blogCollection,
  'services': servicesCollection, // Add the new collection here
};
You could then create a file like src/content/services/tax-planning.mdx with frontmatter like:
---
name: "Tax Planning"
tagline: "Proactive strategies to minimize your tax liabilities."
isFeatured: true
---
Conclusion
Fantastic work! In this lesson, we've put the essential plumbing in place for a powerful, content-driven website. You've gone from a conceptual understanding of MDX to a practical implementation that will serve as the backbone of your project.
Here are our key takeaways:
- MDX Integration: We enabled MDX support in our project with a single command:
npx astro add mdx. - Content Collections: We learned to organize our content logically within the
src/contentdirectory, creating separate collections for different content types. - Type-Safe Schemas: We created a
src/content/config.tsfile to define schemas for our collections using Zod, ensuring all our content is valid and consistent.
You now have a robust system for authoring and managing content. This approach is not only great for developer experience but is also highly scalable and maintainable in the long run.
Up Next: We've only scratched the surface of what Zod can do. In our next lesson, we will define type-safe content schemas using Zod to validate frontmatter in greater detail. We'll explore more advanced schema definitions, including different data types, optional fields, default values, and transformations. This will give you even more granular control over your content's structure.