Hello and welcome back!
In our last module, we mastered the art of structuring our content with static pages, content collections, and even sophisticated nested layouts. Our site is fast and well-organized, but it's completely static. As you know from your experience building with React, modern web applications need interactivity to create engaging user experiences.
This lesson marks our entry into Module 4: Integrating React and Client-Side Interactivity. We'll start by tackling the foundational step: setting up the React integration in your Astro project. Since you're already proficient with React, our focus won't be on writing React components, but on how to seamlessly embed and hydrate them within Astro's architecture. This lesson bridges the gap between Astro's static-first approach and the dynamic, client-side capabilities you're used to.
1. Understanding Astro Integrations
Before we add React, it's important to understand how Astro extends its core functionality. Astro uses a powerful plugin-like system called Integrations. An integration is a package that adds new features, such as support for UI frameworks (like React or Vue), tools (like Tailwind CSS), or new capabilities (like generating a sitemap).
To use React components in our Astro project, we need to add the official @astrojs/react integration. This integration does two key things:
- It allows Astro to understand and render your React components (
.jsxor.tsxfiles) to static HTML during the build process. - It provides the mechanism to "hydrate" these components on the client-side, making them interactive in the browser.
2. Adding the React Integration
Astro provides a convenient command-line tool to handle the entire setup process for you. This is the recommended approach.
In your project's terminal, run the following command:
npx astro add react
The astro add command is a powerful helper that automates the installation and configuration. When you run it, it will:
- Install Packages: It installs the
@astrojs/reactintegration package, along with its necessary peer dependencies:reactandreact-dom. - Configure Astro: It automatically updates your
astro.config.mjsfile to include and enable the React integration. - Configure TypeScript (if applicable): It may also update your
tsconfig.jsonto ensure TypeScript understands JSX syntax within your project.
For a detailed look at this process, the official Astro documentation is an excellent resource.
The official documentation for @astrojs/react provides a concise overview of the installation process. We are following the automated astro add method described here.
Read the 'Installation' section. You'll see the command we just used. This confirms we're following the standard, recommended practice.
3. Verifying the Installation
After the command finishes, let's verify that everything is configured correctly. Open your astro.config.mjs file. You should see that it has been automatically modified to look something like this:
// astro.config.mjs
import { defineConfig } from 'astro/config';
import react from "@astrojs/react"; // This line was added

// https://astro.build/config
export default defineConfig({
  integrations: [react()] // And this was added
});
The presence of the react import and its inclusion in the integrations array confirms that the React integration is active. Your project is now capable of rendering React components.
Test your understanding!
A colleague who is new to Astro asks you what the npx astro add react command actually did to your project's codebase. What are the two primary files that were automatically modified, and what was changed in each?
Show answer
package.json: The command added@astrojs/react,react, andreact-domas dependencies to your project.astro.config.mjs: The command imported thereactintegration and added it to theintegrationsarray, officially enabling it for your Astro site.
4. Creating and Rendering Your First Interactive Component
With the setup complete, let's put it to use. We'll create a simple interactive counter component in React and render it on a new Astro page. This will prove that the integration is working and give you a first glimpse of Astro's "islands architecture" in action.
Step 1: Create the React Component
First, let's create a dedicated folder for our React components to keep the project organized.
- Create a new folder:
src/components/react/. - Inside this folder, create a new file named
InteractiveCounter.tsx.
Now, add the following standard React code to InteractiveCounter.tsx. This is a basic counter that uses the useState hook, which should be very familiar to you.
// src/components/react/InteractiveCounter.tsx
import React, { useState } from 'react';

export default function InteractiveCounter() {
  const [count, setCount] = useState(0);

  const handleClick = () => {
    setCount(count + 1);
  };

  return (
    <div className="counter">
      <p>Current count: <strong>{count}</strong></p>
      <button onClick={handleClick}>Increment</button>
    </div>
  );
}
Step 2: Render the Component in an Astro Page
Next, let's create a temporary page to display our new component.
- Create a new file at
src/pages/react-test.astro. - Add the following code to this file:
---
// src/pages/react-test.astro
import BaseLayout from '../layouts/BaseLayout.astro';
import InteractiveCounter from '../components/react/InteractiveCounter.tsx';
---
<BaseLayout title="React Test Page">
  <div class="container">
    <h1>Testing React Interactivity</h1>
    <p>
      Below is a React component rendered within an Astro page. By default,
      Astro would only output the static HTML. But by adding the `client:load`
      directive, we tell Astro to also send the component's JavaScript to the
      browser, making it interactive.
    </p>

    <InteractiveCounter client:load />

  </div>
</BaseLayout>

<style>
  .container {
    max-width: 80ch;
    margin-inline: auto;
    padding: 2rem;
  }
  h1 {
    text-align: center;
    margin-bottom: 2rem;
  }
</style>
Code Breakdown:
import InteractiveCounter from ...: We import our React component just like any other Astro component. Astro's build process understands how to handle the.tsxfile because of the integration we added.<InteractiveCounter client:load />: This is the most important part. By default, Astro renders UI framework components to static HTML, shipping zero client-side JavaScript. To make our counter interactive, we must add aclient:*directive.client:loadtells Astro to load and hydrate the component's JavaScript as soon as the page loads.
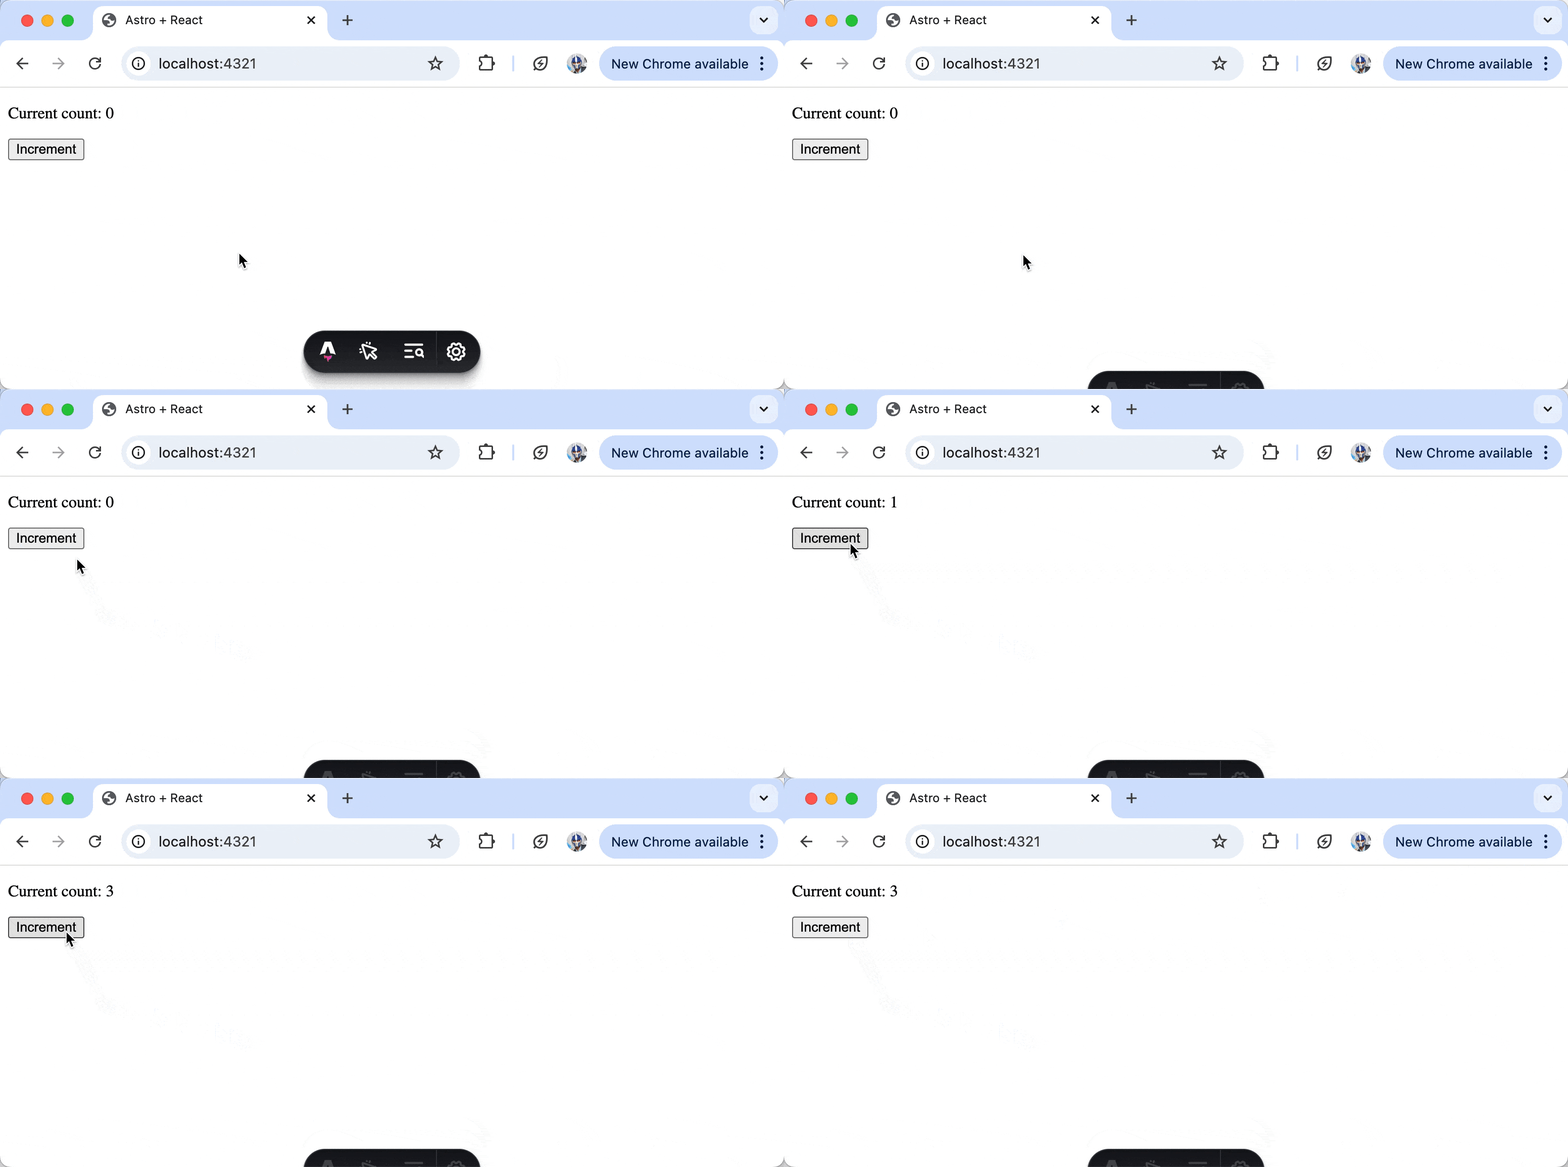
Now, start your dev server (npm run dev) and navigate to http://localhost:4321/react-test. You should see your counter, and when you click the button, the count should increase!
This practical guide from Relia Software further illustrates the process of setting up Astro with React and creating your first component, reinforcing the steps we've just taken.
Astro React Integration: Guide to Migrate React SPA to Astro
The blog post 'Astro React Integration: Guide to Migrate React SPA to Astro' provides a great hands-on example that aligns with what we've just accomplished.
In the section 'Step 1: Set Up Astro Project and Configure React Integration', review the code blocks for creating an Astro page (src/pages/index.astro) and a React component (src/components/ReactComponent.tsx). Notice how it mirrors our process of importing a .tsx component and using it in an .astro file with a client: directive. This reinforces the core pattern.
Conclusion
Congratulations! You have successfully configured your Astro project to support React. You've installed the integration, created an interactive React component, and rendered it within an Astro page.
Key Takeaways:
- Astro uses an Integrations system to add framework support and other features.
- The
npx astro add reactcommand is the simplest and recommended way to install and configure the React integration. - This command modifies
package.jsonandastro.config.mjsfor you. - To make a React component interactive on the page, you must use a
client:*directive, such asclient:load. Without it, the component is only static HTML.
Up Next:
In this lesson, we used client:load to make our component interactive. But what if a component is far down the page and not immediately visible? Loading its JavaScript right away might not be the most performant strategy.
In the next lesson, "Render interactive React components within Astro pages," we will dive deep into Astro's islands architecture. You'll learn about the different client directives (client:load, client:idle, client:visible) and how to choose the right one to optimize your site's performance by loading JavaScript only when it's needed.