Introduction
Welcome back! In our last lesson, we designed the Layer 3 foundation of our network, deciding to place our Switched Virtual Interfaces (SVIs) on the distribution layer switches and assigning them consistent IP addresses (like the first usable IP in each subnet). We've essentially built the on-ramps and off-ramps for our network's highways.
However, a host device—like a user's PC or a printer—doesn't automatically know where these on-ramps are. This lesson answers the final, critical question: How do we actually tell each host which gateway to use?
Our goal is to designate the appropriate default gateway for hosts within a VLAN. We'll explore the 'how' and 'why' behind this process, moving from the network infrastructure we've designed to the configuration of the end devices themselves.
The Role of the Default Gateway
Before we discuss how to assign a gateway, let's solidify why it's needed from a host's point of view. When a PC wants to send a packet, it performs a simple check: is the destination IP address in my local subnet?
- If yes: The PC sends an ARP request to find the destination host's MAC address directly and sends the frame to it.
- If no: The PC can't reach the destination directly. It must send the packet to a router that can forward it onward. This router is the default gateway. The PC sends an ARP request for the gateway's MAC address and forwards the packet there.
The video below gives a quick, clear explanation of this process.
Inter-VLAN Routing using a Multi-Layer Switch | Cisco CCNA 200-301
This clip from Keith Barker explains the fundamental role of a default gateway for any device that needs to communicate outside its local network or VLAN.
Watch from 01:20 to 02:11. Focus on the logic the host (Bob's computer) uses when it needs to send a packet to a non-local destination.
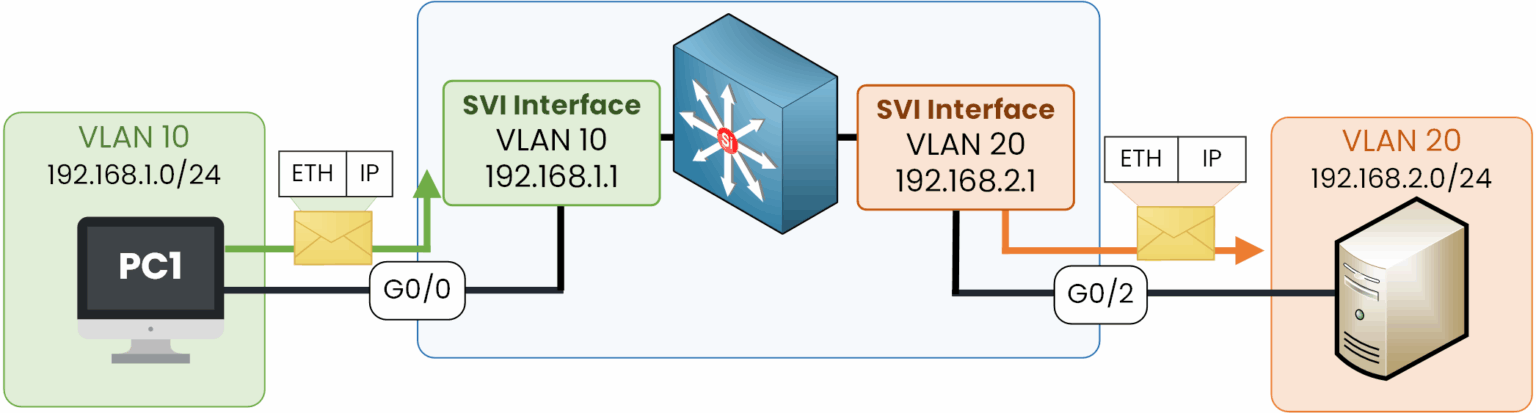
In our design, the SVI on the Layer 3 switch is the default gateway for its corresponding VLAN.
Methods for Designating the Gateway
There are two ways to tell a host what its default gateway is:
- Static Assignment: Manually configuring the IP address, subnet mask, and default gateway on each individual device.
- Dynamic Assignment: Using the Dynamic Host Configuration Protocol (DHCP) to automatically provide this information to devices when they join the network.
Static Assignment
You would manually enter the network settings into each device. This is necessary for devices that provide core network services and must have a predictable, unchanging address, such as:
- The default gateways (SVIs) themselves
- DHCP servers
- DNS servers
- Core routers and switches
Pros:
- Maximum control and predictability.
- Simple for a tiny number of devices.
Cons:
- Completely unscalable. Imagine manually configuring 1,000 workstations.
- Highly prone to human error (typos). A wrong gateway IP can isolate a user from the network.
- Difficult to manage. If you ever need to change the gateway IP scheme, you'd have to touch every single device.
Dynamic Assignment with DHCP
For end-user devices (workstations, phones, printers), dynamic assignment via DHCP is the industry standard. A DHCP server manages a pool of IP addresses for a given subnet and leases them to clients. Along with the IP address, it also provides crucial "options," including:
- Subnet Mask
- Default Gateway (Router)
- DNS Server(s)
This automates the entire process, eliminating typos and making management massively simpler.
DHCP in a Multi-VLAN Environment
Here's the technical challenge you'll face in your architecture: DHCP requests from clients are Layer 2 broadcasts. As we know, VLANs are separate broadcast domains; a broadcast sent in VLAN 10 will not be seen in VLAN 20.
So, how does a client in VLAN 10 get configuration from a centralized DHCP server located in your server VLAN (e.g., VLAN 200)?
The solution is a DHCP Relay Agent. On a Cisco L3 switch, this is configured using the ip helper-address command on the SVI.
Here's how it works:
- A client in VLAN 10 boots up and sends a DHCP Discover broadcast message.
- The Layer 3 switch receives this broadcast on the
interface Vlan10SVI. - The
ip helper-address <server_ip>command on the SVI tells the switch to "help" this broadcast. The switch converts the broadcast into a unicast packet and forwards it directly to the specified DHCP server's IP address. - The DHCP server receives the request, sees that it originated from the
172.20.0.1gateway (the SVI for VLAN 10), and knows to assign an address from the scope for the172.20.0.0/23network. - The server sends a DHCP Offer back to the SVI, which then forwards it to the client.
The following article explains this concept and shows the necessary configuration.
This guide from Cloudmylab explains the common problem of DHCP requests not crossing VLANs and introduces the ip helper-address command as the solution. It's a practical, real-world explanation that aligns with your CLI-focused background.
First, read the section titled 'Layer 3 Switch with SVIs' to see the SVI configuration. Then, jump down to the section 'DHCP Relay: Why Your Devices Can't Get IPs Across VLANs' for a detailed explanation and configuration example of ip helper-address.
This ip helper-address command is the glue that connects your client VLANs to your central DHCP service. It's a command you will use on every single user-facing SVI in your design.
Putting It All Together: From IPAM to Host
Let's connect this back to our planning.
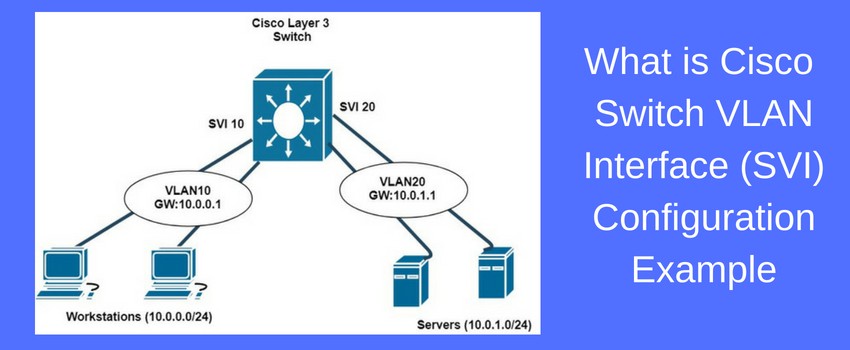
- SVI Planning (Last Lesson): We decided the SVI for the Sales VLAN 10 would be
172.20.0.1/23. - DHCP Relay (This Lesson): We configure
ip helper-address <DHCP_Server_IP>oninterface Vlan10. - DHCP Server Scope: On the DHCP server, we create a scope for the
172.20.0.0/23subnet. Inside that scope's options, we define the "Router" (Default Gateway) parameter as172.20.0.1.
When a sales user plugs in, their PC broadcasts a DHCP request. The SVI relays it. The DHCP server responds with an available IP from the 172.20.0.x pool and tells the PC, "By the way, your default gateway is 172.20.0.1."
The host now has all the information it needs.
Practical Exercise
Let's apply this. Based on the IPAM table you created in the last lesson, you have the following SVIs on your distribution switch:
- Sales:
interface Vlan10with IP172.20.0.1 - Engineering:
interface Vlan20with IP172.20.2.1 - Marketing:
interface Vlan30with IP172.20.3.1
Assume your company has a centralized DHCP server located in a server VLAN with the IP address 172.20.200.10.
Your Task:
Write the exact Cisco IOS commands you would add to your distribution switch configuration to enable DHCP for clients in the Sales, Engineering, and Marketing VLANs.
Click to see the solution
You would enter configuration mode and apply the ip helper-address command to each SVI, pointing to the DHCP server.
configure terminal

! Configuration for Sales VLAN
interface Vlan10
 ip helper-address 172.20.200.10
 exit

! Configuration for Engineering VLAN
interface Vlan20
 ip helper-address 172.20.200.10
 exit

! Configuration for Marketing VLAN
interface Vlan30
 ip helper-address 172.20.200.10
 exit

end
This simple, repeated command is fundamental to making a large, segmented network function automatically.
Conclusion
In this lesson, we bridged the gap between network infrastructure design and end-host configuration. We've established how to ensure every device on the network knows its correct path to the outside world.
Key Takeaways:
- A host's default gateway is the router it sends packets to when the destination is outside its local subnet. In our design, this is the SVI.
- Gateway information can be assigned statically (for servers and infrastructure) or dynamically via DHCP (for end users).
- For DHCP to work across VLANs, you must configure the
ip helper-addresscommand on each client-facing SVI, pointing it to your DHCP server. - The actual gateway IP address is designated within the DHCP scope configuration on the server.
Next Steps
We have successfully built a network where devices in different VLANs can get IP addresses and communicate with each other through a Layer 3 switch. However, right now, communication is wide open. Anyone in any VLAN can try to talk to anyone else.
In the next module, we will address this by learning how to secure network segments with Access Control Lists (ACLs). We'll take the SVIs we've just configured as gateways and turn them into security checkpoints, controlling precisely what traffic is allowed to be routed between our VLANs.