In our previous lesson, we applied Domain-Driven Design principles to decompose our system into a set of well-defined, bounded contexts, resulting in a refined microservice architecture. This gave us a high-level map of our services: Auth, Tenant, Project, File, and Notification. Now, it's time to bring that map to life by tracing the path of a real user through the system.
This lesson focuses on one of the most critical flows in any SaaS application: new company registration and tenant provisioning. We will design the entire journey, from the moment a user decides to sign up to their first successful login. This process is the front door to your application; making it seamless, secure, and robust is paramount for user acquisition and retention. By designing this flow, we will solidify the interactions between our Auth and Tenant services and make concrete decisions about their responsibilities.
The Onboarding Journey: From User to Tenant Admin
At a high level, the onboarding process isn't just about creating a user account. It's about creating an entire new workspace or tenant within our system and establishing the person who signed up as its first administrator.
From the user's perspective, the flow looks straightforward:
- Sign-up: Provide company name, email, and password.
- Verification: Click a link in a confirmation email.
- Login: Access the application.
From the system's perspective, this "simple" flow is a complex orchestration of validation, data creation, and resource provisioning. A single failure at any step could leave the user in a broken state. To manage this complexity and prevent "impossible states" (e.g., a user who is verified but has no company), we will model the process using a Finite State Machine (FSM).
An FSM provides a formal way to define the possible states of a process and the specific events (or "triggers") that can cause a transition from one state to another. This is far superior to using a scattered collection of boolean flags like isVerified, isProvisioned, etc.
Simplifying Customer Onboarding with Finite State Machines
This article by Fernando Hermida offers a fantastic introduction to the power of FSMs for managing complex workflows like customer onboarding. While the code examples are in C#, the concepts are universal and directly applicable.
First, read the introductory section, The Customer Onboarding Challenge, to appreciate the problem we're trying to solve. Then, jump to the section Enter Finite State Machines to understand the core components of an FSM: states, triggers, and transitions. Finally, read the sections on the organizational benefits and the conclusion to solidify why this architectural pattern is so valuable.
Designing the Onboarding State Machine
Inspired by the article, let's define a simple FSM for our onboarding process. This state will be stored against the user record during sign-up.
-
States:
PENDING_VERIFICATION: The initial state after a user submits the sign-up form.PROVISIONING: A transient state triggered after email verification, where the system creates the tenant and associated resources.ACTIVE: The final, successful state. The user is now fully onboarded.FAILED: A terminal state if provisioning fails irrecoverably.
-
Triggers (Events):
SIGNUP_SUBMITTED: User submits the registration form.EMAIL_VERIFIED: User clicks the verification link.PROVISIONING_SUCCEEDED: Backend successfully creates the tenant.PROVISIONING_FAILED: Backend fails to create the tenant.
This gives us a clear and predictable flow:PENDING_VERIFICATION -> PROVISIONING -> ACTIVE
The System Flow: A Step-by-Step Sequence
Now, let's map this FSM onto our microservice architecture. This will detail the sequence of API calls and backend jobs. The Tenant Service will act as the primary orchestrator, as onboarding is fundamentally about creating a new tenant.
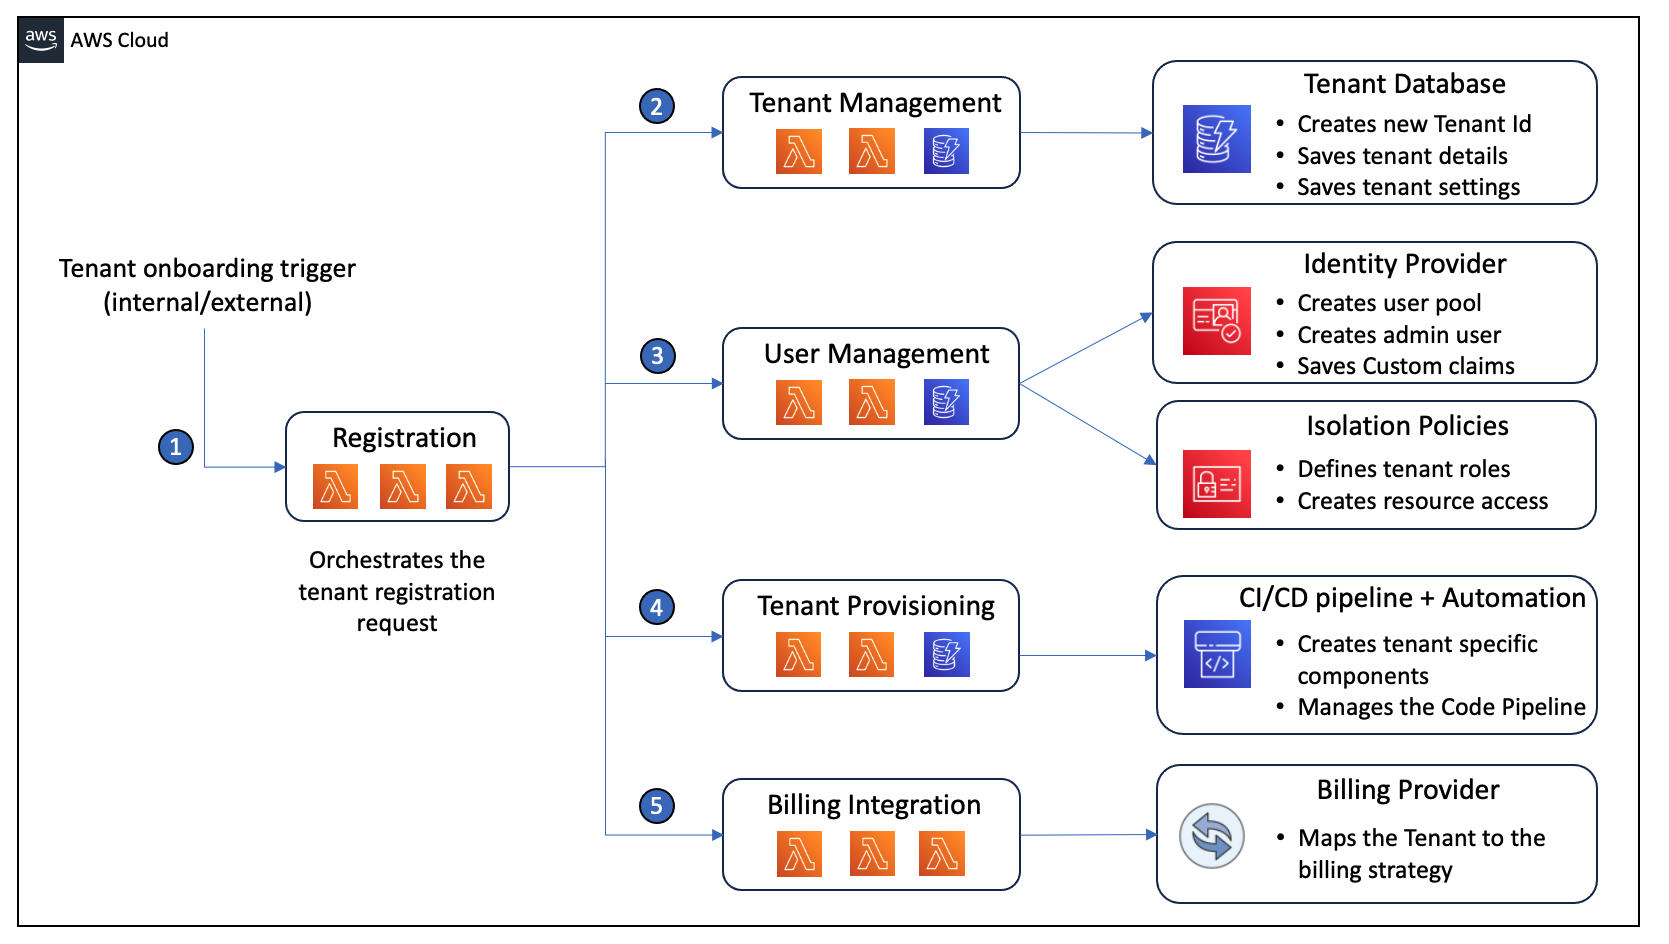
Here is the detailed sequence from sign-up to first login:
-
User Initiates Sign-up (Frontend)
- The user fills out a registration form in the Flutter app with their name, email, password, and the desired company name.
- The frontend sends a
POSTrequest to a public endpoint:POST /api/v1/register.
-
Registration Request (Tenant Service)
- The
Tenant Servicereceives the request at its/registerendpoint. - Decision: Why the
Tenant Serviceand not theAuth Service? Because registration is a business process that involves authentication, but its main purpose is to create a tenant. TheAuth Serviceshould remain a generic utility focused only on validating credentials and issuing tokens. - The service performs basic validation (e.g., password strength, valid email format).
- The
-
Initial User Creation & Verification
- The
Tenant Servicehashes the user's password. - It creates a new
userrecord in its database with thestatusset toPENDING_VERIFICATION. This user is not yet associated with any tenant. - It generates a secure, single-use verification token with an expiration time (e.g., 24 hours).
- It saves the token, associating it with the new user record.
- It triggers an asynchronous background task (e.g., via Celery/ARQ) to send a verification email to the user. This ensures the user gets a fast response from the API, and a temporary email service outage won't break the sign-up flow.
- The
-
User Verifies Email (User -> Frontend -> Backend)
- The user receives the email and clicks the verification link (e.g.,
https://yourapp.com/verify-email?token=...). - The Flutter web app (or mobile app via deep linking) receives the token and sends it to the backend:
POST /api/v1/verify-email.
- The user receives the email and clicks the verification link (e.g.,
-
Token Validation & Tenant Provisioning (Tenant Service)
- The
Tenant Servicereceives the token at its/verify-emailendpoint. - It validates the token: Does it exist? Is it expired? Has it been used?
- If the token is valid, the service transitions the user's state to
PROVISIONINGand begins the core provisioning logic within a single database transaction to ensure atomicity.
a. Create the Tenant: A new record is created in thetenantstable using the company name provided during sign-up. This record gets a newtenant_id.
b. Create the Admin User: The user's status is updated toACTIVE.
c. Link User and Tenant: A record is created in amembershipstable linking theuser_idto the newtenant_idand assigning theCompany Adminrole. This establishes the user as the owner of the new tenant.
d. Provision Initial Resources: The service could make internal calls to other services (e.g.,Project Service) to set up default data for the new tenant, like a "Welcome" project.
e. Assign Subscription: A default subscription tier (e.g., "trial") is assigned to the new tenant. - Once the transaction is successfully committed, the user's state is moved to
ACTIVE. The provisioning is complete. - The service returns a success response, redirecting the user to the login page.
- The
This process explicitly models the tenant as a first-class object, a core principle for building robust multi-tenant systems.
The developer's guide to SaaS multi-tenant architecture - WorkOS
This guide from WorkOS is an exceptional resource that covers the fundamental patterns of multi-tenant architecture. We'll focus on two key sections that are directly relevant to our onboarding flow.
First, read the section Model tenants as a first-class domain object. Pay close attention to the example schema with tenants, users, and memberships tables. This is precisely the structure we will use to link a verified user to their newly created company. Next, read the introduction to multi-tenant authentication and the subsection on the typical auth flow. This explains the critical "two-phase" process: first authenticating the user, then associating them with a specific tenant. This is exactly what happens at login.
-
First Login (Frontend -> Auth Service)
- The user is now on the login page and enters their email and password.
- The frontend sends these credentials to the
Auth Service:POST /api/v1/auth/token. - The
Auth Servicevalidates the credentials against theuserrecord (which is nowACTIVE). - Upon success, the
Auth Servicegenerates a JWT. Crucially, as the WorkOS article highlights, this JWT must be tenant-aware. It will contain standard claims (exp,iat) plus:user_id: The ID of the authenticated user.tenant_id: The ID of the company they are currently logged into.role: The user's role within that tenant (e.g.,company_admin).
- The
Auth Servicereturns the JWT to the frontend.
-
Authenticated Access (Frontend -> Backend)
- The frontend securely stores the JWT and includes it in the
Authorizationheader for all subsequent API requests. - When the user accesses a protected resource like the project dashboard, the request goes to the
Project Service. - Middleware in the
Project Servicevalidates the JWT and extracts thetenant_id. All database queries within that service are now automatically scoped to thattenant_id, ensuring the user only sees data for their own company.
- The frontend securely stores the JWT and includes it in the
This flow, from a simple sign-up form to a fully provisioned and isolated tenant environment, is the backbone of a multi-tenant SaaS.

Conclusion
In this lesson, we transitioned from high-level architectural concepts to the low-level design of a critical user and system flow. We designed the complete company registration and tenant provisioning process, defining the precise sequence of events and the responsibilities of our Tenant and Auth services.
Key Takeaways:
- Onboarding is an orchestrated process: It involves multiple steps that must be managed carefully to ensure a robust and reliable user experience.
- Finite State Machines (FSMs) bring clarity: By modeling the onboarding process as an FSM, we make the flow explicit, prevent invalid states, and simplify maintenance.
- The
Tenant Serviceis the orchestrator: It owns the business logic for creating and provisioning new tenants, calling on other services likeAuthas needed. - Authentication is tenant-aware: The JWT issued upon login must contain the tenant context (
tenant_id), which is the key to enforcing data isolation throughout the application.
Preview of the Next Lesson:
Now that we have a mechanism to create a new tenant, the next logical step is to define what that tenant is allowed to do. In the next lesson, we will design the subscription model, including defining different tiers (e.g., Free, Pro, Enterprise), implementing feature gates to control access based on the subscription, and modeling the subscription lifecycle (trial, active, past_due, canceled).