Hello! Welcome to your next lesson.
In our last session, we explored the locate command. We learned that it's incredibly fast for finding files by name because it searches a pre-built database. However, we also identified its key limitations: the database can be out of date, and you can only search by filename.
Today, we'll master the find command, the powerful and flexible counterpart to locate. find searches the filesystem in real-time, ensuring your results are always accurate. More importantly, it allows you to search for files based on a wide variety of criteria, such as size, modification time, permissions, and type. This lesson will teach you how to construct precise searches with find and even execute actions on the files you discover, a fundamental skill for any Linux administrator and a core topic for the CompTIA Linux+ exam.
1. The Basics of find: Searching by Name and Type
At its core, find operates with a simple structure: find [path] [expression].
- The
[path]tellsfindwhere to start its search (e.g.,.for the current directory,/for the entire system, or~for your home directory). - The
[expression]defines what you're looking for. This is where the power offindlies.
Let's start with the most common criteria: file type and name. The following video provides an excellent introduction to the basic syntax and these fundamental search expressions.
Linux/Mac Terminal Tutorial: How To Use The find Command
This video from Corey Schafer will walk you through the foundational usage of the find command, including how to specify a search path and how to filter by file type and name.
Watch from 00:31 to 04:29. Pay close attention to the syntax for specifying the search path, using -type f for files and -type d for directories, and the difference between -name (case-sensitive) and -iname (case-insensitive) when using wildcards.
As you saw, you can combine expressions to build a more specific search. For example: find . -type f -name "*.log" searches the current directory (.) for items that are files (-type f) and whose names end in .log (-name "*.log").
For a step-by-step written guide that reinforces these concepts, the following resource is very helpful. It also guides you through creating a practice directory, which is a great habit for safely experimenting with new commands.
Find Files and Commands in Linux | CompTIA Linux+
This tutorial provides a clear, text-based walkthrough of basic find operations, mirroring what you saw in the video.
Read the section titled "Perform Basic File Searches Using find and Wildcards." Follow the steps to create the find_lab directory and the sample files. This will give you a safe environment to test the commands yourself.
Test your understanding!
Imagine your practice directory contains two files: Report.pdf and report.txt. You want to find only the PDF file, but you can't remember if the 'r' was capitalized.
Which of the following commands would find only Report.pdf and not report.txt?
find . -name "report.pdf"find . -iname "report.pdf"find . -name "*.pdf"find . -iname "*.pdf"
Show answer
The correct command is find . -iname "*.pdf".
- Option 1 would fail because
-nameis case-sensitive and would not matchReport.pdf. - Option 2 would work, but it's less flexible than using a wildcard.
- Option 3 would fail for the same case-sensitivity reason as option 1.
- Option 4 is the best choice because
-inamehandles the unknown capitalization, and*.pdfcorrectly targets only files with the PDF extension.
2. Advanced Criteria: Searching by Size, Time, and Permissions
The real power of find becomes apparent when you search using criteria beyond just the filename. This is what sets it apart from locate. You can find files based on their metadata, which is essential for system maintenance and troubleshooting.
Some of the most useful criteria are:
- Time:
-mtime(last modified time in days) and-mmin(in minutes). You can specify+Nfor "more than N days/minutes ago" and-Nfor "less than N days/minutes ago". - Size:
-size. You can use suffixes likek(kilobytes),M(megabytes), andG(gigabytes). Like with time, you can use+and-for "larger than" and "smaller than". - Permissions:
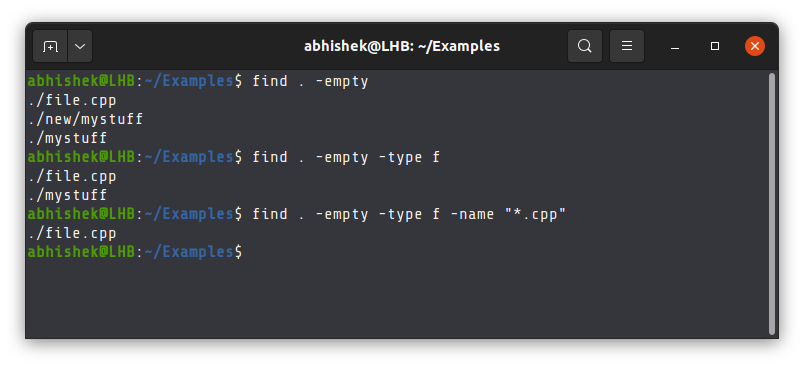
-permlets you search for files with a specific permission set (e.g.,-perm 755). - Empty:
-emptyfinds all files or directories that are empty.
Let's return to the video to see these powerful options in action.
Linux/Mac Terminal Tutorial: How To Use The find Command
Corey Schafer continues his tutorial by demonstrating how to search for files based on their modification time, size, and permissions.
Watch from 04:29 to 09:42. Observe how the + and - symbols are used with the time and size options to create ranges.
Combining criteria is a common practice. For instance, you could search for empty files of a certain type or files that are large and old.
For a quick reference, the article from GeeksForGeeks has a great table summarizing the most common options.
This article from GeeksForGeeks offers a wide range of examples and includes a helpful summary table.
Scroll down to the table under the heading "Options in find Command in Linux". This table is a useful quick reference for the options we've just discussed.
3. Acting on Results: The -exec Option
Finding files is useful, but find becomes a true automation tool when you use it to perform actions on the files it locates. The -exec option allows you to run any command on your search results.
The syntax looks like this:find . -name "*.tmp" -exec rm {} \;
Let's break this down:
-exec rm: This tellsfindto execute therm(remove) command.{}: This is a special placeholder that is replaced by the path of each file thatfinddiscovers.\;: This marks the end of the command to be executed. The backslash (\) is necessary to prevent the shell from interpreting the semicolon specially.
This -exec ... \; structure runs the command once for every single file found. An alternative is -exec ... +, which groups the found files together and runs the command only once with many arguments. This is more efficient.
The following videos will clarify these concepts.
Linux/Mac Terminal Tutorial: How To Use The find Command
First, let's see a practical example of -exec being used for a common system administration task: correcting file ownership and permissions.
Watch from 09:42 to 13:00. Notice how he first finds all directories (-type d) to set their permissions, and then finds all files (-type f) to set theirs. This is a classic, powerful use of find.
Now, let's get a crystal-clear explanation of the difference between terminating the -exec command with \; versus +.
Demystifying "find" and "find -exec" ...Lil' Linux Lesson!
This clip from Veronica Explains provides an excellent visual demonstration of the performance difference between executing a command for each file (\;) versus executing it once for all files (+).
Watch from 06:51 to 07:53. The visual delay when using \; makes the concept very easy to understand.
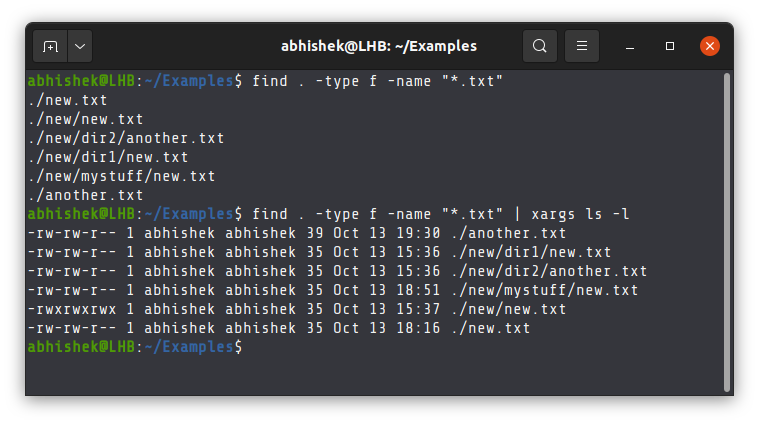
A crucial safety tip: Before you run a find command with a destructive action like rm, always do a "dry run" first. Run the command without the -exec part to see exactly which files will be affected. This can save you from making a huge mistake.
Conclusion
You now have a solid foundation for using find, one of the most powerful and essential commands in the Linux toolkit. You've moved beyond simple name-based searches and can now locate files with precision based on a wide range of attributes.
Key Takeaways:
findsearches the filesystem in real-time, so its results are always current.- The basic syntax is
find [path] [expression]. - You can search by numerous criteria, including name (
-name,-iname), type (-type), size (-size), modification time (-mtime,-mmin), and permissions (-perm). - The
-execprimary is used to perform actions on found files, with{}acting as a placeholder for the file path. -exec ... \;runs the command once per file, while-exec ... +is more efficient, running the command once for a batch of files.
In our previous lessons, we learned to find text within files (grep) and to find files by name (locate, find). In our next lesson, we will build on this by learning how to manipulate text data from files and command output using simple but powerful filter commands like cut and sort.