Hello! Welcome back.
In our first lesson, we identified the physical components of the Siemens S7-1200 and S7-1500 PLC systems. You learned to distinguish between the compact S7-1200 and the modular S7-1500, and to recognize the roles of the CPU, power supply, and I/O modules.
Now that you're familiar with the hardware, it's time to dive into the software that controls it. This lesson focuses on the central nervous system of Siemens automation: the TIA Portal. Your goal for this session is to navigate the TIA Portal interface and create a new project.
Think of the TIA Portal as an Integrated Development Environment (IDE) like PyCharm or VS Code, but for industrial automation. Just as you would use an IDE to write, manage, and debug Python code, you will use TIA Portal to configure hardware, write control logic, and commission entire automation systems. Mastering this environment is the first essential software skill for any controls engineer.
What is the TIA Portal?
The Totally Integrated Automation (TIA) Portal is the engineering software suite from Siemens that unifies all automation tasks into a single framework. Whether you are programming a PLC, designing an HMI (Human-Machine Interface) screen, or configuring a motor drive, you do it all within this one environment. This integration is powerful and is a key reason for its widespread use in industry.
To get a concise overview of what the TIA Portal is and why it's so central to modern automation, please read the following brief introduction.
Understanding the TIA Portal: Unified Automation for Siemens PLCs
This article, 'TIA Portal tutorial: installation, project creation and programming basics,' provides a great introduction to the TIA Portal's purpose.
Please read the section titled 'Understanding the TIA Portal: Unified Automation for Siemens PLCs'. It explains how TIA Portal combines multiple tools into a single interface.
The Two Main Views: Portal vs. Project
When you first launch TIA Portal, you'll be greeted by one of two primary views. Understanding their distinct purposes is key to navigating the software efficiently.
-
Portal View: This is the initial, task-oriented startup screen. It uses large icons to guide you through common first steps like creating a new project, opening an existing one, or migrating an old project. It's designed for quick access and to simplify the workflow for new users.
-
Project View: This is the detailed, "expert" view where the majority of engineering work takes place. It provides a comprehensive look at your entire project, with a hierarchical project tree, a main working area for programming and configuration, and various windows for properties and instructions.
The following video clearly explains and demonstrates the difference between these two views.
How to Create New Project in Siemens Tia Portal? - Configuration Tutorial
This video from Instrumentation Tools gives a clear side-by-side comparison of the Portal and Project views.
Watch from the beginning until 04:09. The presenter will toggle between the Portal View and the Project View, explaining the purpose and layout of each. This will help you get your bearings inside the software.
Creating Your First Project: A Step-by-Step Guide
Now, let's put this knowledge into practice. We will walk through the process of creating a blank project and adding a PLC to it. This is the starting point for every automation task you will undertake.
Step 1: Create a New Project
First, we'll create the project container itself. The process is straightforward and starts from the Portal View.
Siemens TIA Portal - how to create project and first program TUTORIAL
This tutorial from ControlByte Automation demonstrates the project creation process concisely.
Watch from 00:32 to 01:15. The video shows how to use the Portal View to create a new project, give it a name, and choose a save location. As you progress, it's good practice to use descriptive names for your projects (e.g., Conveyor_Control_V1) as this will help build a clean and professional portfolio.
After you click "Create," TIA Portal will prepare the project files and then take you to a screen where you can start configuring your hardware.
Step 2: Add a PLC to Your Project
An empty project isn't very useful. Our next step is to add a controller. We'll add one of the S7-1200 CPUs you learned about in the previous lesson.
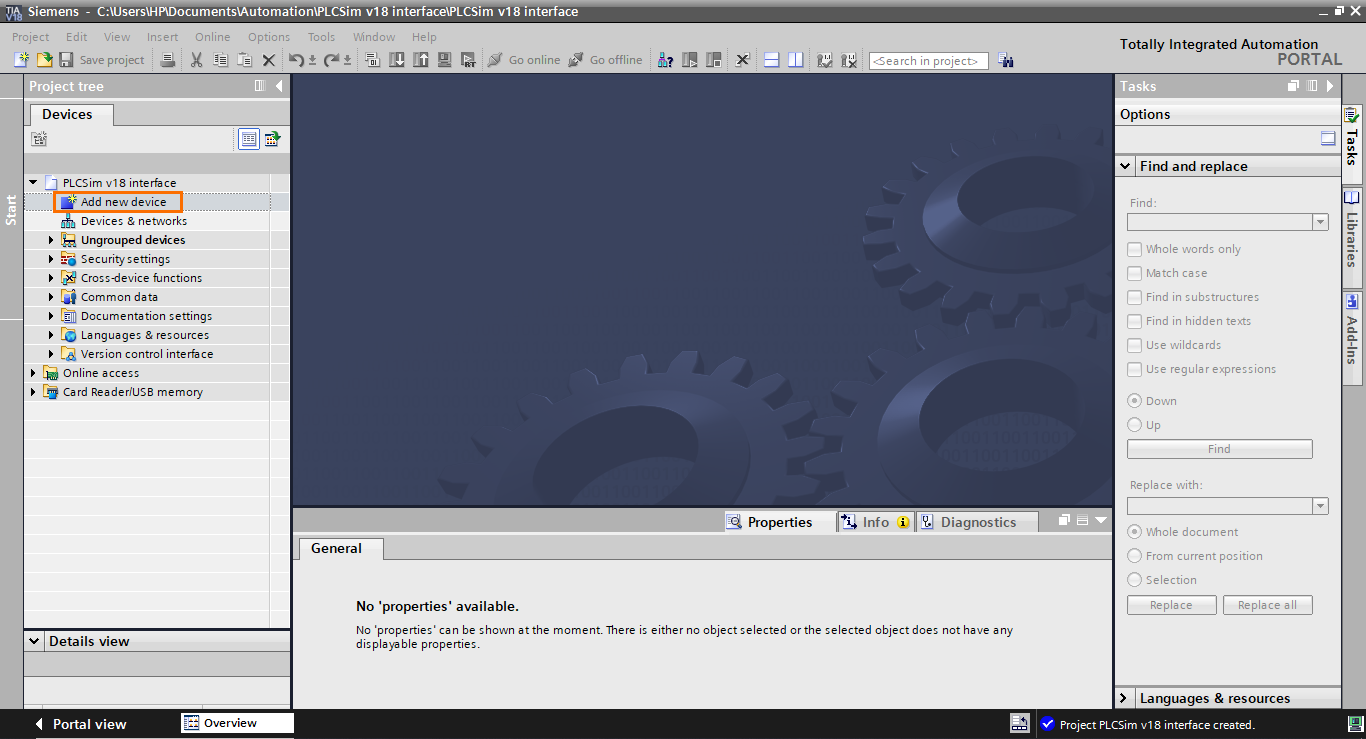
The following video shows how to select a CPU and add it to the project. It also contains a crucial tip about firmware versions.
How to Create New Project in Siemens Tia Portal? - Configuration Tutorial
This video continues from the project creation step and shows how to add and configure a new PLC. Pay close attention to the note about firmware.
Watch from 05:03 to 07:20. The presenter navigates the hardware catalog to add an S7-1200 CPU. Critically, at around 06:30, he mentions that for simulation (which we will use extensively), the CPU firmware version must be 4.0 or higher. This is a vital piece of practical information that can save you a lot of trouble later on.
Exploring the Project View Workspace
Once you've added the CPU, TIA Portal will automatically switch to the Project View and open the Device Configuration editor. This is where you'll spend a lot of your time. Let's break down the main areas of the screen.

Here's a brief overview of the key components of the Project View:
- Project Tree (Left): This is your main navigation panel. It shows a hierarchical view of everything in your project: controllers, I/O modules, program blocks (where your code lives), technology objects, and more.
- Working Area (Center): This is the main canvas where you interact with your project. It will display the hardware configuration, the ladder logic editor, HMI screens, or whatever you have opened from the Project Tree.
- Inspector Window (Bottom): This context-sensitive window shows the Properties, Info, and Diagnostics for whatever item you have selected. For example, if you click on the CPU, it will show you its IP address, I/O addresses, and other settings.
- Catalog/Task Cards (Right): This area provides access to your tools. You'll find the Hardware Catalog here to add more modules, and the Instructions pane to find timers, counters, and other logic elements for your program.
To reinforce your understanding of this layout, please read the following section, which provides a textual breakdown of these components.
TIA Portal Programming Tutorial 2025 | Complete Guide
This guide provides a clear, written description of the main interface components in the Project View, which will help solidify what you've seen in the videos.
Please read the section titled 'Programming Environment Navigation', specifically the subsections for 'Main Interface Components' (Portal View, Project View, Programming Editor). This will serve as a good reference as you become more familiar with the software.
Conclusion
In this lesson, you've taken the first crucial step into the Siemens software ecosystem. You now understand what the TIA Portal is for and how to perform the foundational tasks of creating a project and adding a device.
Key Takeaways:
- TIA Portal is an integrated engineering environment for all Siemens automation hardware.
- The Portal View is a task-based starting point, while the Project View is the detailed environment for all engineering work.
- A new project is created by giving it a name and location, then adding devices like PLCs from the hardware catalog.
- When adding a CPU for simulation purposes, it's crucial to select a model with firmware version 4.0 or higher.
- The Project View is organized into key areas: the Project Tree, the Working Area, the Inspector Window, and the Catalog/Instructions.
Preview of the Next Lesson:
Now that you have a project with a PLC in it, the next step is to configure the hardware in detail. In the next lesson, we will focus on the device configuration editor. You will learn how to configure hardware and assign I/O addresses in TIA Portal, which involves setting up the properties of your CPU and defining the memory addresses for the inputs and outputs that will connect to real-world sensors and actuators.