Hello! Welcome back to our module on designing people-centric systems.
In our last lesson, we laid the strategic groundwork by designing the complete database architecture for a scalable, centralized onboarding hub. We established our single sources of truth: the Employees, Departments, and Onboarding Tasks databases, all connected through relations.
Today, we'll build the "frontend" for that system. Our learning outcome is to create dynamic dashboard templates that surface personalized onboarding tasks for new team members. We will move from the abstract architectural diagram to a tangible, user-friendly interface that each new hire will use to navigate their first weeks at the company. This lesson focuses on the art of presenting the right information to the right person at the right time, a core principle of effective process design.
1. The Core Principle: Separating Backend from Frontend
A truly scalable Notion system, much like any well-designed software, separates its data layer (the backend) from its presentation layer (the frontend).
- Backend: This is your
Vaultof master databases, which we designed in the last lesson (Employees,Onboarding Tasks, etc.). This is where the data lives. - Frontend: These are the dashboards and pages where users interact with the data. These pages pull information from the backend and present it in a digestible, context-specific way.
For our onboarding system, the new hire's personal dashboard is the frontend. We almost never want a new employee to interact directly with the master Onboarding Tasks database. Instead, they should see a curated view of only their tasks on their personal page.
This video introduces this crucial architectural separation.
6 Tips To Master Notion in 2026
The video '6 Tips To Master Notion in 2026' by Matthias Frank effectively explains the concept of separating your workspace into a backend and a frontend.
Watch from 02:42 to 04:36. Pay close attention to the distinction between working on the database itself versus pulling data into dashboards using 'linked database views'. This is the foundational technique for our personalized dashboard.
2. The Engine of Personalization: Dynamic Filters
To create a dashboard that shows personalized tasks, we need a way to filter a master database (Onboarding Tasks) so it only displays entries relevant to a specific user. There are two primary architectural patterns for this.
Pattern A: The "Me" Filter for Shared Dashboards
The simplest way to personalize a view is with the dynamic "Me" filter. This filter automatically shows content from a Person property that is assigned to the person currently viewing the page.
The following article from the "Bulletproof Workspace" methodology—a classic resource on scalable Notion architecture—describes this approach for creating personal homepages.
The article 'The Bulletproof Workspace 2.0' details how to create personalized dashboards for individual team members.
Read the short section titled 'Personalized Dashboards.' Notice how it recommends using the 'Me' option in filters for Person properties to display an individual's assigned tasks and projects.
This is excellent for creating a general "My Tasks" page that everyone in the company can use. However, for an onboarding template that is part of the Employees database, we need a more robust method. Why? Because the page isn't just for the new hire; a hiring manager or HR partner might also view it. We need the dashboard to consistently show the new hire's tasks, regardless of who is looking at the page.
Pattern B: The Self-Referencing Filter for Templates
This brings us to a more powerful pattern: the self-referencing filter. This is the key to creating truly dynamic templates.
Here's the architecture:
- You create a template within a database (e.g., a "New Hire Template" in our
Employeesdatabase). - Inside this template, you add a Linked View of the
Onboarding Tasksdatabase. - You then create a filter on that linked view where the
Employeerelation property (in theOnboarding Tasksdatabase) contains the name of the template itself.
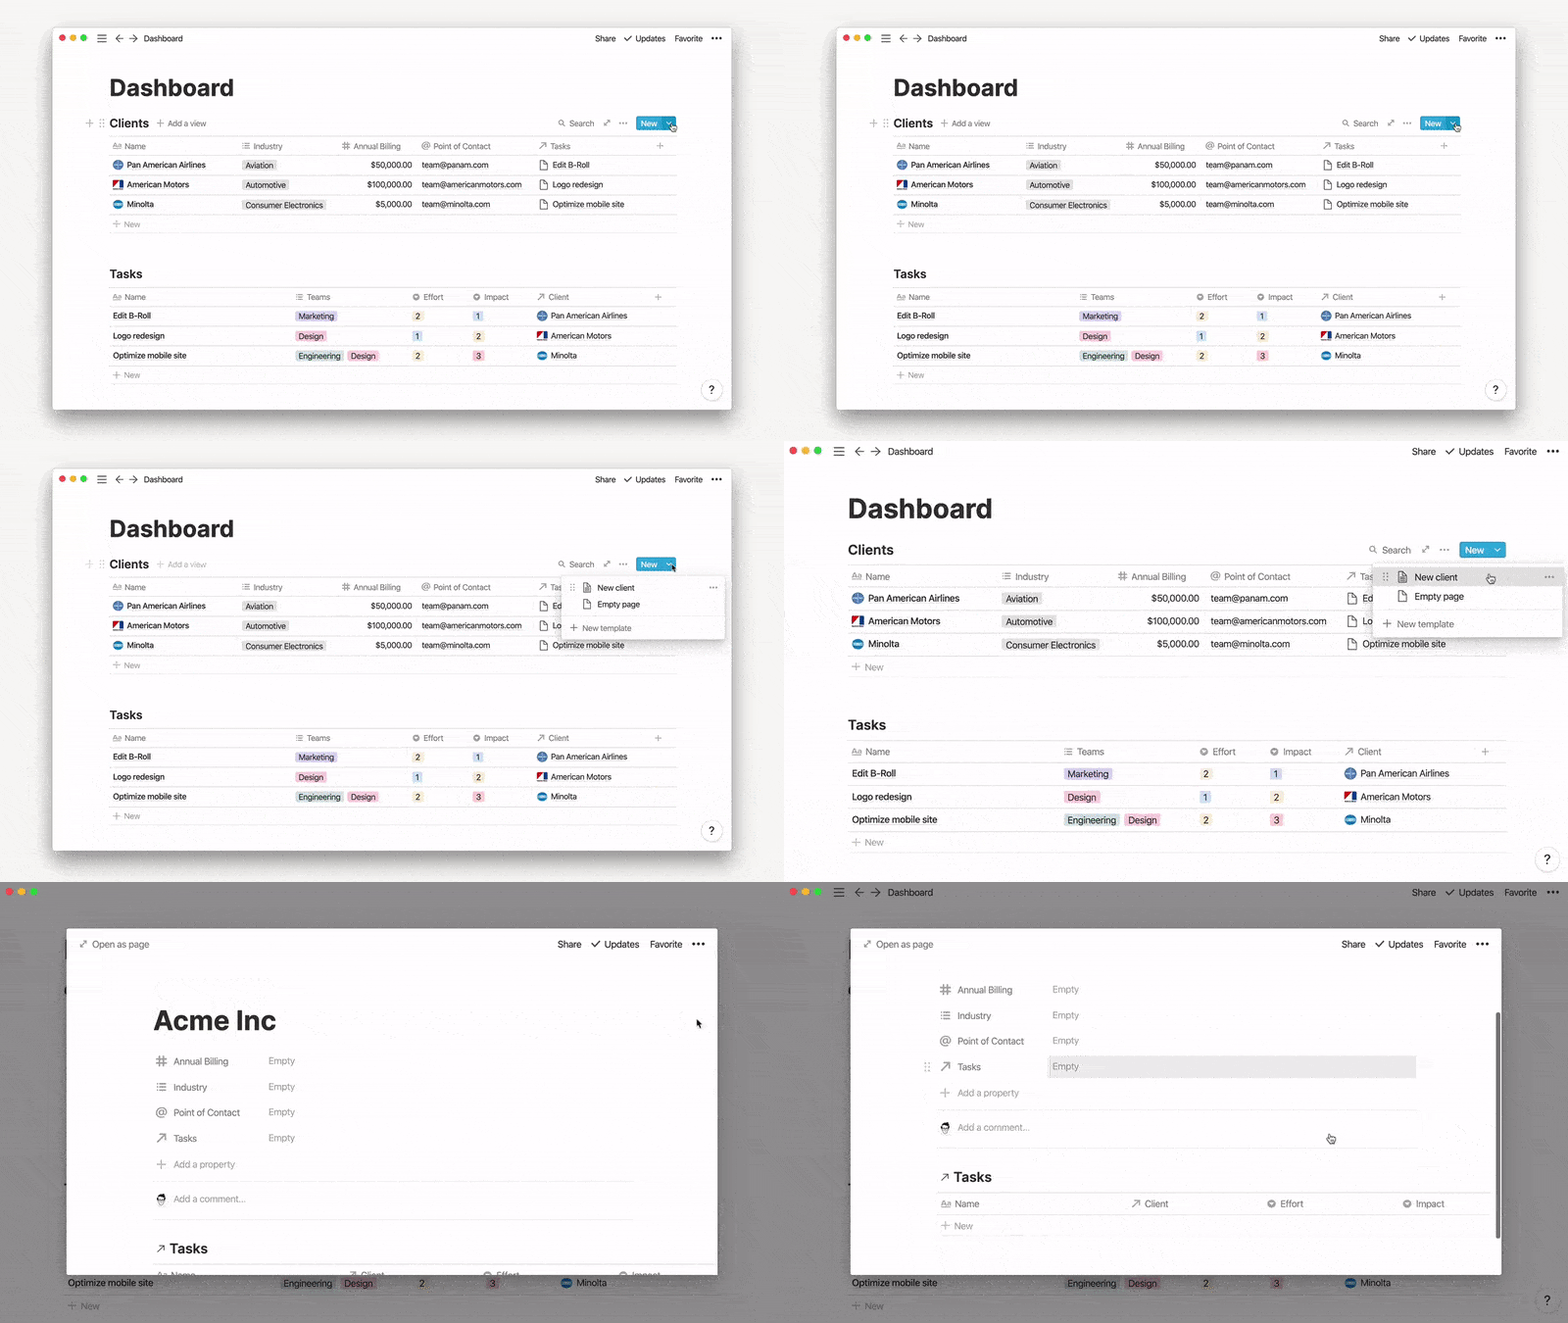
When you create a new page from this template for a new hire, say "Jane Doe," Notion automatically replaces the template reference in the filter with "Jane Doe." The linked view will now be permanently filtered to show only tasks related to Jane.
This GIF provides a perfect visual demonstration of this concept in action.
Test your understanding!
You are designing the "New Hire Template" in your Employees database. You want to include a view of a Meetings database to show the new hire's onboarding-related meetings. The Meetings database has a Person property called "Attendees." What filter would you set up on the linked view of the Meetings database inside the template to ensure it always shows the correct meetings for the new hire?
Show answer
You would add a filter on the linked Meetings database where the "Attendees" property contains the "New Hire Template." When a page is created for a new hire, this filter will dynamically update to filter for that specific person.
3. Designing the Onboarding Dashboard Content
Now that we have the dynamic engine, we can design the layout of the dashboard itself. The goal is to provide a clear, welcoming, and actionable page for the new hire.
A good dashboard template might include:
- A welcome message and a photo.
- Key contacts:
Hiring Manager,Onboarding Buddy(pulled from properties on the page). - A linked view of
Onboarding Tasks, filtered using the self-referencing method described above. You can have multiple views of this task list (e.g., grouped by "Phase," or a Calendar view sorted by "Due Date"). - Links to essential company resources (like the company wiki or benefits portal).
- Team-specific information embedded directly in the page.
The following video from Notion, while also covering database creation, provides excellent examples of the types of content you can build into an onboarding template.
How to run onboarding in Notion
The official 'How to run onboarding in Notion' video showcases how to populate templates with rich, dynamic content like checklists and team-specific databases.
Watch the section from 05:43 to 08:54. Focus on the content being added to the templates: checklists, embedded maps, and even nested databases for team-specific schedules. This demonstrates how you can go beyond a simple task list to create a rich onboarding experience.
Here's an example of a general company onboarding homepage. A new hire would land here and then click a link to their personal dashboard, which we are designing now.

4. Governance: Protecting Your Dashboard
A dynamic dashboard is powerful, but with many users, there's a risk someone might accidentally change a filter or delete a view, breaking the experience for everyone. This is a critical consideration for enterprise-level systems.
The solution is a clever use of Notion's permissions. The architectural pattern is:
- Share the main dashboard page with the new hire with
Can vieworCan commentaccess. This locks the page structure, preventing them from moving or deleting the linked database views. - Then, for each linked database view on the page, go into its specific sharing settings and grant the user
Can edit contentaccess.
This combination allows the user to interact with the data (e.g., check off tasks, change statuses) without being able to alter the structure of the dashboard.
This final video segment walks through this exact process, which is a non-obvious but essential technique for building scalable, "bulletproof" dashboards.
6 Tips To Master Notion in 2026
Returning to '6 Tips To Master Notion in 2026', this segment details the advanced permission-setting strategy required to protect shared dashboards.
Watch from 14:14 to 17:35. This is a very strategic walkthrough. Focus on the problem with simply 'locking' a page and the solution of setting page permissions to 'view' while elevating database permissions to 'can edit content'. This is a key takeaway for building robust systems for clients.
Conclusion
In this lesson, you've learned the architectural patterns for creating truly dynamic and personalized dashboards in Notion. You've moved beyond static pages to design an intelligent system that adapts to its user.
Key Takeaways:
- Frontend/Backend Separation: Scalable systems separate master databases (backend) from user-facing dashboards (frontend) using linked views.
- Self-Referencing Filters: This is the core mechanism for creating personalized content within a database template, ensuring a view is always filtered for the page it lives on.
- Dashboard as a Curated Experience: A good dashboard doesn't just dump data; it organizes it logically using different views, callouts, and clear information hierarchy to guide the user.
- Strategic Permissions: Use a combination of page-level and database-level permissions (
Can view+Can edit content) to create interactive dashboards that users cannot accidentally break.
In our next lesson, we will address the next logical step in a new hire's journey. Once they know what they need to do from their dashboard, they'll need to know how to do it. We will design a knowledge management system that facilitates the capture, organization, and retrieval of company information, serving as the backbone for both onboarding and ongoing work.