Hello! Welcome back to our course on TanStack Query.
In the last lesson, we learned how to change data on the server using the useMutation hook. We successfully submitted a new post, but we were left with a significant problem: our application's UI didn't automatically reflect this change. The new post was on the server, but our list of posts was stale. We'd have to manually refresh the page to see it.
Today, we will solve this exact problem. You will learn how to synchronize your client state with your server state after a mutation. This is one of the most powerful features of TanStack Query, as it automates the process of keeping your UI up-to-date.
Our learning outcome is to invalidate and refetch queries after a successful mutation to synchronize client and server state. We'll cover the primary method for this—query invalidation—and also look at a more direct way to update the cache.
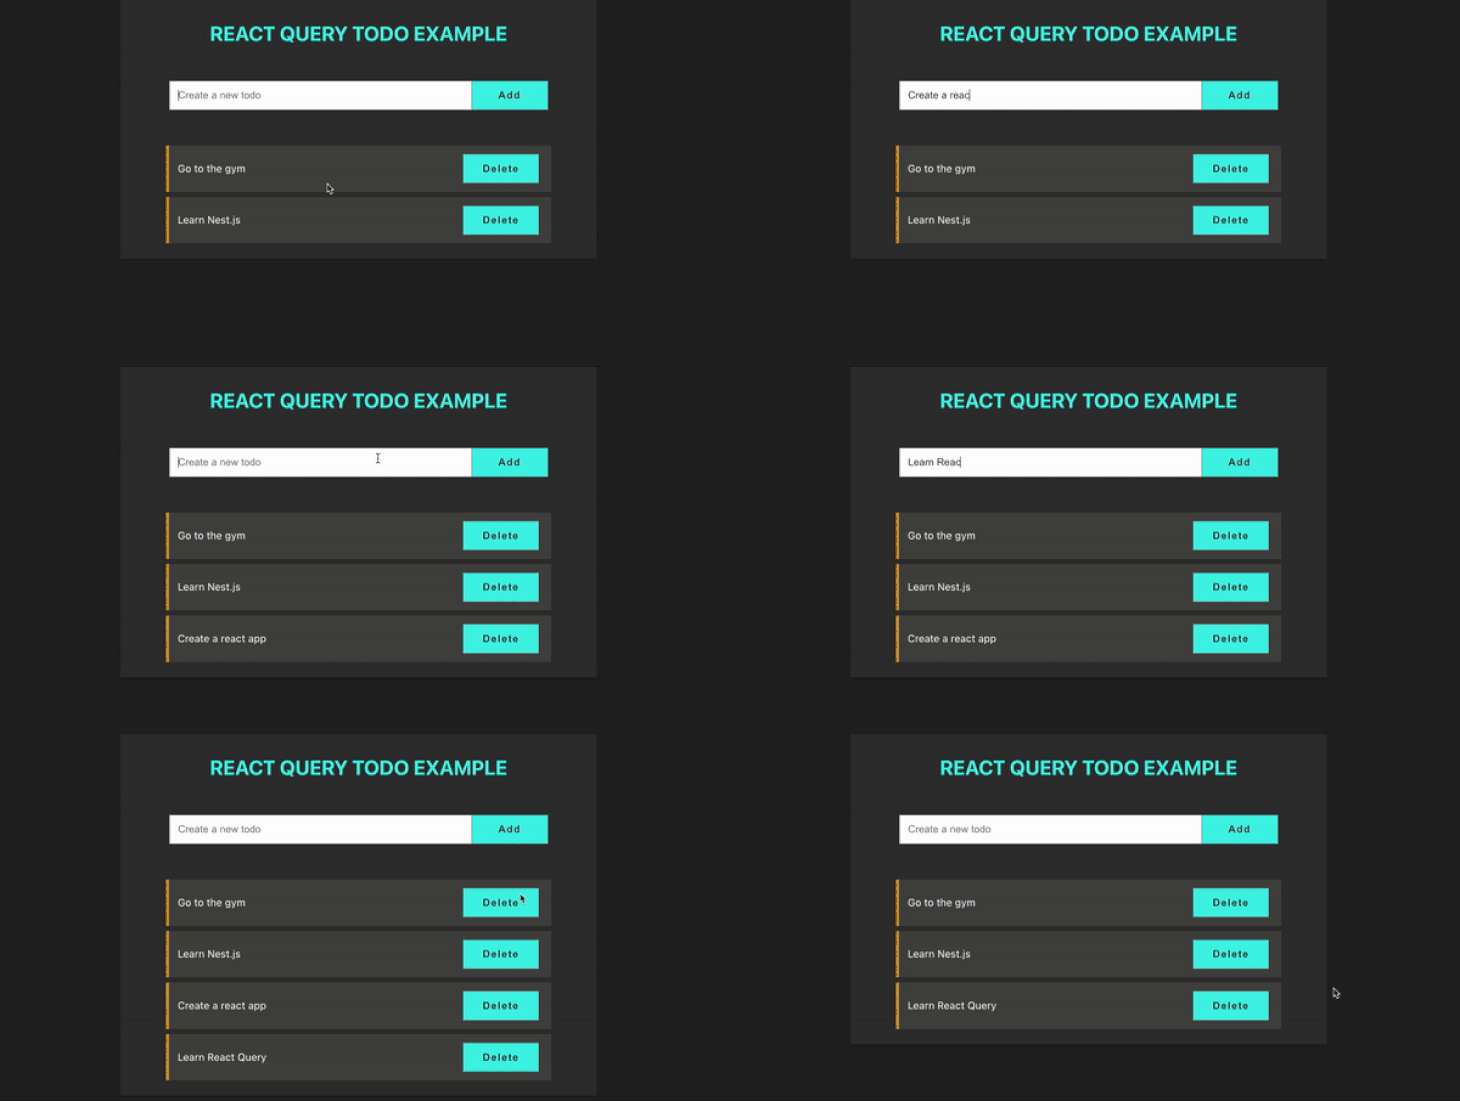
Look at this example of a to-do list application. Notice how adding or deleting an item instantly updates the list. This is the seamless user experience we're aiming to build.
1. The Core Strategy: Query Invalidation
The most common and often simplest way to update your UI after a mutation is through query invalidation.
The concept is straightforward: after you successfully change data on the server (e.g., create a new post), you tell TanStack Query that the cached data for a specific query (e.g., the query that fetches all posts) is now "invalid" or "stale." TanStack Query will then automatically refetch that query if it's currently being used on screen, ensuring your UI displays the latest data from the server.
To do this, we need to access the QueryClient instance. We can get it anywhere in our component tree using the useQueryClient hook. The client has an invalidateQueries method that we can call.
Let's see how this is done.
Mastering Mutations in React Query - TkDodo's blog
The article "Mastering Mutations in React Query" by TkDodo provides an excellent, clear example of using invalidateQueries within the onSuccess callback of a mutation.
Please read the subsection titled "Invalidation". Focus on the code example for useAddComment. Notice how useQueryClient is called, and how queryClient.invalidateQueries is used inside onSuccess with a specific queryKey.
Let's break down the key parts of the code from the article:
-
Get the Query Client:
const queryClient = useQueryClient();This hook gives us access to the
QueryClientinstance we provided at the top level of our app. -
Call
invalidateQuerieson Success:const useAddComment = (id) => { return useMutation({ mutationFn: (newComment) => axios.post(`/posts/${id}/comments`, newComment), onSuccess: () => { // Invalidate the query for comments on this post queryClient.invalidateQueries({ queryKey: ['posts', id, 'comments'] }); }, }); };- The
onSuccesscallback is the perfect place for this logic because we only want to refetch the comments list after we know the new comment was successfully saved to the server. - We pass an object to
invalidateQuerieswith aqueryKey. TanStack Query will then find all queries whose keys match this one and mark them as stale. - As the article mentions, this uses "fuzzy matching." Passing
queryKey: ['posts']would invalidate every query whose key starts with'posts'. This is powerful for invalidating multiple related queries at once (e.g., a list of posts and the detail view for a specific post).
- The
2. A Crucial Detail: Awaiting Invalidation
There's a subtle but important behavior to be aware of. By default, when you call invalidateQueries, the mutation will transition to its isSuccess state immediately, even while the refetch is still in progress. This can lead to a flicker in the UI, where a "Loading..." spinner for the mutation disappears, only for a "Loading..." state for the query to appear.
To create a smoother user experience, you can make the mutation wait for the invalidation and subsequent refetch to complete before it's considered successful.
Mastering Mutations in React Query - TkDodo's blog
TkDodo's blog points out this common gotcha and shows how to resolve it with a simple return statement.
Read the subsection "awaited Promises". The key takeaway is the difference between calling queryClient.invalidateQueries and return queryClient.invalidateQueries inside the callback.
The invalidateQueries method returns a Promise that resolves when the refetching is complete. By returning this promise from the onSuccess callback, you tell TanStack Query to keep the mutation in its isPending state until the promise resolves.
Here is the corrected implementation:
// ...
onSuccess: () => {
  // ✅ The mutation will stay pending until the refetch is done.
  return queryClient.invalidateQueries({ queryKey: ['posts', id, 'comments'] });
}
// ...
This ensures that any UI related to the mutation's loading state (like a disabled button) remains active until the new data is fully loaded and displayed.
3. Alternative: Direct Cache Updates with setQueryData
Invalidation is great, but it always requires an extra network request to get the updated data. What if your API already returns the updated data in the response to your mutation? For example, a PATCH request to update a post might return the full, updated post object.
In this scenario, you can update the cache directly using queryClient.setQueryData, saving a network round-trip.
Mastering Mutations in React Query - TkDodo's blog
Let's look at TkDodo's explanation for this alternative approach.
Read the subsection "Direct updates". Note how the onSuccess callback now receives the newPost data from the mutation and uses queryClient.setQueryData to place it directly into the cache.
The setQueryData method takes two arguments: the queryKey of the cache entry you want to update, and the new data.
//...
onSuccess: (newPost) => {
  // 'newPost' is the data returned from the mutationFn
  // Update the cache for the specific post query directly
  queryClient.setQueryData(['posts', id], newPost);
},
//...
When to choose which?
- Invalidation (
invalidateQueries): This is the "safer" and more robust approach. It guarantees your data is in sync with the server. It's almost always the right choice when a mutation could affect a list of items (e.g., adding a new item, changing an item's title which could affect sorting order). - Direct Update (
setQueryData): This is a great optimization for when you are updating a single item and the API returns the updated data. It provides a faster UI update by avoiding a refetch.
4. A Glimpse into Optimistic Updates
Taking the idea of direct cache updates one step further leads to optimistic updates. This is an advanced pattern that makes your application feel incredibly fast.
Here's the idea:
- When a user triggers a mutation, you immediately update the UI as if the server request was already successful.
- You then send the actual request to the server in the background.
- If the request succeeds, you're done. The UI already shows the correct state.
- If the request fails, you "roll back" the UI to its original state and show an error message.
This pattern involves a few more useMutation callbacks:
onMutate: Runs before themutationFn. This is where you optimistically update the cache.onError: Runs if the mutation fails. This is where you roll back the changes using a snapshot of the old data.onSettled: Runs after the mutation succeeds or fails. This is a good place toinvalidateQueriesto ensure the final state is perfectly in sync with the server, regardless of the outcome.
The Complete Guide to React Query's useMutation
You don't need to memorize this code right now, but it's valuable to see the structure of an optimistic update. This guide provides a very clear, commented example.
Scan through the code block under the "Optimistic Updates" section. Pay attention to the comments explaining each step: canceling queries, snapshotting the previous value, optimistically updating, and rolling back on error.
Optimistic updates add complexity, as you have to manage the rollback logic yourself. However, for many applications, the improvement in perceived performance is well worth the effort.
Conclusion
You've now mastered the final, critical piece of the data-fetching puzzle with TanStack Query. By synchronizing your client and server state, you can create fluid, responsive applications that feel modern and reliable.
Key Takeaways:
- After a mutation, the UI must be synchronized with the server state.
- The primary method is query invalidation using
queryClient.invalidateQueries()in theonSuccesscallback. This marks data as stale and triggers a refetch. - For a smoother UX,
returnthe promise frominvalidateQueriesto keep the mutation in a pending state until the refetch is complete. - An alternative is to perform a direct cache update with
queryClient.setQueryData()if the mutation response contains the new data. - Optimistic updates are an advanced pattern that provides a snappier UI by updating the cache before the server responds.
Next Lesson Preview:
We have now covered the core functionalities of TanStack Query for both reading and writing server state. In our final lesson, we will take a brief look at another powerful tool in the TanStack ecosystem: TanStack Router. We will compare it to other routing libraries like React Router and highlight what makes it unique, especially how it integrates seamlessly with data-fetching patterns you've just learned.