Welcome to our next lesson. In our last session, we mapped out the "learning arc" for your entire 5-session workshop, establishing the macro-rhythm of balancing theoretical "low action" with practical "high action" periods. This gave you a bird's-eye view of the complete student journey.
Now, we will zoom back into the micro-level of a single 2-hour session. Having a good structure and a good balance of activities is essential, but the real art of facilitation lies in the moments between those activities. This lesson is about mastering those moments. Your goal is to learn how to plan smooth transitions between different activity types, ensuring your session flows like a well-edited film sequence rather than a series of disjointed clips.
The Art of the Seamless Cut: What is a Transition?
Think of a great DJ set. The most skilled DJs don't just play good songs; they blend them together seamlessly, creating a continuous flow of energy that carries the audience on a journey. An abrupt, silent gap between tracks can kill the mood instantly. Workshop facilitation is remarkably similar. The "songs" are your activities—a lecture, a demonstration, a group exercise, a debrief. The transitions are the masterful crossfades that connect them.
A transition isn't just filler or dead time; it's a purposeful bridge designed to put your students in the right frame of mind for what's coming next.
How to improve the learning experience with workshop transitions | SessionLab
This article from SessionLab provides an excellent introduction to the concept of workshop transitions. It explains their purpose and gives practical advice on how to design them effectively.
First, read the introduction and the section What are workshop transitions? to grasp the core definition and the DJ analogy. Then, jump to the section How to use workshop transitions and pay close attention to the principles of starting with purpose and pairing transitions with your content.
As the article notes, the key is intention. A transition to prepare for a deep listening exercise is different from one leading into a high-energy, hands-on technical task. Your transitions must serve the learning goal of the next activity.
Building Flow into Your Session Structure: The BOPPPS Model
In a previous lesson, we outlined a simple four-part session structure: Introduction, Instruction, Practice, and Debrief. We can now enhance this with a more detailed framework that has transitions built into its very DNA: the BOPPPS model. It breaks a session into six parts, each flowing logically from the last.
[PDF] Lesson 6.1 – Developing a Lesson
This guide provides a useful framework for structuring a lesson. While some of the context is for a different field, the principles are universal.
Focus on the slide titled The BOPPPS Model, which introduces the six components. Then, read the detailed descriptions of each component on the following slides, from Bridge-In to Summary.
Here is how the BOPPPS model maps to our existing structure and creates natural transitions:
- Bridge-in: Your session's opening hook. This is a classic transition that grabs attention and connects the topic to the students' world. For your workshop, this could be a striking film clip with amazing sound design.
- Objectives: Clearly stating what they will learn. This transitions them from a state of curiosity (from the bridge-in) to a state of focused purpose.
- Pre-assessment: Gauging what they already know. This transitions from you telling them the goals to them actively thinking about the topic. It could be a simple question like, "What do you think is the most important job of a location sound recordist?"
- Participatory Learning: The main event—your instruction and their hands-on practice. This is where the most critical transitions occur.
- Post-assessment: Checking for understanding. This transitions them from doing to reflecting on what they learned, setting them up for the final summary.
- Summary: Reinforcing key takeaways. This final transition provides closure and connects the session to what comes next.
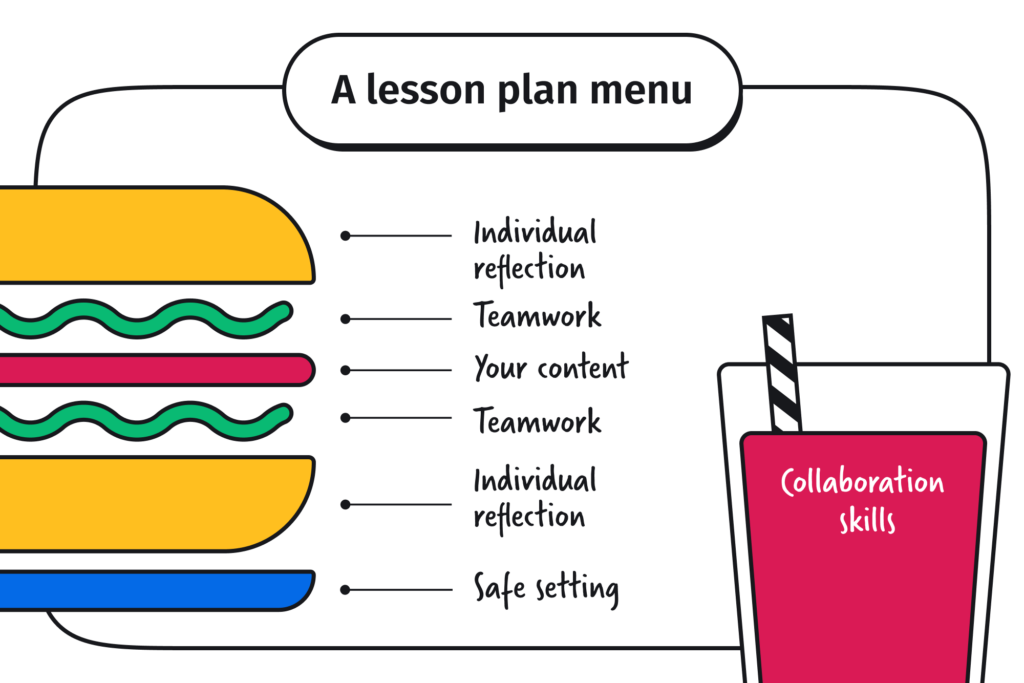
Using a structure like BOPPPS helps you think about session flow not as an afterthought, but as a fundamental part of the design. The variety of activities suggested by the "Lesson plan menu" image below all need to be connected by these thoughtful transitions.
The Most Critical Transition: From Instruction to Practice
The moment you finish explaining or demonstrating a technique and say, "Okay, now you try," is where many workshops break down. Students can feel confused, momentum is lost, and valuable time is wasted. Nailing this transition is paramount in a hands-on workshop like yours. Success here relies on extreme clarity and breaking things down into small, sequential steps.
Giving Crystal-Clear Instructions
An expert facilitator from AJ&Smart provides a simple but powerful formula for giving instructions that ensure a smooth transition into any exercise.
Top 12 Facilitation Techniques And Tactics From An Expert Facilitator
This video offers a wealth of practical facilitation tips. We'll focus on the section about giving instructions, as it's the bedrock of a smooth transition to a hands-on task.
Watch the section from the formula for clear instructions. The speaker outlines the "What, Why, How" formula and explains why giving participants fewer options can actually make them feel more supported.
The What, Why, How formula is your new best friend:
- What: Name the exercise. "Next, we're going to do a boom handling drill."
- Why: Explain the purpose. "We're doing this so you can develop a feel for the weight and balance of the pole and practice moving without creating handling noise."
- How: Give explicit, step-by-step instructions. "First, pick up the pole and find its balance point. Second, practice extending and retracting it slowly. Third, try walking a simple path while keeping the 'mic' end perfectly still."
This structure eliminates ambiguity and ensures everyone understands the task and its purpose before they begin.
One Bite at a Time: The Power of Chunking
For complex technical tasks, even the "How" can be overwhelming if delivered all at once. The key is to break it down and give one instruction at a time. This philosophy is sometimes summarized as "Slow is smooth, and smooth is fast."
Classroom Transitions: Classroom Management Strategies
This video, while aimed at K-12 teachers, contains universally brilliant advice for managing transitions. The core principles are directly applicable to your workshop with adults.
First, watch the opening segment on creating a rhythm. Next, focus on the techniques for getting and keeping attention. The idea of telling students how long you need their focus is very powerful. Then, watch the crucial section on giving one direction at a time. Pay attention to the "don't give them the whole hamburger" analogy. Finally, listen to the summary starting from building rhythms to see how it all comes together.
Imagine teaching students to set up a field recorder for the first time. Instead of listing ten steps and then saying "Go," you would guide them through it one step at a time:
- "Everyone, pick up the recorder. You have 5 seconds." (Wait for compliance).
- "Now, find the battery compartment on the back. You have 10 seconds." (Wait).
- "Insert the batteries, making sure the polarity is correct." (Circulate and check).
- "Next, take one XLR cable..."
This chunking method keeps the entire group in sync, prevents anyone from getting lost, and makes a complex task feel manageable. It transforms a potentially chaotic transition into a smooth, controlled procedure.
Your Turn: Scripting a Transition
Let's apply these concepts to a specific moment in your workshop.
Exercise (15 minutes):
Imagine you are in Session 3: Production 1 (Boom). You've just finished a 10-minute demonstration of proper boom handling technique. Now, you need to transition 12 students into a 20-minute hands-on practice session where they will work in pairs.
Write a script for yourself outlining exactly how you will manage this transition. Your script should cover:
- Getting Attention: How will you signal the end of your demo and bring everyone's focus to you? (e.g., using a countdown).
- Giving Instructions (What, Why, How): What exact words will you use to explain the upcoming practice exercise?
- Chunking the Setup: How will you break down the process of getting into pairs, getting equipment, and finding a space? List the small, sequential commands you will give.
- Checking for Understanding: What quick question will you ask to confirm they're ready before they begin?
This exercise will help you internalize these techniques and be prepared to lead your students smoothly from listening to doing.
Conclusion
You now see that the flow of a workshop is not accidental; it is designed. By treating transitions as essential, purposeful parts of your session, you create a more engaging, efficient, and less confusing learning environment.
Key Takeaways:
- Transitions are the purposeful bridges between your workshop activities.
- Frameworks like BOPPPS help you build a logical flow into your session plan from the start.
- The transition from instruction to practice is the most critical. Master it with the "What, Why, How" formula.
- Break down complex instructions into small, sequential chunks. Remember: "Slow is smooth, and smooth is fast."
- Managing attention, instructions, and materials are all key components of a successful transition.
With these pedagogical frameworks for both the overall workshop arc and the in-session flow now in place, you are ready to start building the actual content. In our next lesson, we will begin Module 2 by selecting and sequencing the core concepts for your first session: "Foundations of Film Sound."