Hello! Welcome back to our journey building a life simulation game.
In the last lesson, we successfully established a complete data pipeline to load a character from a JSON file using our Rust backend and spawn them as a visible, 3D entity in our Unity scene. This was a massive step, bridging the gap between abstract data and a tangible presence in our game world.
Now that we have a character, we need a proper way to view and follow them. This lesson is dedicated to achieving exactly that. Our goal is to implement a third-person camera controller that follows and orbits the player-controlled character. We'll move from a static, fixed camera to a dynamic viewpoint that gives the player a personal and interactive window into the game.
To do this, we won't be writing complex camera math from scratch. Instead, we'll leverage Cinemachine, Unity's powerful and industry-standard package for creating intelligent, dynamic cameras. This is a perfect example of using professional tools to accelerate development, a key skill in modern game creation.
Let's get started.
1. Preparing the Scene and Character
Before we create the camera, we need to ensure our scene is ready.
Install Cinemachine
First, if you don't already have it, you'll need to install the Cinemachine package.
- In Unity, go to Window > Package Manager.
- In the Package Manager window, make sure Packages: Unity Registry is selected at the top.
- Use the search bar to find "Cinemachine".
- Select it from the list and click the Install button.
Prepare the Character Prefab
A good third-person camera doesn't just follow the character's feet; it typically looks at a point around their chest or head for better framing. We'll add a dedicated, empty GameObject to our character prefab to serve as this "look at" target.
- Find the character prefab you used in the last lesson (the one referenced by your
CharacterPrefabDB). - Open the prefab for editing.
- In the Hierarchy view of the prefab, right-click on the root object and select Create Empty.
- Name this new empty GameObject
CameraLookAtPoint. - Position this object. A good starting point is to place it roughly at the character's chest or neck height. You can adjust its
Yposition in the Inspector to do this. For example, aYvalue of1.5might be appropriate.
This simple addition provides a stable and clean target for our camera, independent of any animations that might move the character's head around.
2. Creating the Free Look Camera
With Cinemachine installed, we can create our camera. We'll use a Free Look Camera, which is specifically designed for the orbit-and-follow behavior we want.
This video from Dave / GameDevelopment provides a quick and effective walkthrough of the entire setup process, which we will follow.
THIRD PERSON MOVEMENT in 11 MINUTES - Unity Tutorial
This tutorial provides an excellent, concise guide to setting up a third-person camera using Cinemachine's Free Look component. We'll use it as a primary guide for the next few steps.
Watch from 00:52 to 02:57. This section covers creating the Free Look camera, assigning targets, and configuring the basic orbit settings.
Following the video's guidance, perform these steps:
- In your main scene's Hierarchy, click on Cinemachine > Create FreeLook Camera. This adds a
CM FreeLook1object to your scene. This is a "virtual camera" that will drive yourMain Camera. - Select the
CM FreeLook1object. - In the Inspector, you'll see the
CinemachineFreeLookcomponent. It has two crucial fields:FollowandLook At.- Drag your spawned character's root
GameObjectfrom the Hierarchy into the Follow slot. - Drag the
CameraLookAtPointchild object you just created on your character into the Look At slot.
- Drag your spawned character's root
- Press Play. You should immediately see that the camera now focuses on your character. However, the movement will be very fast and possibly inverted. Let's fix that.
3. Configuring the Camera's Feel
The Free Look camera works by blending between three circular paths, or "rigs," around the target. By adjusting these rigs, you can define the camera's distance and height at different points in its vertical orbit.
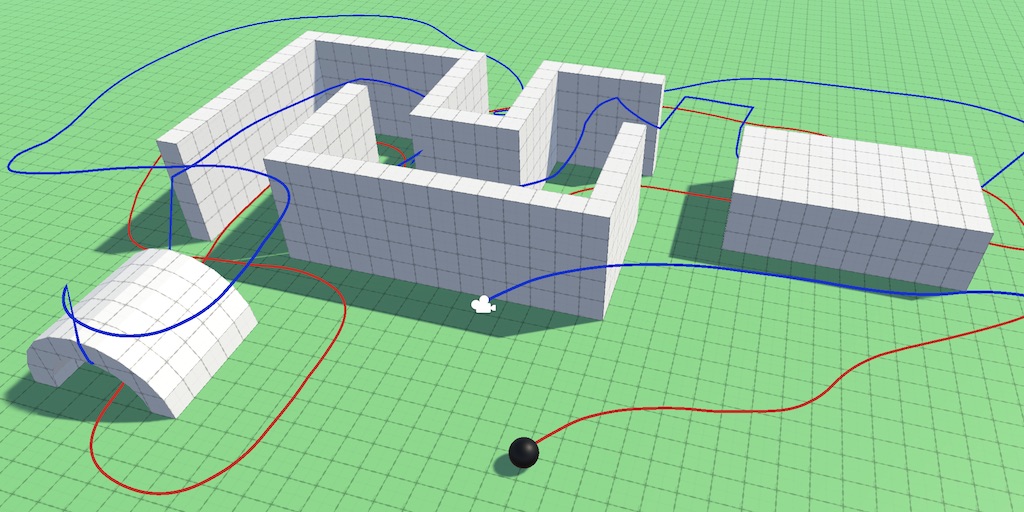
To understand how to tune these settings, the official Unity video on the Free Look camera is very helpful.
This official Unity video explains the concept of the Top, Middle, and Bottom rigs that define the Free Look camera's orbit. Understanding this is key to fine-tuning your camera's behavior.
Watch from 01:30 to 03:21. Pay attention to how changing the Height and Radius of each rig affects the camera's path, and how the Aim properties allow for fine-grained compositional control.
Now, let's apply this knowledge to configure our camera for a pleasant feel. On your CM FreeLook1 object's Inspector:
-
Orbits: Under the
Orbitssection, you'll find settings for the Top, Middle, and Bottom rigs.- Height: Controls how high the camera is on that rig.
- Radius: Controls how far the camera is from the target on that rig.
- Try these starting values:
- Top Rig: Height:
4, Radius:3 - Middle Rig: Height:
2, Radius:5 - Bottom Rig: Height:
0.5, Radius:3.5
- Top Rig: Height:
-
Axis Control:
- Y Axis (Vertical): Set the
Max Speedto around2or3to make vertical movement less sensitive. You may also want to checkInvertif moving the mouse up makes the camera go down (and vice-versa). - X Axis (Horizontal): Set the
Max Speedto around200or300. This feels fast, but it's appropriate for mouse input.
- Y Axis (Vertical): Set the
Experiment with these values in Play mode. Because Cinemachine settings update live, you can tweak them while the game is running to find what feels best. Remember to copy your desired values from Play mode back to Edit mode, or they will be lost when you stop the game.
4. Connecting Player Input
To allow the player to control the camera orbit with the mouse, we need to connect an input source. We will use Unity's modern Input System for this, as it's flexible and supports both mouse and gamepads easily.
This process involves two parts: defining a "Look" action and telling Cinemachine to use it.
Building a third-person controller in Unity with the new input system
This article provides a clear guide on setting up the new Input System and connecting it to a Cinemachine camera. We will follow its steps to create our input bindings.
First, read the section titled 'Setting up input system'. Follow the instructions to create a new Controls.inputactions asset. Create the Player Action Map and the Look action, binding it to the Mouse Delta and Gamepad Right Stick as described. You do not need to create the Jump or Move actions for this lesson. Next, read the part of the 'Setting up Cinemachine' section that describes adding the Cinemachine Input Provider component. This is the final step to link your action to the camera.
To summarize the steps from the article:
- Create Input Actions Asset: In your Project window, go to
Create > Input Actions. Name itGameControls. - Define the "Look" Action:
- Open the
GameControlsasset. Add aPlayerAction Map. - Add a new Action named
Look. - Set its
Action TypetoValueandControl TypetoVector2. - Under the
Lookaction, add two bindings:- One with a
Pathset to Mouse > Delta [Mouse]. - Another with a
Pathset to Gamepad > Right Stick [Gamepad].
- One with a
- Click Save Asset.
- Open the
- Connect to Cinemachine:
- Select your
CM FreeLook1GameObject. - Click Add Component and add the Cinemachine Input Provider.
- In the
XY Axisproperty of this new component, click the small circle icon and select theLook (Input Action)from yourGameControlsasset.
- Select your
Now, when you enter Play mode, you should be able to orbit the camera around your character using the mouse!
5. Preventing Camera Collisions
One final, crucial touch is to prevent the camera from clipping through walls and other objects. Cinemachine has a built-in solution for this.
THIRD PERSON MOVEMENT in 11 MINUTES - Unity Tutorial
The same Dave / GameDevelopment video also has a great segment on fixing camera clipping.
Watch from 05:35 to 06:22. This part explains how to add the CinemachineCollider extension and configure it to avoid clipping.
As shown in the video:
- Select your
CM FreeLook1object. - In the
CinemachineFreeLookcomponent, click the Add Extension dropdown and select CinemachineCollider. - In the new
CinemachineCollidersettings:- Set the Strategy to Pull Camera Forward. This is the most common and intuitive behavior.
- The Collide Against property uses a layer mask to determine what the camera should treat as an obstacle. Create a new Layer (e.g., "Environment") and assign it to your world geometry (floors, walls, etc.). Then, select this layer in the
Collide Againstmask. - Make sure your Player character is on a separate layer (e.g., "Player") and that this layer is not selected in the
Collide Againstmask. This ensures the camera doesn't collide with the character it's trying to follow.
With the collider active, the camera will now intelligently pull itself closer to the character to avoid passing through obstacles, maintaining a clear view.
Conclusion
Congratulations! You've implemented a professional-grade third-person camera controller. You now have a dynamic, interactive viewpoint that follows your character, orbits with player input, and intelligently avoids obstacles. By using Cinemachine, you accomplished this by focusing on high-level configuration rather than low-level code, which is a testament to efficient, modern game development practices.
Key Takeaways:
- Cinemachine is the standard Unity tool for creating complex camera behaviors like third-person following and orbiting.
- A Free Look Camera uses three orbital rigs (Top, Middle, Bottom) to define its path around a target.
- Using dedicated Follow and Look At targets provides stable and predictable camera framing.
- The Input System can be connected to Cinemachine via the
CinemachineInputProviderto give the player control. - The CinemachineCollider extension is an easy and effective way to prevent the camera from clipping through world geometry.
Now that you can see and follow your character, the next step is to make them move. In our next lesson, we will enable point-and-click character movement using Unity's NavMesh system, bringing our character to life with their first form of interaction with the world.