Hello! Welcome to your next lesson in our Go crash course.
In our last session, we saw how Go's multiple return values enable a powerful and explicit error handling pattern: (result, error). I mentioned that the error type you've been using is special. Today, we'll uncover why: error is not a struct or a primitive, but an interface.
This lesson is dedicated to interfaces, arguably Go's most powerful and distinctive feature. For someone with your background in C++ and Java, Go's approach might seem unusual. There's no implements keyword, and no explicit inheritance hierarchy. Instead, Go uses a form of structural typing, often called "duck typing": if a type can walk like a duck and quack like a duck, Go considers it a duck.
By the end of this lesson, you will understand this philosophy and be able to define and implement interfaces, and use type assertions to work with interface values. This knowledge is absolutely critical for understanding the architecture of the Kubernetes libraries you'll be working with, which rely heavily on interfaces for testing and extensibility.
1. Defining and Implementing Interfaces
At its core, a Go interface is a collection of method signatures. It defines a set of behaviors. Any type that provides definitions for all the methods in an interface is said to satisfy that interface, automatically and implicitly.
Let's watch a video that walks through this entire process: defining an interface, creating structs that satisfy it, and then using the interface as a function argument to write more general, flexible code.
Golang: The Last Interface Explanation You'll Ever Need
The video 'Golang: The Last Interface Explanation You'll Ever Need' from the Flo Woelki channel provides an excellent introduction to what interfaces are and how they are implicitly satisfied.
Watch the segment from 00:39 to 08:36. Focus on: The syntax for defining the shape interface. How the rectangle and circle structs satisfy the interface simply by implementing the area() method, with no explicit declaration. How the calculateArea function can accept any type that satisfies the shape interface, demonstrating polymorphism.
As you just saw, the process is:
-
Define the Interface: Create a
typewith theinterfacekeyword and list the required method signatures.// Any type that wants to be a "geometry" MUST have these two methods. type geometry interface { area() float64 perim() float64 } -
Define the Concrete Type: Create your
struct.type rect struct { width, height float64 } -
Implement the Methods: Attach the methods required by the interface to your struct.
// By implementing area() and perim(), 'rect' now implicitly
// satisfies the 'geometry' interface.
func (r rect) area() float64 {
    return r.width * r.height
}

func (r rect) perim() float64 {
    return 2*r.width + 2*r.height
}
For a quick text-based summary of this example, "Go by Example" is a great reference.
The 'Interfaces' page on 'Go by Example' provides a concise, runnable example of the concepts from the video.
Review the first half of the page, down to the measure function. This will reinforce how the rect and circle structs implement the geometry interface.
This implicit nature encourages a powerful Go idiom: "Accept interfaces, return concrete types." By having your functions accept interface types (like geometry or io.Reader), you decouple them from specific implementations, making them more reusable and much easier to test. This is a pattern you'll see constantly in the Redis operator codebase.
2. The Empty Interface and Type Assertions
What if you have an interface with no methods?
type any interface{}
// or, in modern Go (1.18+)
// type any = interface{}
This is the empty interface. Since it has no methods, every single type in Go satisfies it. This makes it useful for functions that need to handle values of an unknown type. But once you have a value stored in an empty interface, how do you get its original, underlying type back?
This is where type assertions come in. A type assertion checks the concrete type of an interface value and can extract it.
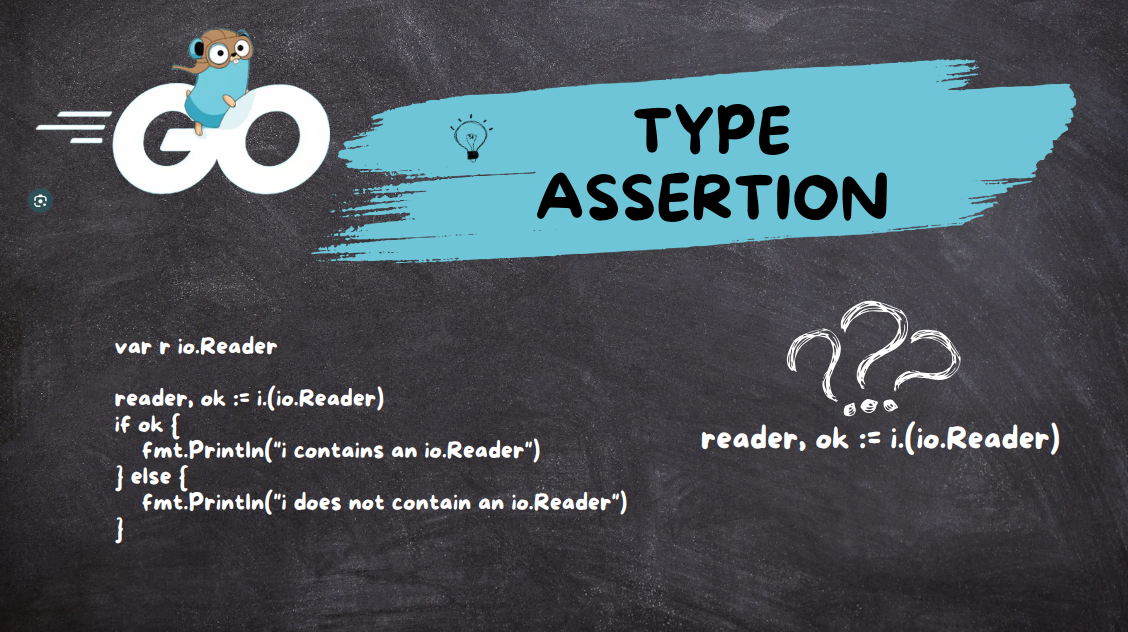
There are two main ways to perform a type assertion:
-
Single Value Assertion:
v := i.(T)
This asserts that the interfaceiholds the concrete typeTand assigns the underlyingTvalue tov. Warning: Ifidoes not hold typeT, this statement will trigger a runtime panic. -
"Comma, ok" Idiom:
v, ok := i.(T)
This is the safe and idiomatic way. It behaves like the map lookup you've already seen. Ifiholds typeT,okwill betrueandvwill hold the underlying value. If not,okwill befalseandvwill be the zero value for typeT. This version does not panic.
When you need to check against several possible types, a chain of if/else statements can become clumsy. Go provides a more elegant construct for this: the type switch.
Type Assertions in Go: the only guide you need!
The 'Type Assertions in Go' video, also by Flo Woelki, dives deeper into these concepts. It clearly explains the 'comma, ok' idiom and the type switch.
Watch these two segments: Safe Assertions (01:55 - 03:38): This covers the panicking version and then introduces the safe 'comma, ok' idiom. Type Switches (06:22 - 08:57): Pay attention to the special switch v := value.(type) syntax. This is the idiomatic way to handle an interface value that could be one of several different concrete types.
The type switch is a very powerful tool you'll encounter in Kubernetes controllers when handling generic resource objects.
3. A Practical Application: The error Interface
Let's now connect this back to our previous lesson. The built-in error type is simply a pre-declared interface:
type error interface {
    Error() string
}
Any type that defines a method Error() string satisfies the error interface. This is why you can return different error types from the same function (e.g., from os.Open or fmt.Errorf), because they all fulfill this contract.
This also means you can create your own custom error types to carry more information. This is extremely useful for distinguishing between different failure modes in your application. For example, in the Redis operator, you might have one custom error for "invalid Redis config" and another for "failed to connect to Kubernetes API," allowing the reconciliation logic to react differently.
Let's see how to create and use a custom error type.
Golang: The Last Interface Explanation You'll Ever Need
We return to the first video to see a practical example of the error interface.
Watch the segment from 14:19 to 17:29. It demonstrates: The definition of the standard error interface. How to create a calculationError struct. How implementing the Error() string method on this struct allows it to be used as a valid error.
4. Practice Exercise
Let's put all these concepts together. You'll create a system that can log messages to different destinations by using an interface.
Task:
- Define an interface called
Loggerwith a single method:Log(message string). - Create two structs:
ConsoleLoggerandFileLogger.FileLoggershould have a field for the filename, e.g.,FileName string. - Implement the
Loggerinterface on both structs.ConsoleLogger.Logshould print the message to the console, prefixed with[CONSOLE].FileLogger.Logshould print a message simulating a file write, e.g.,[FILE: my_app.log] <message>.
- Write a function
Process(l Logger)that takes aLoggerinterface. Inside this function:- Call
l.Log("Processing started."). - Use a type assertion to check if the provided
Loggeris of the concrete type*FileLogger. - If it is, print an additional, special message like
Special check: This is a file logger for 'my_app.log'. - Call
l.Log("Processing finished.").
- Call
- In your
mainfunction, create an instance ofConsoleLoggerand an instance ofFileLogger(e.g., withFileName: "my_app.log"), and pass each one to yourProcessfunction to see the different behaviors.
Solution
package main

import "fmt"

// 1. Define the Logger interface
type Logger interface {
	Log(message string)
}

// 2. Create the ConsoleLogger struct
type ConsoleLogger struct{}

// 3. Implement the Logger interface for ConsoleLogger
func (cl ConsoleLogger) Log(message string) {
	fmt.Printf("[CONSOLE] %s\n", message)
}

// 2. Create the FileLogger struct
type FileLogger struct {
	FileName string
}

// 3. Implement the Logger interface for FileLogger
func (fl *FileLogger) Log(message string) {
	fmt.Printf("[FILE: %s] %s\n", fl.FileName, message)
}

// 4. Write a generic Process function
func Process(l Logger) {
	fmt.Println("--- Starting Process ---")
	l.Log("Processing started.")

	// Use a type assertion to check for a specific concrete type
	if fileLogger, ok := l.(*FileLogger); ok {
		fmt.Printf("Special check: This is a file logger for '%s'\n", fileLogger.FileName)
	}

	l.Log("Processing finished.")
	fmt.Println("--- Finished Process ---")
}

func main() {
	// 5. Create instances and pass them to Process
	console := ConsoleLogger{}
	file := &FileLogger{FileName: "my_app.log"}

	Process(console)
	fmt.Println()
	Process(file)
}
Expected Output:
--- Starting Process ---
[CONSOLE] Processing started.
[CONSOLE] Processing finished.
--- Finished Process ---

--- Starting Process ---
[FILE: my_app.log] Processing started.
Special check: This is a file logger for 'my_app.log'
[FILE: my_app.log] Processing finished.
--- Finished Process ---
Conclusion
You've just unlocked a core piece of Go's design philosophy. Interfaces provide a powerful way to build abstract, decoupled, and testable systems.
Key Takeaways:
- An interface defines a set of methods (a behavior).
- A type satisfies an interface implicitly by implementing all of its methods.
- This allows for polymorphism, where functions can operate on different types as long as they satisfy the required interface (e.g., the
Processfunction in our exercise). - The empty interface,
interface{}orany, can hold a value of any type. - Type assertions (
v, ok := i.(T)) and type switches are used to discover and work with the concrete type underlying an interface value. - The standard
errortype is a perfect real-world example of an interface in action.
In the next lesson, we will focus specifically on Go's standard error handling pattern. We'll solidify what we learned about the error interface today and explore best practices for creating, wrapping, and handling errors, which will be essential for writing robust controller logic.