Welcome back. In our last lesson, we explored how to structure data using JavaScript objects and arrays, which act as the blueprints for the information in your UI. Now, we'll introduce the "brains" of the operation: conditional logic. This is how you'll make your web pages dynamic and responsive to the data you've structured and the actions a user takes.
As a UI/UX designer, you constantly make decisions about what a user should see and when. Should a "new" badge appear on a feature? Should a success message display after a form submission? Should a loading skeleton show while data is fetching? Conditional logic is the programming concept that allows you to implement these decisions in code.
Today, we'll cover the two primary ways to write conditional logic in JavaScript: the versatile if/else statement for handling various scenarios, and the concise ternary operator for simpler, binary choices. By the end of this lesson, you'll be able to control which UI elements appear on a page based on specific conditions.
The Foundation of Decision-Making: if...else Statements
The most fundamental tool for decision-making in JavaScript is the if statement. It works just like it sounds: if a certain condition is true, then execute a block of code. You can extend this with else to provide an alternative block of code to run if the condition is false. For more complex scenarios with multiple conditions, you can chain them together using else if.
This structure allows you to build logic flows:
if: Checks the primary condition.else if: Checks a new condition if the previous one was false.else: Acts as a final catch-all if none of the preceding conditions were true.
The following video provides an excellent deep dive into how these statements work, using a practical train ticket pricing example to illustrate the concepts.
If Statements in JavaScript – A Deep Dive for Beginners
This video, "If Statements in JavaScript – A Deep Dive for Beginners," from the Future Fullstack channel, clearly breaks down the core concepts of conditional logic.
Please watch the following segments to build your understanding: Introduction to if statements: This part explains the basic concept of decision-making and how an if statement executes a code block only when a condition is true. Introducing if-else: Learn how else provides a binary choice, allowing you to run a different block of code when the if condition is false. Handling multiple conditions with else if: This section shows how to chain multiple checks together to handle more complex scenarios with several possible outcomes.
Now that you've seen the syntax, let's look at how this is applied in a real web page to directly manipulate what the user sees. The following tutorial from the Mozilla Developer Network (MDN) walks through adding interactivity to a page using these very concepts.
JavaScript: Adding interactivity - Learn web development | MDN
This MDN guide provides hands-on examples of using conditional logic to change page content dynamically.
Please read the following three sections. As you read, notice how an if/else block is the core mechanism that makes the UI respond to user actions or stored data. Start at the section Adding an image changer. This is a perfect, simple example of using if/else to toggle a UI element's state (in this case, an image source) based on its current value. Next, read Adding a personalized welcome message. Here, the code checks if data exists in the browser's storage and uses an if/else block to decide whether to show a stored message or prompt the user for their name. This is a very common pattern for creating personalized user experiences. Finally, review the short section A user name of null?. This demonstrates how to use another if statement to handle edge cases, such as a user cancelling a prompt. This aligns directly with the "Exploratory & Edge Case Thinking" skill we're developing.
A Concise Alternative: The Ternary Operator
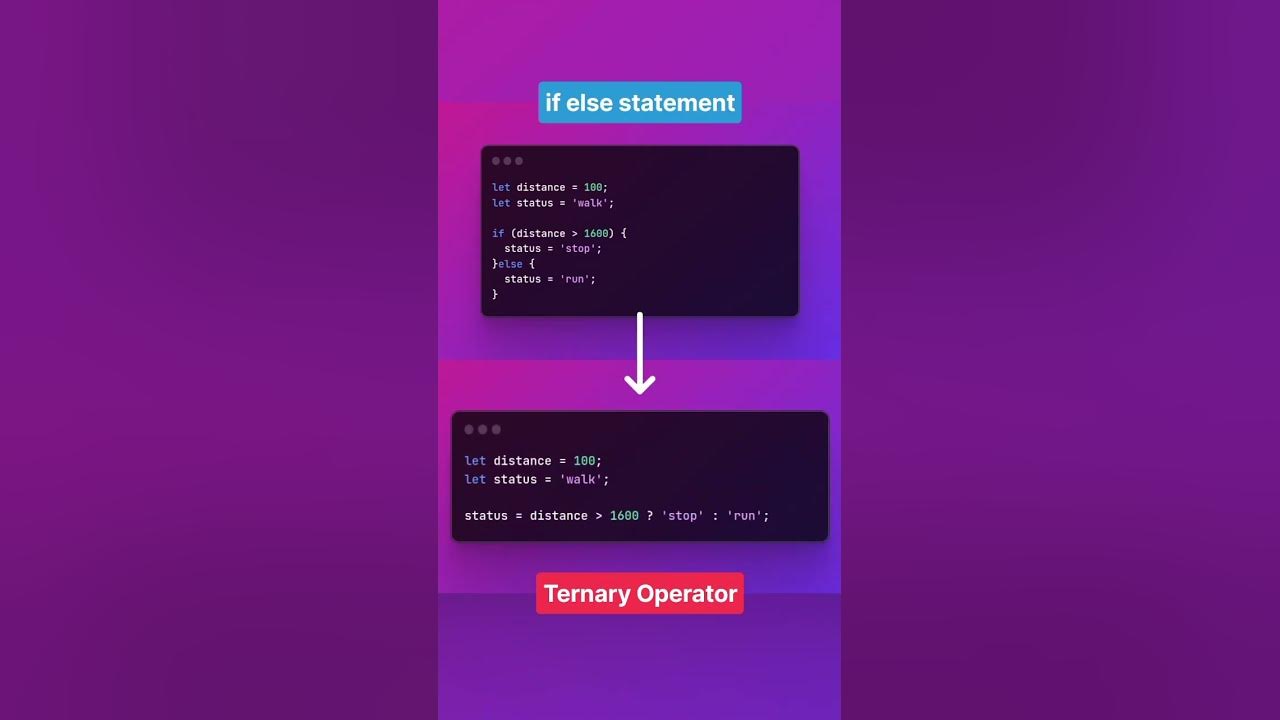
For simple, binary decisions where you need to choose between two values, a full if/else block can feel a bit verbose. JavaScript provides a more compact alternative called the ternary operator. It's a shorthand that packs a condition and two possible outcomes into a single line.
Its syntax is: condition ? expressionIfTrue : expressionIfFalse;
You can read the ? as "then" and the : as "else".
Let's say we have a product from our previous lesson and want to create a status message:
// Using if/else
let statusMessage;
if (product.inStock === true) {
  statusMessage = "Available";
} else {
  statusMessage = "Sold Out";
}

// Using the ternary operator
const statusMessageTernary = product.inStock ? "Available" : "Sold Out";
Both achieve the same result, but the ternary operator is more concise. It's especially useful for assigning values to variables or for conditional rendering inside modern frameworks like React, which you'll learn later.
The following article explains the ternary operator and its best practices.
How to Write Cleaner JavaScript Code Using the Ternary Operator
This blog post provides a quick and effective overview of the ternary operator.
Focus on these points: Read the definition to understand the syntax. Review the examples, paying close attention to "Basic Conditional Assignment" and "Inline Rendering in React"—the latter gives you a glimpse of how powerful this operator becomes in component-based development. Skim the best practices. The key takeaway is to use ternaries for simple choices to maintain readability. For complex logic with multiple else if branches, stick with the standard if/else structure.
Applying Conditionals to User Experience
Conditional logic is the technical foundation for many core UX patterns you design. Your ability to think through these states in Figma translates directly to writing conditional code.
- Loading States: You don't want to show users a blank screen while data loads. Instead, you conditionally show a placeholder. Once the data arrives, you hide the placeholder and show the actual content.

The short video below demonstrates exactly this principle: it uses a load event to determine when the page is ready, and then conditionally hides a loading spinner.
How to Create and Display a Loading Spinner on Page Load (without JQuery) - HTML, CSS & JavaScript
This video, "How to Create and Display a Loading Spinner," shows a practical, real-world use of conditional display.
Watch how JavaScript is used to control the loader's visibility: Hiding the loader: The code listens for the page load event. When that event fires (the condition), it adds a CSS class to the loader to hide it. Removing the loader: After the hiding animation finishes, another event fires, which then completely removes the loader element from the page. This is another conditional action.
Time to Practice
Let's use the products array of objects we created in the last lesson. Open your developer console and paste in the following data structure:
const products = [
  {
    id: "prod-001",
    name: "Classic White T-Shirt",
    price: 250,
    inStock: true
  },
  {
    id: "prod-002",
    name: "Slim Fit Jeans",
    price: 600,
    inStock: false
  },
  {
    id: "prod-003",
    name: "Leather Belt",
    price: 350,
    inStock: true
  },
  {
    id: "prod-004",
    name: "Running Shoes",
    price: 800,
    inStock: false
  }
];
Now, complete the following tasks:
-
Use
if/elsefor detailed messages:
Write afor...ofloop to iterate through theproductsarray. Inside the loop, use anif/elsestatement to check theinStockproperty of each product.- If
inStockistrue, print a message like:"Classic White T-Shirt is available for purchase." - If
inStockisfalse, print:"Slim Fit Jeans is currently sold out."
- If
-
Use the ternary operator for a quick status:
Loop through theproductsarray again. This time, inside the loop, use a ternary operator to assign either the string"In Stock"or"Out of Stock"to a variable namedstatus. Then, print the product's name and its status, like:"Leather Belt: In Stock".
Click to see a solution
// Data from the exercise
const products = [
  { id: "prod-001", name: "Classic White T-Shirt", price: 250, inStock: true },
  { id: "prod-002", name: "Slim Fit Jeans", price: 600, inStock: false },
  { id: "prod-003", name: "Leather Belt", price: 350, inStock: true },
  { id: "prod-004", name: "Running Shoes", price: 800, inStock: false }
];

// 1. Solution for if/else
console.log("--- Detailed Status (if/else) ---");
for (const product of products) {
  if (product.inStock === true) {
    console.log(`${product.name} is available for purchase.`);
  } else {
    console.log(`${product.name} is currently sold out.`);
  }
}

// 2. Solution for ternary operator
console.log("\n--- Quick Status (Ternary) ---");
for (const product of products) {
  const status = product.inStock ? "In Stock" : "Out of Stock";
  console.log(`${product.name}: ${status}`);
}
Conclusion
You have just learned the fundamental building block for creating dynamic, interactive user interfaces. By combining the data structures from our last lesson with the conditional logic from this one, you can now model information and make decisions based on it.
Key Takeaways:
if/elsestatements are your go-to tool for handling logic with multiple paths or complex conditions.- The ternary operator (
? :) is a clean, concise shorthand for simple binary choices, perfect for assigning one of two values to a variable. - Conditional logic is the code equivalent of UX decisions, allowing you to control visibility, styles, and content to create responsive and user-friendly experiences.
In our next lesson, we'll dive deeper into working with arrays. Now that you can make decisions about a single item, we'll explore powerful methods like .map() and .filter(). These will allow you to efficiently transform entire lists of data—for instance, to create a new array containing only the products that are in stock, or to generate a list of product names from your array of product objects.