Hello! In our last lesson, we explored how to render dynamic lists and apply conditional rendering, which are essential for creating UIs that respond to data. We saw how to use map() to display lists, filter() to show specific items, and conditional operators like ? : and && to show or hide elements.
Today, we'll build directly on those skills to tackle one of the most common tasks in web development: handling forms. This lesson will teach you how to create controlled components to manage and validate form inputs in React. You'll learn the standard "React way" to capture user input, ensure the data is valid, and provide helpful feedback to the user—all foundational skills for building interactive applications.
This is the final piece of our React Fundamentals module, and it will set you up perfectly for our first mini-project in the next module.
What are Controlled Components?
In standard HTML, form elements like <input>, <textarea>, and <select> maintain their own state and update it based on user input. In React, we can use a technique called controlled components to let React state be the "single source of truth" for the form data.
The flow works like this:
- A React state variable (created with
useState) holds the current value of the input. - The input element's
valueattribute is bound to that state variable. - An
onChangeevent handler on the input updates the state variable whenever the user types.
This gives React full control over the form element's value, making it easier to manage, validate, and react to changes.
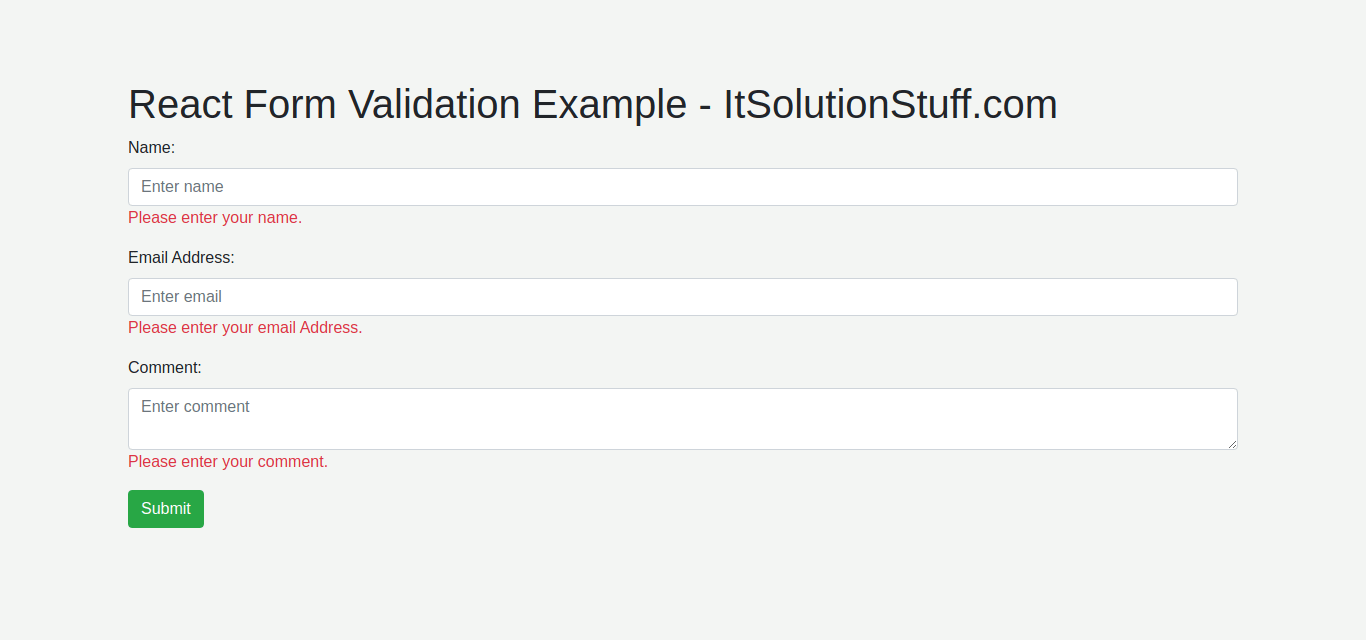
To start, let's get a clear definition of controlled components and see a simple code example. This article from daily.dev provides a concise explanation.
Read the section titled 'Controlled Components'. Focus on the three key steps: setting up state with useState, binding the input's value, and using handleChange to update the state.
Handling Multiple Inputs Efficiently
While you could create a separate useState for every single input field, this quickly becomes repetitive and difficult to manage in larger forms. A much better practice is to use a single state object to hold the values for all your inputs.
To make this work, we'll create a single handleChange function that can dynamically update the correct property in our state object. We do this by giving each input a name attribute that matches the corresponding key in our state object.
Inside handleChange, we can access event.target.name to know which input changed and event.target.value to get its new value.
function MyForm() {
  const [formData, setFormData] = useState({
    username: '',
    email: '',
  });

  const handleChange = (e) => {
    const { name, value } = e.target;
    setFormData(prevFormData => ({
      ...prevFormData,
      [name]: value // Using computed property name to update the right key
    }));
  };

  return (
    <form>
      <input
        type="text"
        name="username"
        value={formData.username}
        onChange={handleChange}
      />
      <input
        type="email"
        name="email"
        value={formData.email}
        onChange={handleChange}
      />
    </form>
  );
}
The key piece of syntax here is [name]: value. This is an ES6 feature called computed property names, which allows you to use a variable as a key in an object literal.
BEST Ways to Handle and Validate React Forms without a Library
Watching this pattern being built from scratch is the best way to understand it. This video from Lama Dev demonstrates exactly how to refactor a form from using multiple state variables to a single, scalable state object.
Watch from 05:30 to 07:13 to see the initial approach using one useState per input. Then, watch carefully from 12:50 to 17:10 where he refactors this into a much cleaner solution using a single values state object and a dynamic onChange handler. Notice how he uses an array of input configurations to build the form dynamically—this is a very powerful pattern that uses the list rendering skills you learned in the last lesson!
Implementing Form Validation
Now that React controls our form's state, we can easily implement validation. A simple and effective way to start is by using built-in HTML5 validation attributes.
Attributes like required, minLength, maxLength, type="email", and pattern (which accepts a regular expression) let the browser do the initial validation work for us.
BEST Ways to Handle and Validate React Forms without a Library
The same video has an excellent segment on using these HTML5 attributes for client-side validation. It's a great example of the 80/20 principle you like—achieving powerful validation with minimal code.
Watch from 27:23 to 33:26. Pay close attention to how the pattern attribute is used with regular expressions to enforce rules for the username and password. Don't worry about memorizing the regex; the key takeaway is knowing that this powerful tool is available directly in your JSX.
Improving Validation UX: When to Show Errors
Showing validation errors is a perfect use case for the conditional rendering skills you learned previously. However, when you show them is crucial for a good user experience.
- onChange: Showing an error on every keystroke can be annoying.
- onSubmit: Waiting until the user submits the form can be too late.
- onBlur: Showing an error after the user has finished with an input (and "blurred" away from it) is often the best balance.
To implement this, we can track which fields have been "touched" by the user. We'll add an onBlur event handler to our inputs. When a field is blurred, we mark it as touched and can then conditionally display an error message if the field is invalid and has been touched.
BEST Ways to Handle and Validate React Forms without a Library
Let's see how to implement this improved user experience. The video continues by adding this exact onBlur logic.
Watch from 33:26 to 38:50. The key idea here is adding a focused state for each input to track if it's been blurred. He then uses this state in CSS to conditionally show the error message and apply a red border (input:invalid[focused='true']). This is a clever way to combine React state with CSS for a great UX.
This is where your knowledge of conditional rendering shines. The pattern for showing an error message would look like this in JSX:
{errors.email && touched.email && <span>{errors.email}</span>}
This uses the logical && operator we covered. The error message will only be rendered if an error exists and the field has been touched.
Handling Form Submission
The final step is handling the form submission itself.
- Attach an
onSubmitevent handler to the<form>element. - In the handler function, call
event.preventDefault()to stop the browser from performing a full-page reload. - At this point, your complete, validated form data is available in your state object, ready to be sent to an API.
A great UX touch is to disable the submit button until all required fields are valid.
How to Use a Single Function to Manage React Form State
This video from Dave Gray shows a clean, JavaScript-based way to check if the form is ready to be submitted and conditionally disable the submit button.
Watch from 09:26 to 11:30 to see how he creates a canSave variable by checking if all values in the state object are truthy. Then, watch the brief clip from 03:07 to 03:33 to see how the handleSubmit function is structured with event.preventDefault().
Test your understanding!
You're building a simple login form with an email and a password field.
Your Task:
- Create a
LoginFormcomponent. - Use a single state object to manage the values for
emailandpassword. - Implement a single
handleChangefunction. - Add basic validation:
- Both fields should be
required. - The email field should be of
type="email". - The password field should have a
minLengthof 8.
- Both fields should be
- Conditionally render an error message below the password field only if it's been touched (
onBlur) and its value is less than 8 characters long. (For simplicity, you can manage the "touched" state in a separate state variable). - The submit button should be disabled until both fields have some value.
Show answer
Here is one possible solution. There are many ways to structure the validation logic, but this follows the patterns we've discussed.
import React, { useState } from 'react';

function LoginForm() {
  const [formData, setFormData] = useState({
    email: '',
    password: '',
  });

  // State to track if the password field has been touched
  const [passwordTouched, setPasswordTouched] = useState(false);

  const handleChange = (e) => {
    const { name, value } = e.target;
    setFormData(prev => ({ ...prev, [name]: value }));
  };

  const handlePasswordBlur = () => {
    setPasswordTouched(true);
  };

  const handleSubmit = (e) => {
    e.preventDefault();
    console.log('Form submitted:', formData);
    alert(`Welcome, ${formData.email}!`);
  };

  // Validation logic
  const isPasswordInvalid = passwordTouched && formData.password.length > 0 && formData.password.length < 8;
  const canSubmit = formData.email !== '' && formData.password !== '';

  return (
    <form onSubmit={handleSubmit} style={{ display: 'flex', flexDirection: 'column', gap: '10px', maxWidth: '300px' }}>
      <h2>Login</h2>
      <div>
        <label htmlFor="email">Email</label>
        <input
          type="email"
          id="email"
          name="email"
          value={formData.email}
          onChange={handleChange}
          required
        />
      </div>
      <div>
        <label htmlFor="password">Password</label>
        <input
          type="password"
          id="password"
          name="password"
          value={formData.password}
          onChange={handleChange}
          onBlur={handlePasswordBlur} // Mark as touched on blur
          minLength="8"
          required
        />
        {isPasswordInvalid && <p style={{ color: 'red', margin: 0 }}>Password must be at least 8 characters.</p>}
      </div>
      <button type="submit" disabled={!canSubmit}>
        Log In
      </button>
    </form>
  );
}

export default LoginForm;
Conclusion
Congratulations on completing the React Fundamentals module! Handling forms is a complex but essential part of frontend development, and you've now learned the core patterns for doing it effectively in React.
Key Takeaways:
- Controlled components use React state as the single source of truth for form inputs.
- Use a single state object and a dynamic
handleChangefunction with thenameattribute to manage multiple inputs efficiently. - Leverage HTML5 validation attributes (
required,pattern, etc.) for quick and powerful client-side validation. - Improve user experience by showing validation errors
onBlur(when a user leaves an input) rather than on every change. - Always use
event.preventDefault()in youronSubmithandler to prevent a full-page reload.
In our next module, we'll begin our Mid-Course Project: a Movie Search Application. You will immediately put today's lesson into practice by building the search input component that will power the entire application.