Hello! In our last lesson, we built out the core navigation of our single-page application, allowing users to move between static pages like "Home" and "About" using the <Link> component. This works well, but real-world applications are rarely just a collection of static pages. Think about an e-commerce site: you don't build a separate page for every single product. Instead, you have one "product detail" template that dynamically displays the correct information based on the product ID in the URL.
Today, we'll learn how to build exactly that. This lesson addresses the learning outcome: Use route parameters to create dynamic pages that display specific content. We will move beyond static paths and learn how to create flexible routes that can handle dynamic data, like /users/123 or /products/456.
This is a fundamental concept for building data-driven applications, from social media profiles to blog posts and e-commerce item pages.
First, take a look at this GIF. It perfectly illustrates what we're aiming to achieve today.
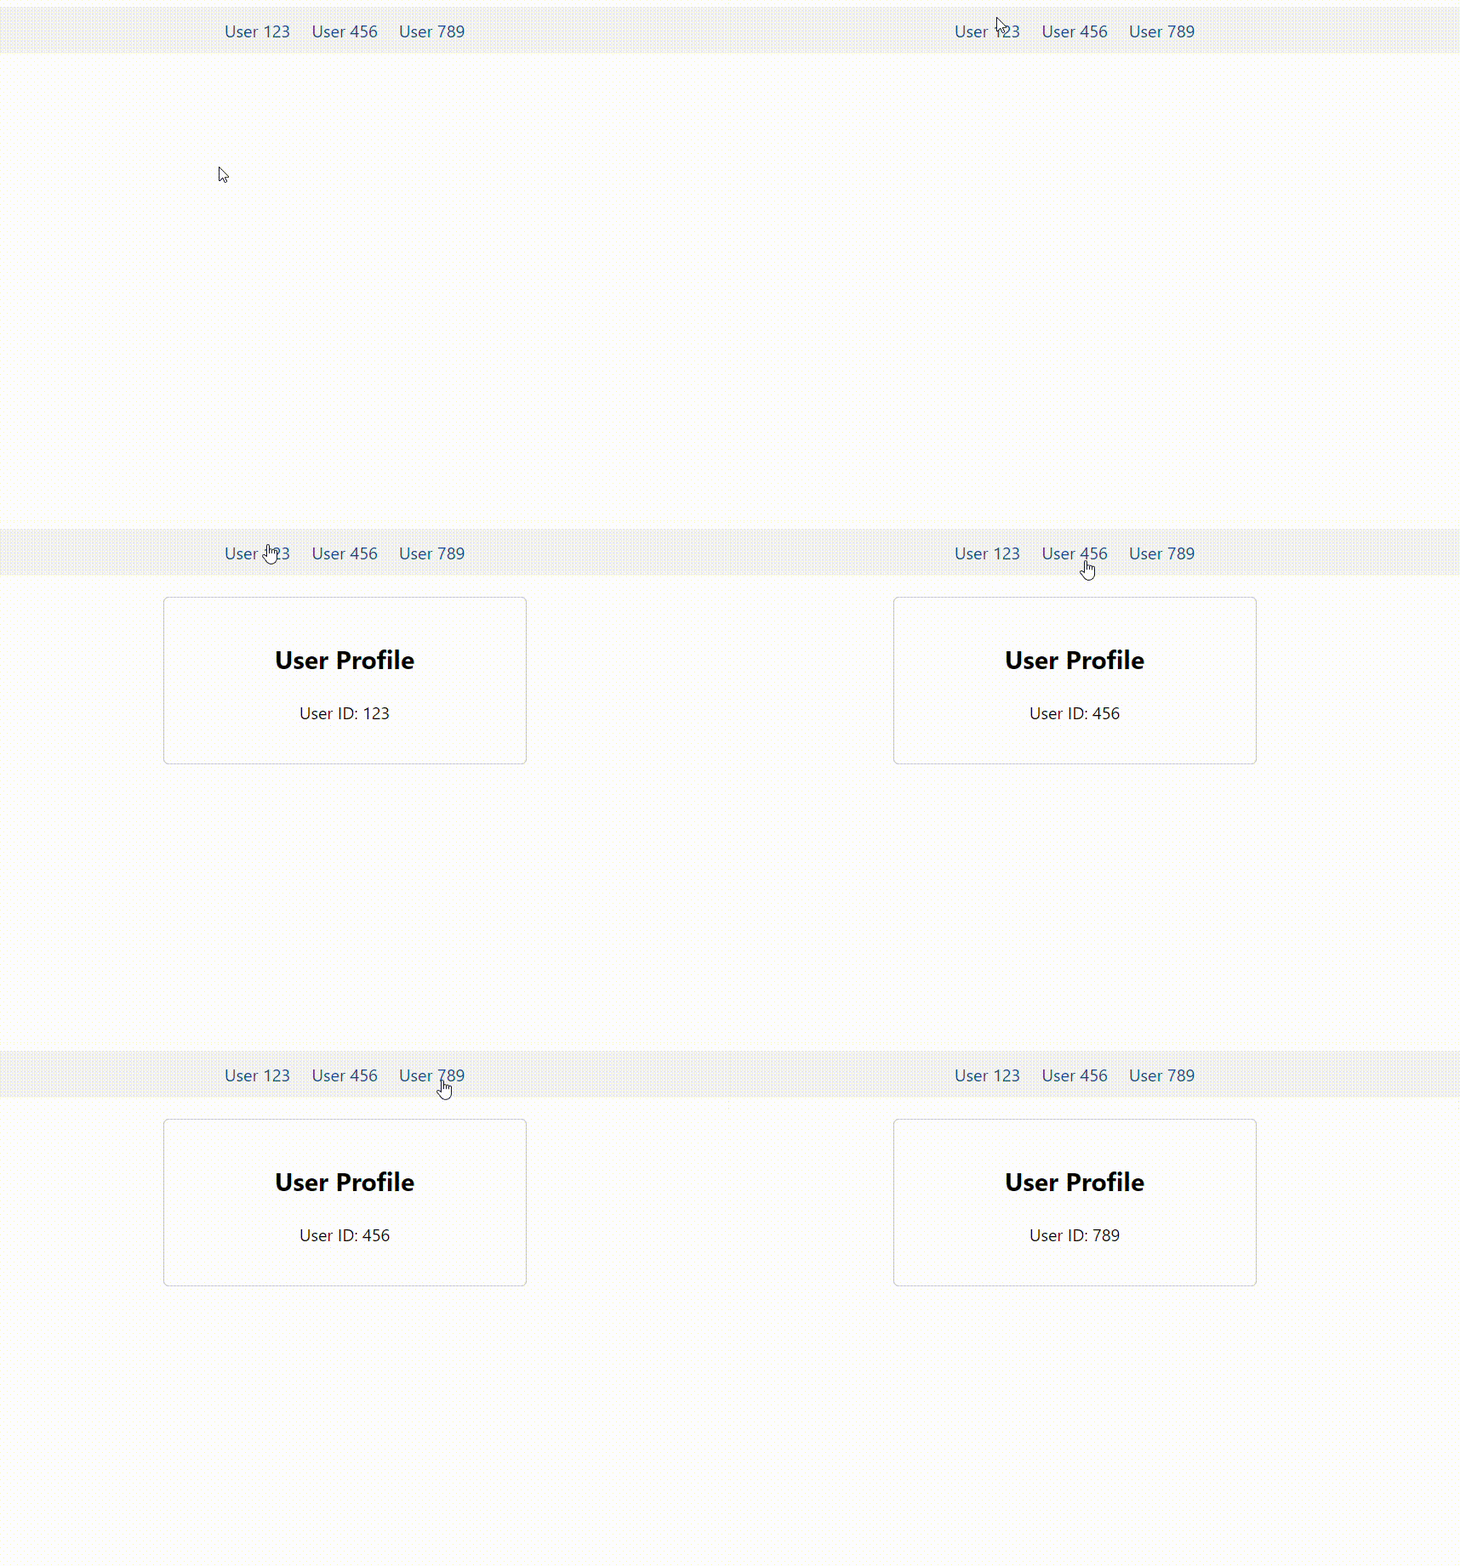
1. Defining a Dynamic Route
To create a dynamic route, you need to tell React Router that a part of the URL path is a placeholder, not a literal string. We do this by prefixing a segment of the path with a colon (:). This placeholder is called a route parameter or a dynamic segment.
For example, let's say we want to show a profile page for different users. Instead of creating routes for /users/alice, /users/bob, etc., we can define a single dynamic route:
<Route path="/users/:userId" element={<UserProfile />} />
In this case, :userId is our route parameter. This route will now match URLs like:
/users/1/users/123/users/jane-doe
React Router will capture the value from that segment of the URL (e.g., "123") and make it available to our component.
Let's see how we add this to our router configuration in main.jsx. Building on our previous setup, we'll add a route for individual blog posts.
// src/main.jsx
// ... other imports
import PostPage from './pages/PostPage'; // A new component we will create

const router = createBrowserRouter([
  {
    path: "/",
    element: <App />,
    errorElement: <NotFoundPage />,
    children: [
      {
        index: true,
        element: <HomePage />,
      },
      {
        path: "about",
        element: <AboutPage />,
      },
      // New dynamic route for blog posts
      {
        path: "posts/:postId", // :postId is the route parameter
        element: <PostPage />,
      },
    ],
  },
]);
For a clear explanation from the official documentation, you can refer to the "Dynamic Segments" section of the resource below.
The official React Router documentation provides a concise and authoritative explanation of dynamic segments.
Read the short section titled 'Dynamic Segments'. Notice the syntax for defining single and multiple dynamic segments in a route.
2. Accessing Route Parameters with useParams
Now that we've defined a dynamic route, how does our PostPage component know which post it's supposed to display? This is where the useParams hook comes in.
The useParams hook returns an object containing key-value pairs of the dynamic parameters from the current URL. The keys correspond to the parameter names you defined in your route path.
Let's create our PostPage.jsx component and use this hook.
// src/pages/PostPage.jsx
import { useParams } from 'react-router-dom';

function PostPage() {
  // useParams() returns an object like { postId: "123" }
  // We can destructure it to get the postId directly.
  const { postId } = useParams();

  return (
    <div>
      <h1>Blog Post Details</h1>
      <p>You are viewing post number: <strong>{postId}</strong></p>
    </div>
  );
}

export default PostPage;
If you navigate to /posts/42 in your browser, the PostPage component will render, and you'll see the message: "You are viewing post number: 42". If you go to /posts/hello-world, you'll see: "You are viewing post number: hello-world".
Test your understanding!
Given the following route configuration:<Route path="/products/:category/:productId" element={<ProductDetail />} />
And a user navigates to the URL: /products/electronics/5001.
What would be the output of console.log(useParams()) inside the ProductDetail component?
Show answer
The console would log an object with both parameters:{ category: "electronics", productId: "5001" }
3. Creating Links and Fetching Dynamic Data
We can now access the postId, but the real goal is to fetch data for that specific post and display it. This involves two steps:
- Creating links that point to our dynamic routes.
- Using the parameter to fetch data.
Let's watch a comprehensive video that walks through this entire process, from defining the route to fetching and displaying the data. This video uses a modern and highly effective data-fetching pattern with React Router's loader functions.
React Router Complete Tutorial | React Routing For Beginners | React Router DOM Tutorial
This video from GreatStack provides a fantastic, practical walkthrough of creating a dynamic 'Job Details' page. It covers defining the route, accessing the parameter, and using a loader function to fetch the data before the page renders.
Watch the following segments to see the full implementation: Defining the Dynamic Route (01:21:26 - 01:23:11): See how the :id parameter is added to the route configuration. Accessing the Parameter (01:23:11 - 01:24:58): A quick look at using useParams to grab the ID from the URL. Fetching Data with a Loader (01:26:09 - 01:32:33): This is the core part. Pay close attention to how a loader function is created. It receives params, uses the id to fetch data, and how the useLoaderData hook retrieves this data in the component. This is the modern, recommended way to handle this. Linking to Dynamic Routes (01:33:57 - 01:36:13): See how to create a list of links where each one points to a specific detail page.
Summary of the Loader Pattern
As you saw in the video, using loader functions is a powerful pattern that simplifies data fetching. Here’s a summary of the steps for our blog post example:
-
Create a
loaderfunction: Thisasyncfunction receives an object containing the routeparams. It uses thepostIdfromparamsto fetch the specific post data and returns it.// src/pages/PostPage.jsx export async function loader({ params }) { const { postId } = params; // In a real app, you'd fetch from your API // const response = await fetch(`https://api.yourapp.com/posts/${postId}`); // const post = await response.json(); // For this example, we'll simulate a fetch const post = { id: postId, title: `Post ${postId}`, body: `This is the content for post ${postId}.` }; return { post }; } -
Attach the
loaderto the route: Inmain.jsx, import the loader and add it to the route definition.// src/main.jsx import PostPage, { loader as postLoader } from './pages/PostPage'; // ... inside createBrowserRouter { path: "posts/:postId", element: <PostPage />, loader: postLoader, // Attach the loader here } -
Use
useLoaderDatain the component: ReplaceuseParamswith theuseLoaderDatahook to get the data that the loader returned. React Router ensures this data is available before the component renders.// src/pages/PostPage.jsx import { useLoaderData, Link } from 'react-router-dom'; function PostPage() { // Data from our loader function const { post } = useLoaderData(); return ( <div> <Link to="/">← Back to Home</Link> <h1>{post.title}</h1> <p>{post.body}</p> </div> ); } -
Link to the dynamic routes: On your
HomePageor a dedicatedBlogPage, you would map over an array of posts to create the links.// src/pages/HomePage.jsx import { Link } from 'react-router-dom'; const posts = [ { id: 1, title: 'First Post' }, { id: 2, title: 'Second Post' }, { id: 3, title: 'Third Post' }, ]; function HomePage() { return ( <div> <h1>My Blog</h1> <ul> {posts.map(post => ( <li key={post.id}> <Link to={`/posts/${post.id}`}>{post.title}</Link> </li> ))} </ul> </div> ); }
This approach is clean, robust, and handles loading and error states more gracefully than traditional useEffect-based fetching.
Conclusion
You've now unlocked one of the most powerful features of client-side routing. By creating dynamic routes, you can build scalable, data-driven interfaces that are central to modern web applications.
Key Takeaways:
- Define dynamic routes using the colon syntax in the route path (e.g.,
path="/posts/:postId"). - Use the
useParamshook to access the values of dynamic URL segments within your components. - The most common use case for route parameters is to fetch and display specific data for an item, like a product, user, or blog post.
- The modern React Router pattern uses
loaderfunctions to fetch data before the component renders, and theuseLoaderDatahook to access it, simplifying state management for data fetching.
In our next lesson, we will dive deeper into the useEffect hook. While loaders are excellent for route-based data fetching, useEffect remains a crucial tool for managing all other kinds of side effects in your components, such as setting up timers, subscriptions, or manually manipulating the DOM. Mastering its dependency array is key to writing performant and bug-free React code.