Hello!
In our last lesson, we established the "what" and "why" behind knife pleats, identifying their characteristics and understanding why they are the perfect choice for the structured, architectural bodice you envision. We covered the key terminology like pleat depth and underlay, setting a strong theoretical foundation.
Now, we transition from theory to practice. This lesson is about execution—the precise, hands-on process of creating those sharp, clean pleats. Your background in product design has shown you that a great concept requires meticulous implementation, and the same is true in sewing. The quality of your finished bodice will depend directly on the accuracy you achieve in these fundamental steps.
Your learning outcome for this lesson is to: Mark, fold, and press pleats accurately using pattern markings.
Let's begin the process of turning a flat piece of fabric into a three-dimensional, structured panel.
1. From Blueprint to Fabric: Transferring Markings
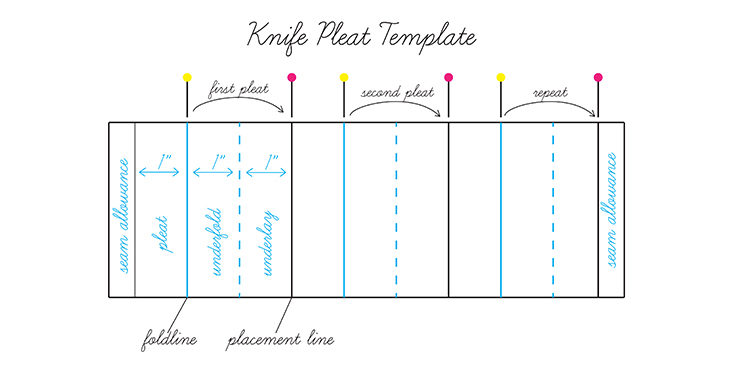
Just like an architectural drawing, a sewing pattern contains all the critical information for construction. For pleats, the key markings are the fold line (where the fabric folds over) and the placement line (where the fold line is placed). Your first task is to transfer these lines from the paper pattern to your fabric with absolute precision.
Choosing Your Marking Tools
There are many ways to transfer these markings, and choosing the right tool depends on your fabric. For the muslin prototypes you'll be making, a simple chalk pencil or water-soluble marker will work well. However, for your final silk organza, you'll need a method that won't damage or permanently mark the delicate material.
The video below provides an excellent overview of the different marking tools and, most importantly, demonstrates how to interpret pleat markings on a pattern.
Sewing Pattern Markings: How to Transfer Pattern Markings onto Fabric | The Daily Sew
Let's watch a segment from 'Sewing Pattern Markings' by The Daily Sew. This will show you how pleat markings typically appear on a pattern and introduce a variety of marking tools.
First, watch from 02:59 to 04:30. Pay close attention to how notches and lines indicate where to fold the pleat and in which direction. Then, watch from 05:44 to 09:13 to see a survey of different marking tools like tracing paper, chalk pens, and tailor's chalk.
The Professional's Choice: Thread Marking
For delicate fabrics like silk organza, where chalk or markers could be damaging or hard to remove, the preferred method is using thread. This technique, called tailor's tacks or thread tracing, involves making small, temporary stitches along the marking lines. It's precise, gentle on the fabric, and easy to remove.
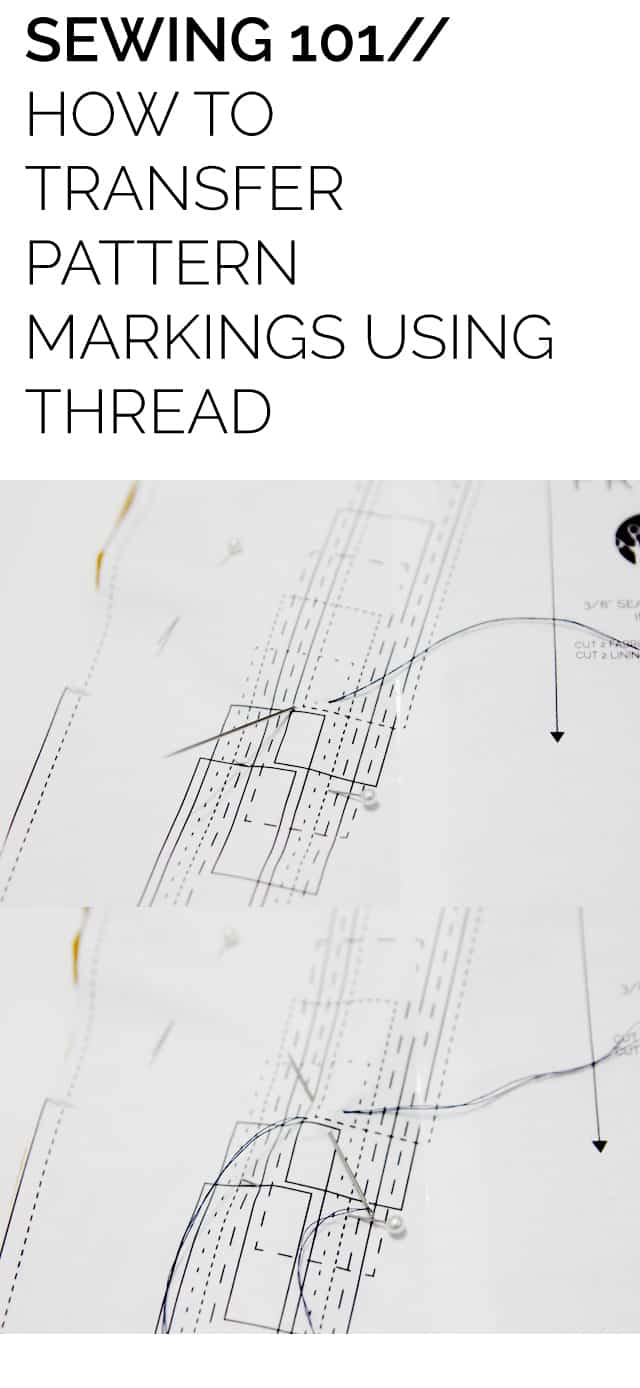
This is a couture-level technique that will be invaluable when you work on your final gown.
2. The Mechanics: Folding, Pinning, and Pressing
With your lines accurately marked, you can now form the pleats. The process is a sequence of folding, pinning to secure, and pressing to set the shape.
The following video gives a clear, concise demonstration of this entire workflow.
Your guide to pleats: Learn all about sewing pleats.
The video 'Your guide to pleats' from the Seamwork channel provides a fantastic visual walkthrough of creating a knife pleat. It covers the core actions you'll be performing.
Please watch the segment from 03:08 to 05:22. Focus on these key steps: Marking: Notice how they draw full lines for clarity. Folding & Pinning: See how the 'pleat line' is brought over to meet the 'placement line'. Pressing: Observe the use of a hot iron in an up-and-down 'pressing' motion, not a side-to-side 'ironing' motion.
Quality Control: Ensuring Consistency
As you saw, the process is straightforward, but consistency is key. For an architectural effect, every pleat must be the same width from top to bottom. A great quality control habit, which should feel familiar from your design work, is to measure as you go.
How To Sew Knife Pleats: The Emma Skirt Sewing Tutorial
Let's read a quick tip from the tutorial 'How To Sew Knife Pleats' on The Flora Modiste blog, which emphasizes the importance of measurement.
Read the section 'How to sew knife pleats sewing tutorial: Step 2'. The key takeaway here is the recommendation to use a ruler to measure the width of each pleat at the top, middle, and bottom as you're pinning. This ensures perfect uniformity.
Setting the Pleats
Pressing is what locks the pleat's shape into the fabric's memory.
- Heat: Use the highest temperature your fabric can safely tolerate. Always test on a scrap first!
- Motion: As mentioned, use an up-and-down pressing motion. Sliding the iron can distort the fabric and the pleat.
- A Pro Tip: The Seamwork video (at 05:11) mentioned using a solution of one part vinegar to three parts water to help set crisp pleats in natural fibers like cotton or silk. This works by slightly changing the pH of the fabric, making it more receptive to creasing.
Once pressed, it's good practice to staystitch along the raw edge (e.g., the waistline or neckline edge) to hold the pleats securely in place for the next stages of construction. The Seamwork video demonstrates this from 05:33 onwards.
3. A Look Ahead: Couture Pleating on Silk Organza
While the techniques we've covered will work perfectly for your muslin prototypes, creating flawless pleats in sheer silk organza requires an even higher level of precision. The article below details a couture approach to creating pleated organza panels, similar to what you'll be doing.
Re-create Couture Pleated Silk Organza Panels
Let's look at the article 'Re-create Couture Pleated Silk Organza Panels' from Threads Magazine. This is a preview of the high-fidelity techniques you will use for your final dress fabric.
Read the sections that describe chalking the foldlines and then hand-basting them for accuracy, and creating a plastic template to help press the pleats perfectly. This is an inspiring look at the level of detail that goes into high-end garment construction.
Making a custom pressing tool from a plastic mat is a brilliant example of creating a specialized jig for a manufacturing process—a concept you're likely very familiar with. Keep these ideas in your back pocket; we will revisit them when we begin working with your final silk fabrics.
Conclusion
You now have the complete workflow for creating precise, beautiful knife pleats. This process is a microcosm of garment construction: translating a design from a 2D pattern to a 3D form through accurate marking, careful manipulation, and skilled finishing.
Key Takeaways:
- Pleat creation starts with accurately transferring fold lines and placement lines from your pattern to your fabric.
- Choose your marking tool based on your fabric type. For delicate silks, thread tracing (tailor's tacks) is the professional standard.
- The core action is to fold the fabric along the fold line and bring it to meet the placement line, then pin it securely.
- Measure your pleats at multiple points to ensure consistent width for a clean, architectural look.
- Use a hot iron and an up-and-down pressing motion to set crisp creases. A vinegar-water solution can help on natural fibers.
- Staystitch the pleats along the raw edge to secure them for construction.
For your practical exercise this week, I encourage you to take a square of muslin or similar scrap cotton and practice making a small panel of knife pleats. Experiment with different pleat depths and see how it changes the look. This is your first construction prototype!
In our next lesson, we will address how to give these pleated panels the support they need to maintain their structure in a strapless bodice. We will explore the difference between interfacing and underlining and decide which is best for your design.