Hello! Welcome to the next lesson in our journey through APIs in React.
In our previous session, you learned how to fetch data from an API using a GET request and display it in your component. This covers the "Read" part of the common CRUD (Create, Read, Update, Delete) acronym.
Today, we're focusing on the "Create" and "Update" parts. You'll learn how to send data to an API using POST and PUT requests in response to user actions. This is what allows users to add new items, submit forms, or edit existing data in your application. We will see how to construct these requests and, crucially, where to trigger them in your code.
By the end of this lesson, you'll be able to build forms that create and update data on a server, a fundamental skill for any interactive web application.
Creating Data with POST Requests
When you want to create a new resource on a server, like a new blog post or a new user account, you use a POST request. You send the data for the new item in the body of the request, and the server is responsible for creating it and usually assigning it a unique ID.
To make a POST request with the fetch API, you need to provide a second argument: an options object that configures the request. It has three key properties:
method: You'll set this to'POST'.headers: This tells the server what kind of data you're sending. For JSON, you'll setContent-Typetoapplication/json.body: This is the actual data you're sending. Since HTTP can only transmit text, you must convert your JavaScript object into a JSON string usingJSON.stringify().
Let's watch a video that puts this all together.
Full React Tutorial #29 - Making a POST Request
This video from the Net Ninja demonstrates how to build and send a POST request using fetch from within a form's handleSubmit function.
Watch from the beginning to 02:24. Pay close attention to the three key properties being set in the fetch options object: method, headers, and body.
As you saw, the process is straightforward. Inside an event handler like handleSubmit, you construct the fetch call with the correct options.
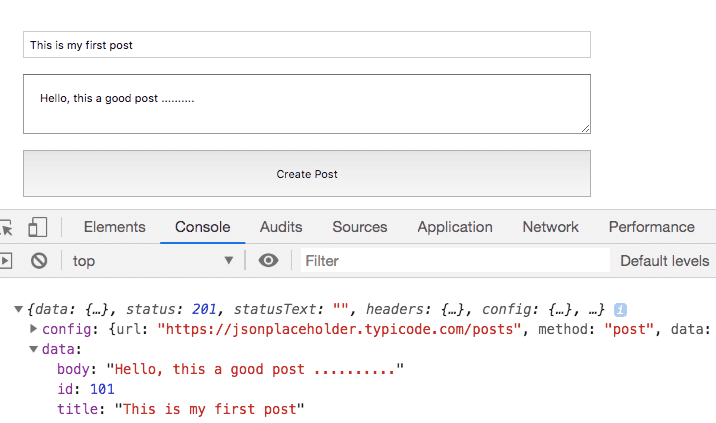
Providing User Feedback During a POST Request
Just like with GET requests, POST requests are asynchronous. They take time to complete. It's essential to give the user feedback. A common pattern is to disable the submit button and change its text to "Submitting..." or "Saving..." to prevent duplicate submissions and inform the user that something is happening.
This next clip from the same video shows exactly how to implement this using a loading state.
Full React Tutorial #29 - Making a POST Request
Let's continue with the Net Ninja video to see how to add a loading state to improve the user experience during a POST request.
Watch from 02:49 to 05:02. Notice how an isPending state variable is used to conditionally render the button's text and disabled attribute.
Updating Data with PUT Requests
While POST is for creating new resources, PUT is typically used for updating an existing resource. The key difference is that a PUT request targets a specific resource URL that includes the item's unique ID (e.g., /api/posts/42).
The flow for updating data usually involves these steps:
- Fetch the current data for an item and pre-populate a form with it.
- Allow the user to edit the values in the form. Each change updates the component's state.
- When the user submits the form, you send a
PUTrequest to the item's specific endpoint, with the updated data from your state in the request body.
The fetch options for a PUT request are almost identical to POST, you just change the method: method: 'PUT'.
The following video demonstrates this entire update process.
React tutorial for beginners #56 Update Data with API | Put Method
This tutorial by Code Step By Step shows how to handle a data update. It covers making form fields editable and then constructing a PUT request to save the changes.
Watch from 01:16 to 07:22. The video is broken into a few key parts: Making the form editable (01:16 - 03:57): See how onChange handlers are added to form inputs to update the component's state as the user types. Preparing the update function (03:57 - 05:27): An updateUser function is created and attached to the button's onClick event. Constructing the PUT request (05:27 - 07:22): This is the most important part. Notice how the userId is appended to the fetch URL and the method is set to PUT.
The Right Place for a Request: Event Handlers vs. useEffect
This is one of the most important concepts to get right. In previous lessons, we placed our GET requests inside a useEffect hook. Why don't we do the same for POST and PUT?
The rule is:
- Use
useEffectfor side effects that run because a component rendered. Fetching data when a component first mounts is a perfect example. The render causes the fetch. - Use event handlers (like
onSubmitoronClick) for side effects that run because the user did something. Submitting a form is a user action. The user's click causes thePOSTrequest.
Placing a POST request inside useEffect is an anti-pattern that can lead to bugs and confusing logic. You should call your data-sending function directly from the event handler.
How to use the useEffect hook in React: A complete guide
This article from the LogRocket blog provides an excellent, clear explanation of why you shouldn't use useEffect for handling user events. Please read the section that contrasts the wrong way with the right way.
Find and read the section titled "2. Handling user events". It presents a Form component example, first with an incorrect useEffect approach, and then with the correct event handler approach. Focus on understanding why the second approach is better.
A Note on fetch vs. axios
Throughout this course, we've used the browser's built-in fetch API. It's powerful and readily available. However, in many professional projects, you'll encounter a popular library called Axios.
Axios is a promise-based HTTP client that simplifies some aspects of making API requests. For POST requests, its main advantages are:
- Automatic JSON Transformation: It automatically converts your JavaScript data object to a JSON string and back. You don't need to call
JSON.stringify()on the body orresponse.json()on the result. - Better Error Handling:
fetchdoesn't consider HTTP errors like404or500to be promise rejections. Axios does, which can make error handling more straightforward.
You don't need to switch to Axios now, but it's good to be aware of it. The fundamental concepts of method, headers, and body remain the same.
Axios POST requests: Handling errors, authentication, and ...
This article provides a good comparison between fetch and Axios. Reading this small section will help you understand why another library for handling HTTP requests exists.
Read the section titled "Why use Axios?" to see a direct comparison of the code required for a POST request using fetch versus Axios.
Conclusion
Great job! You've now covered the "Create" and "Update" operations, giving you the power to build fully interactive applications where users can not only view data but also contribute and modify it.
Key Takeaways:
- Use a
POSTrequest to create a new resource on a server. - Use a
PUTrequest to update an existing resource at a specific URL. - The
fetchoptions object for these requests requiresmethod,headers(like'Content-Type': 'application/json'), and abodywith stringified JSON data. - Crucially,
POSTandPUTrequests should be triggered from event handlers (onSubmit,onClick), not from theuseEffecthook. - Always provide user feedback, such as a loading state, during asynchronous write operations.
Next Up:
You may have noticed that the logic for fetching, creating, and updating data can get repetitive. In our next lesson, we will explore a powerful React pattern to solve this: we will refactor our data-fetching logic into a reusable custom hook. This will make our components cleaner, more declarative, and easier to maintain.