Hello! Let's dive into our next topic.
In the previous lesson, we saw how to use the useNavigate hook to programmatically redirect users after an event, like submitting a form. We also learned how to pass information using the location.state object. These skills are the building blocks for one of the most essential features in any web application: authentication and protected routes.
Today, you'll learn how to create a protected route component to restrict access for unauthenticated users. We'll build a component that acts as a guard, checking if a user is logged in before allowing them to see a specific page. If they aren't, we'll redirect them to a login page, and—crucially—we'll remember where they were trying to go so we can send them back there after they log in.
1. The Logic of a Protected Route
At its core, protecting a route is about making a decision. When a user requests a page, our application needs to answer a few questions:
- Is this route private?
- If so, is the user logged in?
- If they are logged in, show them the page.
- If they are not logged in, redirect them to the login page.
This flow is universal for almost any application with a login system.
This flowchart provides a great visual overview of the entire process, including the "redirect back" logic we'll implement.

To implement this, we need two key things:
- A way to manage and share the user's authentication status across our entire app.
- A special "wrapper" component that contains the logic from the flowchart.
2. Managing Authentication State with Context
A user's login status is a piece of global state. Multiple components might need to know if the user is logged in: the navbar (to show "Login" or "Logout"), the profile page, and of course, our protected route component.
Passing this state down through props would be cumbersome (a problem known as "prop drilling"). A much better solution is React's Context API, which allows you to share state across the component tree without passing props down manually at every level.
We will create an AuthContext to provide the user's status and login/logout functions to any component that needs them.
The following video provides an excellent, step-by-step guide to setting up an authentication context.
React Router Tutorial - 15 - Authentication and Protected Routes
Let's watch a segment from Codevolution's "React Router Tutorial - 15 - Authentication and Protected Routes". This part focuses on creating a simple but effective system for managing user authentication state using React's useState and Context API.
Watch from 03:04 to 06:29. As you watch, focus on: The creation of the AuthContext using createContext. The AuthProvider component that holds the user state and the login/logout functions. The creation of the useAuth custom hook, which simplifies accessing the context's value.
To summarize the video, you would create a file like src/context/AuthContext.jsx:
// src/context/AuthContext.jsx
import { useState, createContext, useContext } from 'react';

const AuthContext = createContext(null);

export function AuthProvider({ children }) {
  const [user, setUser] = useState(null); // `null` means logged out

  const login = (username) => {
    setUser(username);
  };

  const logout = () => {
    setUser(null);
  };

  // The value provided to the context consumers
  const value = { user, login, logout };

  return <AuthContext.Provider value={value}>{children}</AuthContext.Provider>;
}

// Custom hook to use the auth context
export function useAuth() {
  return useContext(AuthContext);
}
Then, you would wrap your entire application in App.js or main.jsx with the AuthProvider to make the context available everywhere:
// In main.jsx or App.js
import { AuthProvider } from './context/AuthContext';

//...
<AuthProvider>
  <App />
</AuthProvider>
//...
3. Creating the ProtectedRoute Component
Now for the main event. We'll create a component that acts as our guard. In React Router v6, the cleanest way to do this is by using the <Outlet> component, which you've already seen in our lesson on nested routes.
Our ProtectedRoute component will do the following:
- Use our
useAuthhook to check if a user is logged in. - If they are, it will render an
<Outlet />, which represents any nested child routes. - If they are not, it will use the
<Navigate />component to redirect them to the login page.
This image shows the core idea perfectly. If a token (our user state) exists, render <Outlet />; otherwise, render <Navigate />.
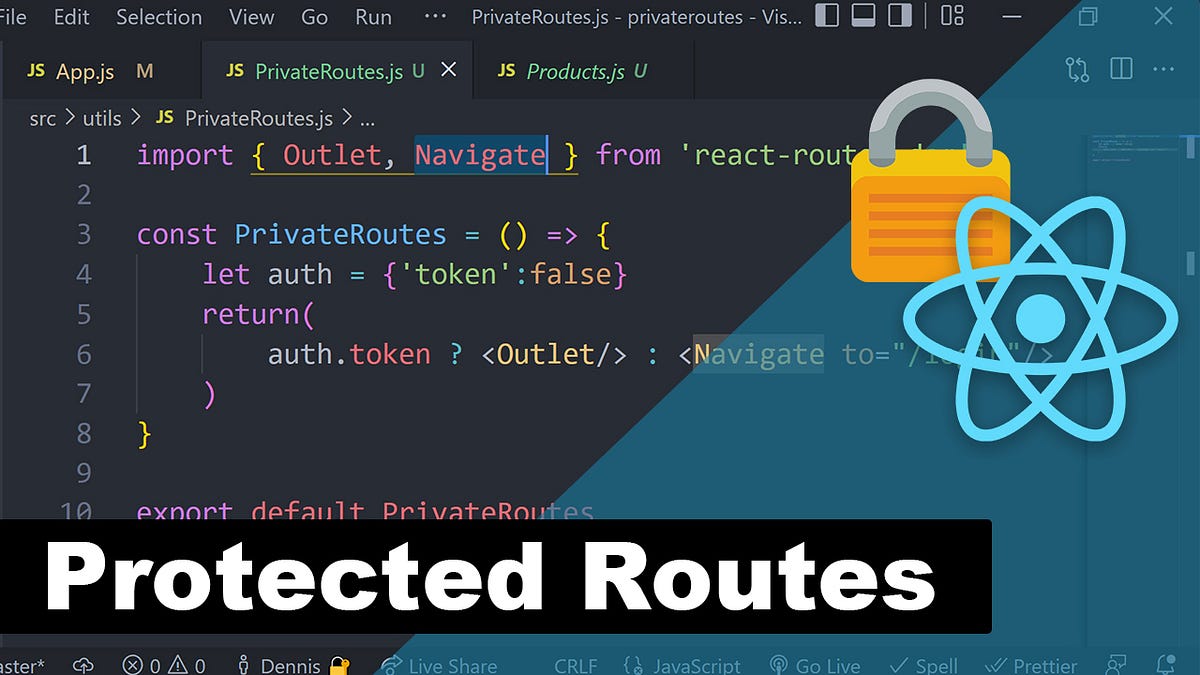
Let's create this component.
// src/components/ProtectedRoute.jsx
import { Navigate, Outlet, useLocation } from 'react-router-dom';
import { useAuth } from '../context/AuthContext';

function ProtectedRoute() {
  const { user } = useAuth();
  const location = useLocation();

  if (!user) {
    // Redirect them to the /login page, but save the current location they were
    // trying to go to. This allows us to send them along to that page after they
    // log in, which is a nicer user experience than dropping them off on the home page.
    return <Navigate to="/login" state={{ from: location }} replace />;
  }

  return <Outlet />;
}

export default ProtectedRoute;
Let's break down two important parts of that <Navigate> component:
state={{ from: location }}: This is where we use the concept from our last lesson! We're passing the currentlocationobject (which contains the path the user was trying to visit, e.g.,/profile) through thestateprop. The login page will be able to access this.replace: This tells React Router to replace the current entry in the history stack. This is crucial. When the user is redirected to the login page, we don't want them to be able to click the browser's "back" button and end up on the protected page they were just kicked out of.
4. Configuring the Routes
With our AuthProvider and ProtectedRoute components ready, we can now configure our routes in App.js. The structure is very intuitive: we create a parent <Route> that uses our ProtectedRoute as its element, and then nest the actual protected routes inside it.
// src/App.js
import { Routes, Route } from 'react-router-dom';
import HomePage from './pages/HomePage';
import LoginPage from './pages/LoginPage';
import ProfilePage from './pages/ProfilePage'; // A dummy protected page
import ProtectedRoute from './components/ProtectedRoute';

function App() {
  return (
    <Routes>
      {/* Public Routes */}
      <Route path="/" element={<HomePage />} />
      <Route path="/login" element={<LoginPage />} />

      {/* Protected Routes */}
      <Route element={<ProtectedRoute />}>
        <Route path="/profile" element={<ProfilePage />} />
        {/* You can add more protected routes here */}
        {/* <Route path="/dashboard" element={<DashboardPage />} /> */}
      </Route>
    </Routes>
  );
}

export default App;
This setup is clean and scalable. Any route nested inside the ProtectedRoute element will automatically be guarded.
5. Completing the Loop: The Login Page
The final piece of the puzzle is the LoginPage. It needs to do two things:
- Call the
loginfunction from ourAuthContexton successful authentication. - Navigate the user to their intended destination (
location.state.from) or to the homepage as a fallback.
The next video demonstrates exactly how to implement the login page logic and the "redirect back" feature.
React Router Tutorial - 15 - Authentication and Protected Routes
Let's return to the Codevolution video. This final segment demonstrates how to tie everything together by building the login page and, most importantly, redirecting the user back to the page they originally wanted to visit.
Watch from 06:29 to 08:48 and then from 15:31 to 17:38. These sections cover: Creating a simple login form. Using the useNavigate and useLocation hooks in the login component. Checking for location.state.from to determine the redirect path. Using the replace option on navigation to improve browser history behavior.
Here's what the code for a LoginPage.jsx would look like, based on the principles in the video:
// src/pages/LoginPage.jsx
import { useState } from 'react';
import { useNavigate, useLocation } from 'react-router-dom';
import { useAuth } from '../context/AuthContext';

function LoginPage() {
  const [username, setUsername] = useState('');
  const navigate = useNavigate();
  const location = useLocation();
  const { login } = useAuth();

  // Get the path to redirect to from location state, or default to homepage
  const from = location.state?.from?.pathname || '/';

  const handleSubmit = (event) => {
    event.preventDefault();
    // In a real app, you'd have validation and an API call here
    if (username) {
      login(username);
      // Send them back to the page they tried to visit before being redirected
      navigate(from, { replace: true });
    }
  };

  return (
    <div>
      <h1>Login</h1>
      <form onSubmit={handleSubmit}>
        <label>
          Username:
          <input
            type="text"
            value={username}
            onChange={(e) => setUsername(e.target.value)}
            required
          />
        </label>
        <button type="submit">Login</button>
      </form>
    </div>
  );
}

export default LoginPage;
Now, if a user tries to go to /profile, they'll be sent to /login. After they enter a username and click "Login", they'll be seamlessly redirected to /profile.
Conclusion
You have just implemented one of the most fundamental patterns in modern web development. By creating a reusable protected route component, you can easily secure parts of your application and provide a smooth, professional user experience.
Key Takeaways:
- Protected Routes are wrapper components that guard access to their children based on a condition, like authentication.
- React Context is the ideal tool for managing global state like a user's authentication status. A custom
useAuthhook makes it easy to consume this context. - The modern pattern in React Router v6 uses a parent
<Route>with the protected component as itselement, which then renders an<Outlet />for authenticated users. - The
<Navigate />component is a declarative way to redirect unauthenticated users. - To create a good user experience, use
useLocationand thestateprop on<Navigate>to remember the user's intended destination and redirect them there after they log in.
Next Up:
Our login function is currently just a simulation. In a real-world application, logging in involves making a network request to a backend server to verify credentials. In the next module, we will explore how to work with APIs in React, fetching data and managing loading/error states. This will allow you to replace our simulated authentication with a real one.