Hello! Welcome to the final lesson in our module on advanced state management.
In the last few lessons, you mastered two powerful React hooks. First, you learned to use the useContext hook to provide data to any component in your application without passing props down manually through every level—a perfect solution for the "prop drilling" problem. Then, you learned to use the useReducer hook to manage complex state logic in a predictable and centralized way, separating the "what happened" from the "how it's done."
So, what's next? What happens when you have complex state that also needs to be accessed by many different components across your app? This is a very common scenario in real-world applications. Today, we'll connect these two concepts. You will learn how to combine useContext and useReducer to create a robust, scalable global state management solution right within React, without needing external libraries.
Why Combine useReducer and useContext?
You might be thinking: why not just put a complex state object from useState into a Context? You could, but it has a significant drawback. When you pass both the state and the state updater function (setState) in the context value, any component that consumes this context will re-render whenever the state changes, even if that component only needs the updater function.
By combining useReducer and useContext, we get the best of both worlds:
- Centralized Logic (
useReducer): All state transitions are handled by a single, predictable reducer function. - Global Access (
useContext): The state and thedispatchfunction can be accessed from anywhere in the component tree without prop drilling.
This combination forms the basis of many powerful state management patterns in modern React.
The Basic Pattern: A Global Counter
Let's start by seeing how to combine these hooks at a fundamental level. We'll take a simple useReducer implementation and make its state globally available using Context.
The steps are:
- Create State Logic: Set up
useReducerin a top-level component (likeApp.js). - Create Context: Use
React.createContext()to create a context object. - Provide Context: Wrap your component tree with the
Context.Providerand pass thestateanddispatchfunction fromuseReduceras its value. - Consume Context: In any nested component, use the
useContexthook to access the sharedstateanddispatchfunction.
This video from Codevolution provides a clear, step-by-step demonstration of this exact process.
React Hooks Tutorial - 22 - useReducer with useContext
This video, 'useReducer with useContext', demonstrates the core concept of combining these two hooks to manage a global state.
Please watch from the beginning to 10:52. Pay close attention to how the four steps I listed above are implemented: The Problem (0:00 - 3:21): Understand the goal of sharing a single counter state between deeply nested components. useReducer Setup (3:39 - 5:45): See how the reducer and initial state are defined in the main App component. Providing Context (5:45 - 7:10): Notice how createContext is used and how the <CountContext.Provider> wraps the application, passing an object with the count and dispatch as the value. Consuming Context (7:10 - 10:52): Observe how the nested components use useContext to grab the global state and dispatch actions.
After watching, you should see the core mechanism clearly: useReducer creates the state and the means to change it (dispatch), and Context acts as the delivery system to get them where they need to go.
A Scalable Solution: The Provider Pattern
The approach in the video works perfectly, but for larger applications, we can organize our code more cleanly. Instead of cluttering our main App component with state logic and context providers, we can encapsulate all of it into a single, reusable Provider component.
This pattern involves:
- Creating a dedicated file (e.g.,
TasksContext.js) for all the wiring. - Moving the reducer logic into this file.
- Creating a custom Provider component (e.g.,
TasksProvider) that contains theuseReducerhook and wraps itschildrenwith the context providers. - Creating custom hooks (e.g.,
useTasks,useTasksDispatch) that wrapuseContextto make consuming the state and dispatch function more explicit and easier.
The official React documentation explains this powerful pattern.
Scaling Up with Reducer and Context - React
This article, 'Scaling Up with Reducer and Context', from the React team, is the definitive guide to this pattern. We'll focus on the section that refactors our basic implementation into a clean, reusable provider.
Please read the section titled 'Moving all wiring into a single file'. Focus on how it creates a TasksProvider component to bundle the logic and useTasks() / useTasksDispatch() custom hooks to provide clean access to the context values. This is a crucial pattern for building maintainable React apps.
This "Provider Pattern" is a cornerstone of modern React development. It keeps your application components clean and focused on presentation, while the state management logic is neatly organized and abstracted away.
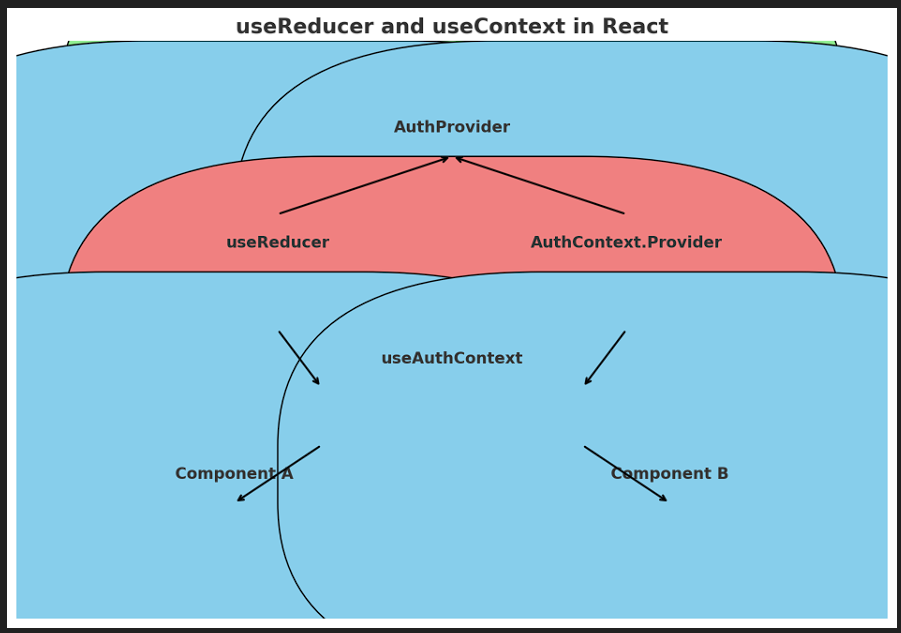
Here's a diagram that illustrates the concept. Imagine AuthProvider is our TasksProvider. It uses useReducer internally and provides the resulting state and dispatch function to any child component via context.
Putting It All Together: A Shopping Cart Example
Now let's see this pattern applied to a more realistic and complex example. We'll walk through building a simple shopping cart feature. This will solidify your understanding of how to structure the files and connect all the pieces.
This example will have:
- A state object with a
totalprice and an array ofproducts. - A reducer with actions like
ADD_TO_CART,REMOVE_FROM_CART, andUPDATE_PRICE. - A
ShopProvidercomponent that encapsulates all the logic. - A custom
useShophook to access the cart's state and actions.
useContext with useReducer React Hooks Crash Course
This video from DesignCode, 'useContext with useReducer', walks through building a shopping cart and is a perfect real-world implementation of the Provider Pattern.
Please watch from 01:26 to 19:34. This is a detailed walkthrough, so focus on the structure and patterns: File Structure (01:26 - 04:17): Note the creation of shopContext.js and shopReducer.js to separate concerns. Reducer Logic (04:17 - 07:30): See how the shopReducer is built with a switch statement for different actions. The Provider Component (07:30 - 13:48): This is the most important part. Watch how ShopProvider is created. It calls useReducer, defines functions like addToCart that dispatch actions, and provides the state and these functions through the context's value prop. It also creates the custom useShop hook at the end. Consuming the Context (13:48 - 19:34): Finally, see how clean it is to use the useShop() hook in the ProductCard and Cart components to get the global state and dispatch actions.
Conclusion
Congratulations! You have now combined two of React's most powerful hooks to create a scalable and maintainable state management solution. This pattern allows you to handle complex, shared state without relying on external libraries like Redux, giving you more control and a deeper understanding of React's inner workings.
Key Takeaways:
- Combining
useReduceranduseContextgives you centralized state logic and global accessibility without prop drilling. - The Provider Pattern is the standard for implementing this. It involves:
- Creating a reducer function for your state logic.
- Creating a custom
Providercomponent (e.g.,ShopProvider) that callsuseReducerand passes thestateanddispatchfunctions via aContext.Provider. - Wrapping your application or relevant component tree with this custom
Provider. - Creating custom hooks (e.g.,
useShop) to provide easy and clean access to the context's values in any child component.
Next Up:
We've concluded our deep dive into React's state management capabilities. You now have the tools to manage everything from simple component state (useState) to complex global state. In the next module, we will shift our focus from application logic and data to visual presentation. You will learn about different styling strategies in React and get hands-on experience with one of the most popular modern CSS frameworks: Tailwind CSS.