Hello! Welcome back.
In our last lesson, we learned how to identify repetitive, stateful logic that is ripe for extraction. We saw that when multiple components use the same combination of useState and useEffect, it's a strong signal that we can clean up our code.
Today, we'll take the next logical step. Now that we know what to extract, we'll learn how to create the basic structure for this reusable logic.
By the end of this lesson, you will be able to create a custom hook following the 'use' naming convention. This is a fundamental rule in React that enables much of the magic that makes custom hooks work.
From Logic to Hook: The Basic Structure
Let's revisit the flowchart from our previous lesson. We've already covered the first step, "Identify the Logic to Extract". Now, we'll focus on the next two: "Create a New File" and "Define the Hook Function".
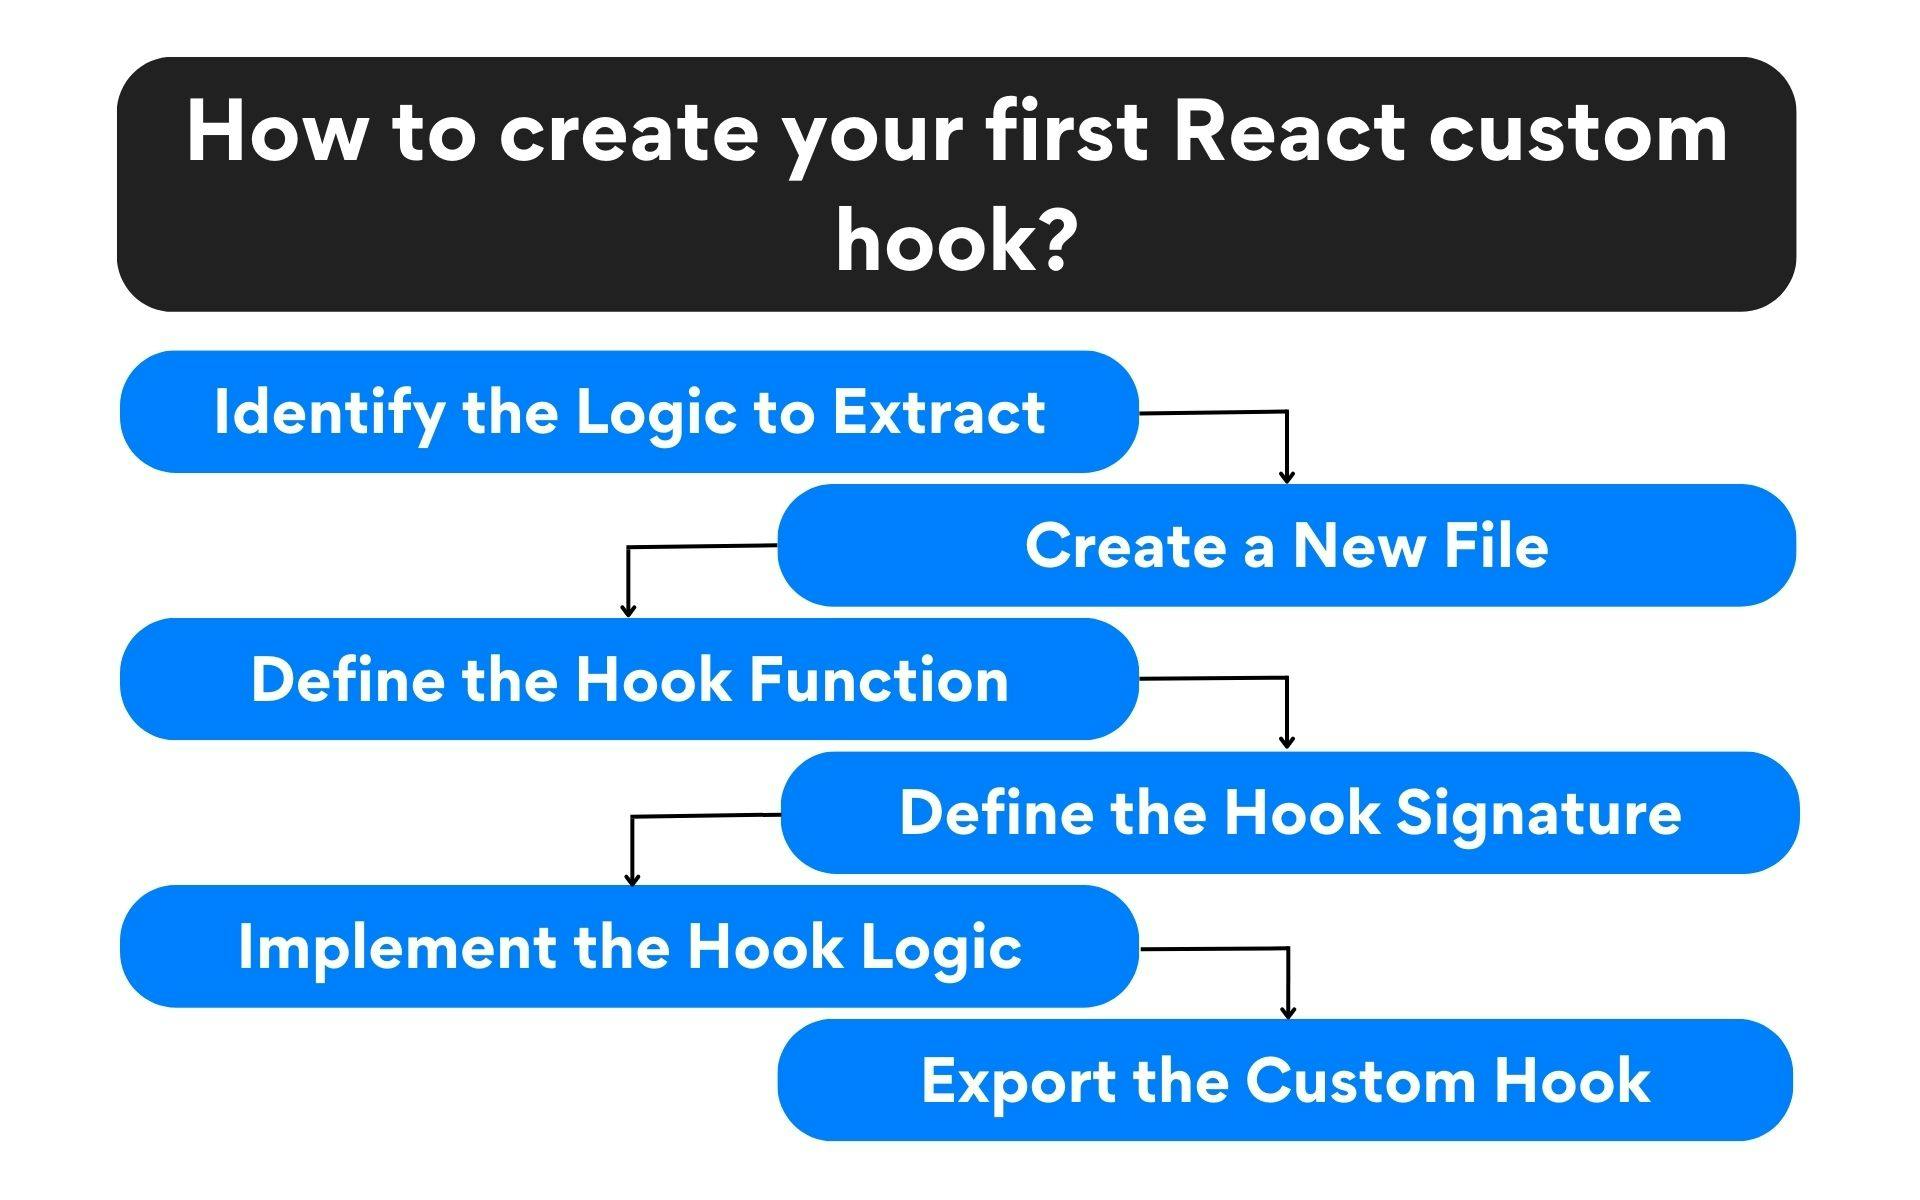
At its core, a custom hook is a special JavaScript function. What makes it special are two key rules:
- Its name must start with the word
use. - It can call other hooks inside of it (like
useState,useEffect, etc.).
Let's start with a video that demonstrates the creation of a very simple custom hook.
Custom Hooks in React (Design Patterns)
This clip from Cosden Solutions walks through building a basic useCounter hook. Pay close attention to how it's just a function that uses useState inside it.
Watch the section from 02:49 to 04:15. Notice the function definition, the use of camelCase, and the fact that it doesn't return any JSX.
As you saw, a custom hook is not a component. It doesn't render a UI. Instead, it's designed to encapsulate and provide stateful logic that a component can then use.
The 'use' Prefix: A Critical Convention
You might be wondering why the use prefix is so important. Is it just a stylistic choice? The answer is no—it's a rule that React's tooling depends on.
The official React documentation explains this perfectly.
Reusing Logic with Custom Hooks
Let's read the section on naming conventions from the official React documentation. This will clarify why the 'use' prefix is a strict requirement.
Please read the section titled Hook names always start with use. Focus on the two main reasons for this convention.
To summarize the key points from the documentation:
- It signals to developers: When you see a function call like
useOnlineStatus(), you immediately know it might contain stateful logic and must follow the Rules of Hooks. A call togetOnlineStatus()would not carry the same meaning. - It enables the linter: React's ESLint plugin (
eslint-plugin-react-hooks) uses this naming convention to find violations of the Rules of Hooks. If you name your hookgetOnlineStatusand try to calluseStateinside it, the linter will report an error. If you rename it touseOnlineStatus, the linter understands it's a hook and allows it.
This short video reinforces the point about the linter and error-checking.
Learn Custom Hooks In 10 Minutes
The channel Web Dev Simplified provides a very concise explanation of why this convention is so important for React's tooling.
Watch from 01:06 to 01:27. The presenter highlights how the use prefix enables React's linting and error-checking rules.
Building the Hook File
Now let's put this into practice. The standard way to organize a custom hook is to place it in its own file, just like you would with a component.
- Create a new file: The filename should match the hook's name (e.g.,
useCounter.jsoruseFetchData.js). - Define the function: Write a standard JavaScript function, ensuring its name starts with
useand is written in camelCase. - Export the function: Use
export defaultso it can be imported and used in any component.
Here is the basic template:
// In a new file, e.g., 'useMyHook.js'
import { useState, useEffect } from 'react';

function useMyHook(someParameter) {
  // 1. You can call other hooks here.
  const [data, setData] = useState(null);

  // 2. You can use effects here.
  useEffect(() => {
    // ... some logic
  }, []);

  // 3. You return data, functions, or objects that your
  //    components will use. (More on this in the next lesson!)
  return data;
}

// 4. Export the hook to make it available.
export default useMyHook;
This article provides a few more clear examples of this structure.
Crafting Clear Code with React Hooks Naming Convention
This article from DhiWise reinforces the naming convention with several practical examples. It's a good summary of what we've discussed.
Read the sections 'Principles Behind Naming Custom Hooks' and 'Prefixing with use: The React Convention'. Notice the structure of the useFetchData and useInput hooks.
Your Turn: Create a useCounter Hook
Let's apply what you've learned. Below is a Counter component. Its logic for incrementing a number every second is a perfect candidate for extraction.
Your task is to create a custom hook named useCounter that contains this logic.
Starting Code:
// App.js
import { useState, useEffect } from 'react';

export default function Counter() {
  const [count, setCount] = useState(0);

  useEffect(() => {
    const id = setInterval(() => {
      setCount(c => c + 1);
    }, 1000);
    return () => clearInterval(id);
  }, []);

  return <h1>Seconds passed: {count}</h1>;
}
Instructions:
- Create a new file named
useCounter.js. - Inside
useCounter.js, create and export a function nameduseCounter. - Move the
useStateanduseEffectlogic from theCountercomponent into youruseCounterhook. - Your
useCounterhook should return thecountstate variable. - Update the
Countercomponent inApp.jsto import and use your newuseCounterhook. The body of the component should be just two lines:const count = useCounter(); return <h1>Seconds passed: {count}</h1>;
This is the first challenge from the React documentation article we looked at earlier. You can find an interactive CodeSandbox to try this in by navigating to "Challenge 1 of 5: Extract a useCounter Hook" in the article "Reusing Logic with Custom Hooks" (ID: [LINK](https://react.dev/learn/reusing-logic-with-custom-hooks)).
This exercise is a great first step, as it covers creating the hook, naming it correctly, and even gives a small preview of how a hook provides data back to the component.
Conclusion
Great work! You've now learned the foundational syntax and conventions for creating your own custom hooks. This is a huge step toward writing cleaner, more modular, and more professional React code.
Key Takeaways:
- A custom hook is a JavaScript function whose name starts with
use(e.g.,useCounter). - This naming convention is a strict rule that allows React's tools to automatically check for errors.
- Custom hooks can call other built-in hooks like
useStateanduseEffectinside them. - The standard practice is to define each custom hook in its own file (e.g.,
useCounter.js) and export it for use in other components.
Next Up:
We've successfully created the structure of a custom hook and followed the naming rules. But a hook isn't very useful if it can't provide data or functions back to the component that's using it. In our next lesson, we will focus on exactly that: returning values and functions from a custom hook and how components consume them. We'll explore different return patterns, like returning a single value, an array, or an object.