Hello and welcome back!
In our last lesson, you built a standalone desktop flow, mastering the art of automating UI-based tasks. This is a powerful skill for tackling legacy systems. However, the true power of RPA is realized when it's integrated into your broader, cloud-native business processes.
Today, we will connect the cloud to the desktop. Our goal is to integrate a desktop flow with a cloud flow, passing input and output parameters. You will learn how to trigger your UI automations from a cloud flow, provide them with dynamic data, and receive their results back in the cloud for further processing.
For you, this is like taking a self-contained C# console application and exposing it as a callable service within a larger distributed system. The cloud flow acts as the orchestrator, and the desktop flow becomes a specialized worker, ready to perform its task on command.
1. The Bridge: Input and Output Variables
The connection between a cloud flow and a desktop flow is built on a simple, powerful concept: input and output variables.
- Input Variables: These are parameters that a desktop flow is designed to accept. The cloud flow provides values for these variables when it calls the desktop flow.
- Output Variables: These are variables that a desktop flow exposes to return data. Once the desktop flow finishes its run, these values become available as dynamic content in the calling cloud flow.
This diagram illustrates the process perfectly:
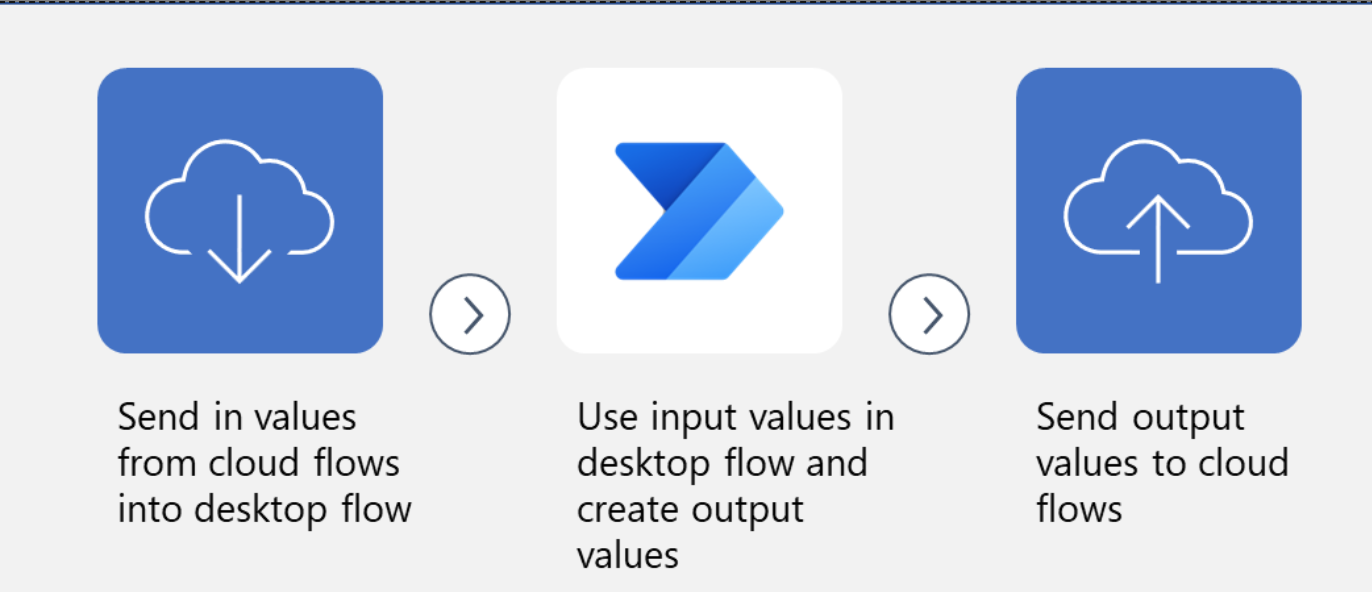
A key detail for a developer like yourself is that Power Automate for Desktop distinguishes between a variable's internal name (used within the desktop flow logic) and its external name (the "public" name exposed to the cloud flow). This is similar to the concept of public vs. private members in a class.
2. Step 1: Preparing Your Desktop Flow for Integration
Before a cloud flow can communicate with your desktop flow, you must explicitly define its inputs and outputs. Let's walk through how to modify a desktop flow to include these variables.
Use Input & Output Variables in Power Automate Desktop Like a Pro!
This video by Veronique Lengelle provides a clear, step-by-step guide on creating input and output variables. We'll start by defining the input variable that will receive data from the cloud.
Watch from 02:42 to 04:25. Focus on how to: Access the input/output variables pane. Create a new input variable. Define its data type, internal Variable name, and External name.
Now that your desktop flow can accept data, let's define what it will send back.
Use Input & Output Variables in Power Automate Desktop Like a Pro!
Next, let's create the output variable. A crucial step here is not just defining the variable, but also assigning a value to it during the flow's execution.
Continue watching from 04:40 to 06:57. Observe the process for: Creating a new output variable and defining its properties. Using the Set variable action to populate the output variable with a value generated during the flow (in this case, a random number). This is the critical step that makes the data available to the cloud flow.
Your desktop flow is now ready for integration. It has a defined contract—it accepts certain inputs and promises to return certain outputs.
3. A Quick Prerequisite: Machine Connections
To allow a cloud flow to run a desktop flow, a secure connection must be established to the machine where the automation will run. This involves installing the on-premises data gateway and the Power Automate Desktop application on the target machine, and then registering that machine in your Power Platform environment.
You may have already configured this, but if you need a refresher on the setup process, the first part of this video from Anders Jensen provides an excellent walkthrough.
Run Desktop Flows From Power Automate Cloud
This video details the one-time setup required to connect your machine to the Power Automate cloud service. This is a foundational step for any cloud-to-desktop integration.
If you haven't yet registered your machine, watch from the beginning to 05:48. This covers installing the machine runtime and registering it with your Power Platform environment. This step is only necessary once per machine.
4. Step 2: Orchestrating with a Cloud Flow
With the desktop flow prepared and the machine connected, you can now build the cloud flow to act as the orchestrator.
The central piece of this integration is the "Run a flow built with Power Automate for desktop" action.
Use Input & Output Variables in Power Automate Desktop Like a Pro!
Let's return to Veronique Lengelle's tutorial to see how to configure the cloud flow to call the desktop flow we just prepared.
Watch from 08:18 to 12:16. This will show you the end-to-end process: Adding the desktop flow action to your cloud flow. Selecting the Run Mode (Attended vs. Unattended). Attended mode requires a user to be signed in, while Unattended can run in the background on a server (this requires additional licensing). Mapping Inputs: Notice how the external name of your input variable (my player name in the video) appears as a parameter in the action. You pass data into it using dynamic content from previous steps. Using Outputs: See how the external name of the output variable (Var out random number) becomes available in the dynamic content picker for all subsequent actions, allowing you to use the result in conditions, emails, or Dataverse updates. Finally, the video shows a complete test run, demonstrating the data passing from the cloud, to the desktop, and back again.
The official Microsoft documentation also provides a step-by-step guide, which is a useful reference for your certification preparation.
Create a cloud flow to call the desktop flow
For a formal, text-based reference, review the following guide from Microsoft Learn. It reinforces the steps you just saw in the video.
Read through steps 18 to 23 and the 'Test the flow' section. These steps explicitly detail how to add the action, select the run mode, and map the input parameters using dynamic content.
Test your understanding!
You've created a desktop flow to look up customer details in a legacy application.
- The input variable in PAD has an internal name
customerID_internaland an external nameCustomerID. - The output variable has an internal name
customerName_internaland an external nameCustomerName.
In your cloud flow, you have an action "Run a flow built with Power Automate for desktop".
- Which variable name will you see as a parameter field in this action?
- After the action runs, which variable name will you search for in the dynamic content pane to get the customer's name?
Show answer
- You will see the external name,
CustomerID, as the input parameter field in the cloud flow action. - You will search for the external name,
CustomerName, in the dynamic content pane to use the output from the desktop flow.
The internal names (customerID_internal, customerName_internal) are only visible and used within the Power Automate Desktop editor.
5. Real-World Application: A Deeper Dive
The examples so far have used simple text and number variables. However, you can pass more complex data. In many enterprise scenarios, you might pass a JSON object as a string, or receive a JSON array of results from the desktop flow.
The following lab guide from Microsoft provides a more advanced, practical application of these concepts.
Use Desktop Flow from Cloud Flow
This lab guide demonstrates a more complex integration within a construction funding solution. It's a great example of how these concepts apply in a real-world business process.
Skim through the sections 'Task #2: Create child flow' (from Exercise #2) and 'Task #1: Create child flow' (from Exercise #3). You don't need to build the entire solution, but focus on observing the patterns: Passing Multiple Inputs: In the 'Run a flow built with...' action, notice how multiple parameters like LoanNumber, RequestedAmount, and RiskScore are passed to the desktop flow from dynamic content. Handling Complex Outputs: In the first task, the desktop flow returns SitePhotos as a JSON string. The cloud flow then uses the Parse JSON action to convert this string into a usable object, allowing it to loop through the results (Apply to each image) and create Dataverse records for each photo. Conditional Logic: In the second task, the cloud flow uses the FundingStatus output from the desktop flow in a Condition action to decide whether to update a Dataverse row as 'Approved' or 'Denied'.
These patterns—passing multiple inputs, parsing JSON outputs, and driving conditional logic—are fundamental to building robust, enterprise-grade RPA solutions.
Conclusion
You have successfully bridged the gap between cloud and desktop automation. By orchestrating desktop flows from the cloud, you can now embed UI automation into any event-driven, API-based process within your Power Platform solutions.
Key Takeaways:
- Orchestration: Cloud flows trigger and manage the execution of desktop flows.
- Data Contract: Input and output variables form the data contract between the cloud and the desktop, using their external names.
- The "Run a flow built with..." Action: This is the key component in a cloud flow that calls, passes data to, and receives data from a desktop flow.
- Machine Connection: A secure connection to a registered machine is a prerequisite for execution.
- Advanced Patterns: You can handle complex data structures like JSON and use desktop flow outputs to drive conditional logic in your cloud flow.
What's Next?
You now have a solid grasp of automation with Power Automate, both in the cloud and on the desktop. But Power Automate isn't the only automation service in the Microsoft ecosystem. For large-scale, developer-centric orchestrations, Azure Logic Apps is often used.
In our next lesson, we will compare these two powerful services. You will learn to describe the differences in triggers, actions, and licensing between Power Automate and Azure Logic Apps, enabling you to make informed architectural decisions about which tool to use for a given integration scenario.