Introduction
In our last lesson, we explored the frequency spectrum, learning how the full range of audible sound is organized and perceived. You now understand the concepts of amplitude (loudness) and frequency (pitch), which are the fundamental physical properties of sound waves. The next logical step is to understand how we capture these waves and store them for manipulation in a studio environment.
This lesson directly addresses the learning outcome of distinguishing between analog and digital audio signals. We will investigate the two fundamental ways sound is represented in audio technology. You will learn what defines an analog signal, how a digital signal is created from it, and the crucial trade-offs between these two formats. Understanding this distinction is one of the most essential pillars of audio engineering, as it forms the basis for every decision you will make in a recording studio.
The Analog World: A Continuous Representation
At its core, an audio recording is a representation of a sound wave. An analog signal creates this representation by generating an electrical voltage that is a direct analogy of the sound wave's pressure variations. Think of a microphone's diaphragm vibrating in response to a singer's voice; it converts those continuous pressure changes into a continuously varying electrical current.
The key word here is continuous. An analog waveform has no breaks or jumps. It is a smooth, unbroken line that mirrors the original acoustic wave's shape over time.
This first reading from MasteringBOX provides an excellent explanation of what an analog audio signal is, its core characteristics, and the inherent advantages and disadvantages of the format.
How Do Audio Signals Work in Analog and Digital Audio
Please read the first major section of the article, "Analog Audio Signals".
Start by reading the introduction to get an overview. Then, focus on the section Analog Audio Signals, which explains how transducers like microphones work and defines the characteristics of an analog waveform. Finally, read the summary of the pros and cons to understand why analog is both cherished for its "warmth" and challenged by its imperfections like noise and degradation.
As you read, the central idea to grasp is that analog technology—whether on magnetic tape or a vinyl record—stores a physical imprint of the sound wave. This direct physical relationship is responsible for both its praised "natural" quality and its susceptibility to noise, wear, and tear.
The Digital World: A Discrete Representation
While analog signals are continuous, computers and modern digital devices cannot work with infinitely variable information. They operate on the basis of discrete, countable data: ones and zeros. Therefore, to bring audio into a computer, we must convert the continuous analog wave into a format the computer can understand. This is a digital audio signal.
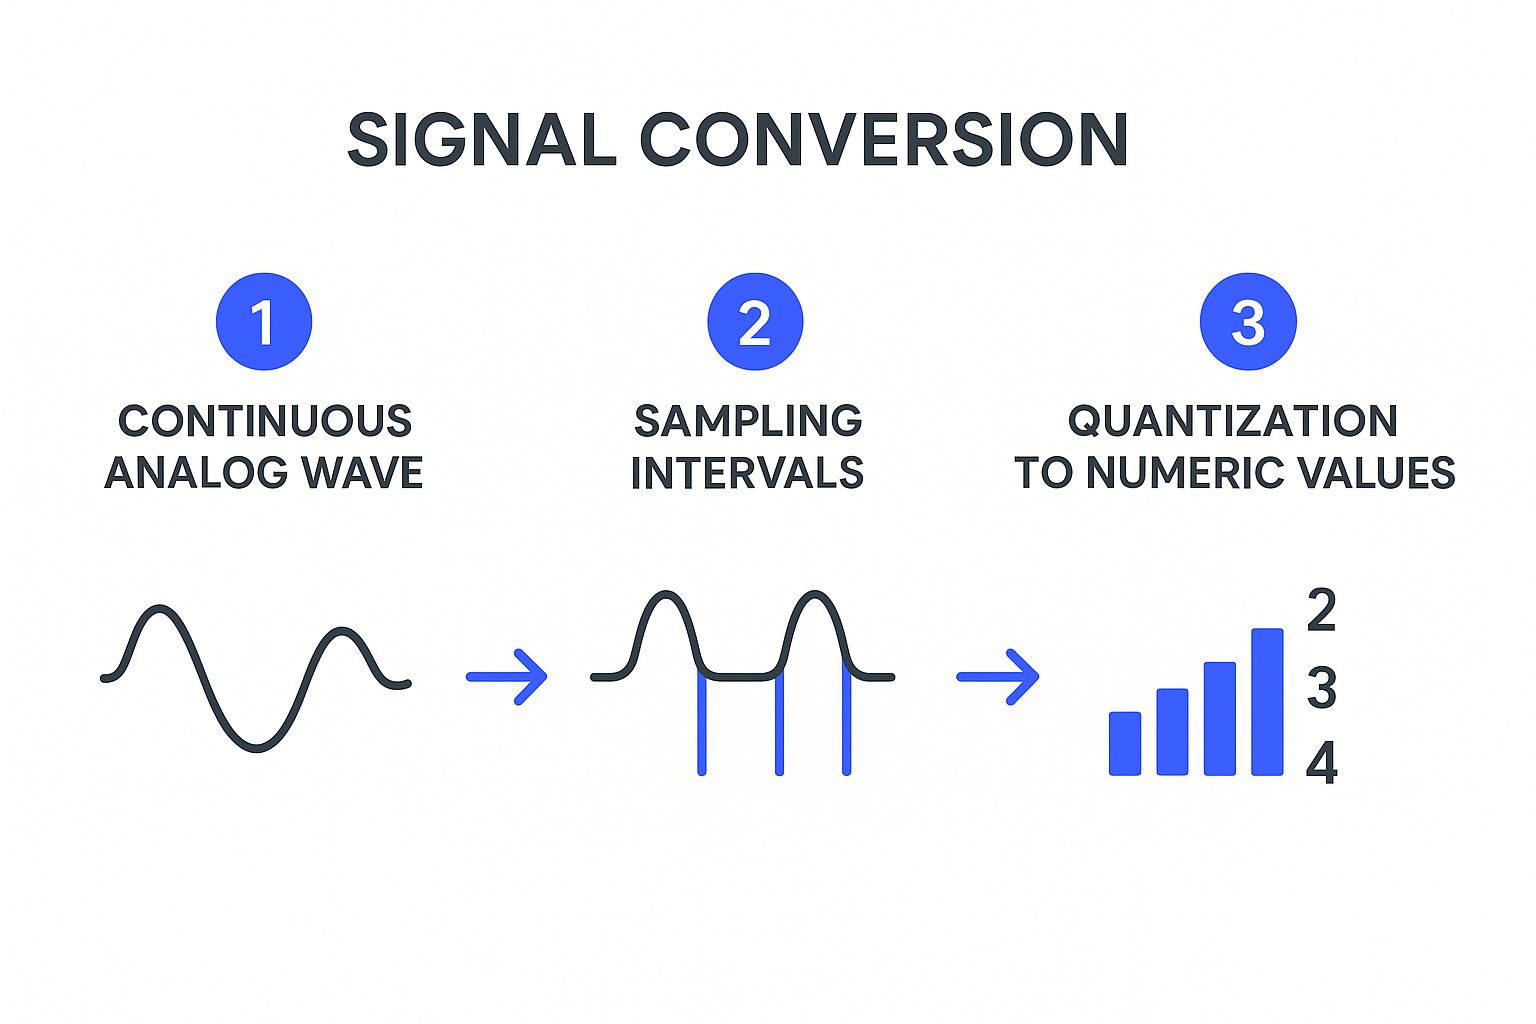
A digital signal is a discrete representation of the sound wave. Instead of a continuous line, it's a sequence of numbers, or samples, where each number represents the amplitude of the wave at a specific moment in time. It's like plotting a series of points on a graph to approximate the shape of a curve, rather than drawing the curve itself.
This diagram shows the entire conceptual chain from a sound source to a stream of digital data.

The conversion process itself, known as Analog-to-Digital Conversion (ADC), can be broken down into two key steps: Sampling and Quantization.
The Bridge Between Worlds: A/D and D/A Conversion
The process of converting an analog signal to a digital one is handled by a device called an Analog-to-Digital Converter (ADC). When you want to listen back, the reverse process is handled by a Digital-to-Analog Converter (DAC), which reconstructs the continuous wave from the series of numbers. These converters are the heart of any audio interface.
The following short video provides a quick, animated overview of this two-way conversion process.
A/D Conversion, Sample Rate & Bit Depth for audio explained
Watch this short video from Mixed Signals for a concise visual explanation of A/D and D/A conversion.
Pay close attention to the entire video (from start to finish). It clearly defines the roles of sampling (measuring amplitude at fixed intervals) and quantization (mapping those values to numbers), which are the two critical stages we will now explore in more detail.
With that overview in mind, let's dive deeper into the two parameters that define the quality of a digital audio signal: sample rate and bit depth.
- Sample Rate determines how often we take a "snapshot" of the analog wave. It's measured in Hertz (Hz) or kilohertz (kHz). A sample rate of 44.1 kHz means we are measuring the wave's amplitude 44,100 times per second. The sample rate dictates the highest frequency that can be accurately captured.
- Bit Depth determines the precision of each snapshot. It defines how many possible values we can use to describe the amplitude of each sample. A higher bit depth provides more possible values, resulting in a more accurate amplitude measurement and a greater dynamic range (the difference between the quietest and loudest possible sounds).
The next reading, from the same MasteringBOX article, explains the ADC process, sample rate, and bit depth in greater detail.
How Do Audio Signals Work in Analog and Digital Audio
Now, please read the second major section of the article, "Digital Audio Signals".
Begin with the section on the ADC process. Then, carefully read the section on Sample Rate and Bit Depth, as these are core concepts you will configure in every recording session. Finally, review the pros and cons to see why digital offers incredible flexibility but requires careful management of levels and system settings.
A Tale of Two Formats: The Great Debate
For decades, engineers have debated the merits of analog versus digital. Analog is often described as "warm" and "musical," while digital is praised for its "clarity" and "precision." As you've just learned, these subjective terms arise from the fundamental technical differences between the two formats.
The following video from Audio University does an excellent job of comparing the two formats on several key points, debunking common myths along the way.
Analog vs Digital Audio | The Truth About Which Is Better...
This video provides a balanced comparison of analog and digital audio, addressing noise, fidelity, and workflow.
Please watch the following segments: Noise Level (3:19 - 4:29): This explains why digital audio has a significantly lower inherent noise floor than analog formats like tape or vinyl. Signal Fidelity (4:30 - 7:49): This is a crucial section. It addresses the common misconception that digital audio is a "stair-step" approximation and explains how, according to the Nyquist theorem, a digital system can perfectly reconstruct a smooth, accurate waveform. Distortion & 'Warmth' (8:55 - 10:51): This part contrasts the "soft" saturation of analog gear with the harsh "clipping" of digital systems when overloaded. It explains why analog's non-linear behavior is often considered desirable. Editing & Distribution (10:52 - 13:35): This highlights the immense practical advantages of digital audio, such as non-destructive editing and lossless, worldwide distribution.
The key distinction in distortion is critical:
- Analog Distortion (Saturation): When an analog circuit is pushed hard, it overloads gracefully, adding musically related harmonics that can sound pleasing or "warm."
- Digital Distortion (Clipping): When a digital signal exceeds its maximum level (0 dBFS), it is brutally chopped off. This creates a harsh, unpleasant sound that is almost always undesirable. This is why maintaining proper headroom is non-negotiable in the digital domain.
Conclusion
In this lesson, we have established the fundamental distinction between the two ways sound is represented in audio technology. This knowledge is not just academic; it underpins the entire modern studio workflow.
Here are the key takeaways:
- Analog signals are continuous electrical representations of sound waves. They are praised for their "natural" sound but are susceptible to noise, degradation, and physical editing limitations.
- Digital signals are discrete representations, created by sampling an analog wave and storing its amplitude as a sequence of numbers. They offer pristine, lossless copying, incredible editing flexibility, and a very low noise floor.
- The conversion from analog to digital (ADC) is defined by sample rate (frequency information) and bit depth (amplitude information).
- Analog and digital systems handle overload differently: analog saturates (often pleasantly), while digital clips (harshly).
In our next lesson, we will look more closely at the process of sampling. We will explore the Nyquist theorem in detail to understand exactly how a series of discrete points can perfectly capture a continuous wave, and what that means for choosing the correct sample rate for your recordings.