Hello! Welcome back to building our chess game.
In the last lesson, you successfully made the board interactive by detecting mouse clicks, mapping them to board squares, and highlighting the selected square. It was a huge step forward!
Today, we'll build on that foundation to implement a core piece of gameplay. Instead of just selecting any square, we'll implement the logic to select a piece and then visually show all of its legal moves. This is where your game logic from the earlier modules starts to connect with the graphical interface.
Our learning outcome is to implement selection logic to highlight a clicked piece and its valid move squares.
1. Evolving Our State Management
In the previous lesson, we used a single state variable, selected_square: Option<(usize, usize)>, to track the user's click. This was a great start, but to handle piece selection and move validation, we need a slightly more descriptive state.
We need to track two new things:
- The specific square of the piece that is currently selected.
- A list of all the valid moves for that selected piece.
Let's modify the state variables at the beginning of your main function. We'll replace selected_square with selected_piece and add a new vector for valid_moves.
// In main(), before the loop. Remove `selected_square`.
let mut selected_piece: Option<(usize, usize)> = None;
let mut valid_moves: Vec<(usize, usize)> = Vec::new();
selected_piece: This will store the(rank, file)of the piece the player has clicked on. It's anOptionbecause a piece isn't always selected.valid_moves: This vector will hold the(rank, file)coordinates of all possible destination squares for theselected_piece.
2. Implementing the Selection Logic
Now, let's update the input handling block in your main loop. The logic will be:
- When the player clicks, get the
(rank, file)of the clicked square. - Check your
game_stateto see if there's a piece on that square. - If a piece exists:
- Set
selected_pieceto the clicked(rank, file). - Call your move generation logic (which you built in Modules 5 & 6) to get all valid moves for that piece.
- Store these moves in your
valid_movesvector.
- Set
- If the clicked square is empty:
- Clear the selection. This means setting
selected_piecetoNoneand clearing thevalid_movesvector.
- Clear the selection. This means setting
Here's how this looks in code. Replace your previous if is_mouse_button_pressed... block with this:
// Inside your main loop, replacing the previous input handler
if is_mouse_button_pressed(MouseButton::Left) {
    let (mouse_x, mouse_y) = mouse_position();

    let file = (mouse_x / SQUARE_SIZE).floor() as usize;
    let rank = (mouse_y / SQUARE_SIZE).floor() as usize;

    if rank < 8 && file < 8 {
        // Check if there is a piece on the clicked square
        if game_state.board[rank][file].is_some() {
            // A piece was clicked. Select it.
            println!("Selected piece at ({}, {})", rank, file);
            selected_piece = Some((rank, file));

            // Generate and store its valid moves.
            // NOTE: You need to have a function like `get_valid_moves` on your GameState.
            // This is a placeholder for the logic you built in earlier modules.
            valid_moves = game_state.get_valid_moves(rank, file);
        } else {
            // An empty square was clicked. Deselect everything.
            println!("Deselected.");
            selected_piece = None;
            valid_moves.clear();
        }
    } else {
        // Clicked outside the board. Deselect everything.
        selected_piece = None;
        valid_moves.clear();
    }
}
Note: This code assumes you have a method like get_valid_moves(rank, file) on your GameState struct that returns a Vec<(usize, usize)>. You'll need to make sure your existing move generation functions are callable in this way.
3. Highlighting the Selected Piece and Its Moves
With our state updated, the final step is to draw the highlights. We'll use draw_rectangle again, but this time for two purposes:
- Draw a distinct highlight on the square of the
selected_piece. - Iterate through the
valid_movesvector and draw a highlight on each of those squares.
Add this code to your main loop, right after the input handler and before next_frame().await:
// --- NEW: Visual Feedback for Selection and Valid Moves ---

// Highlight the selected piece, if any
if let Some((rank, file)) = selected_piece {
    draw_rectangle(
        file as f32 * SQUARE_SIZE,
        rank as f32 * SQUARE_SIZE,
        SQUARE_SIZE,
        SQUARE_SIZE,
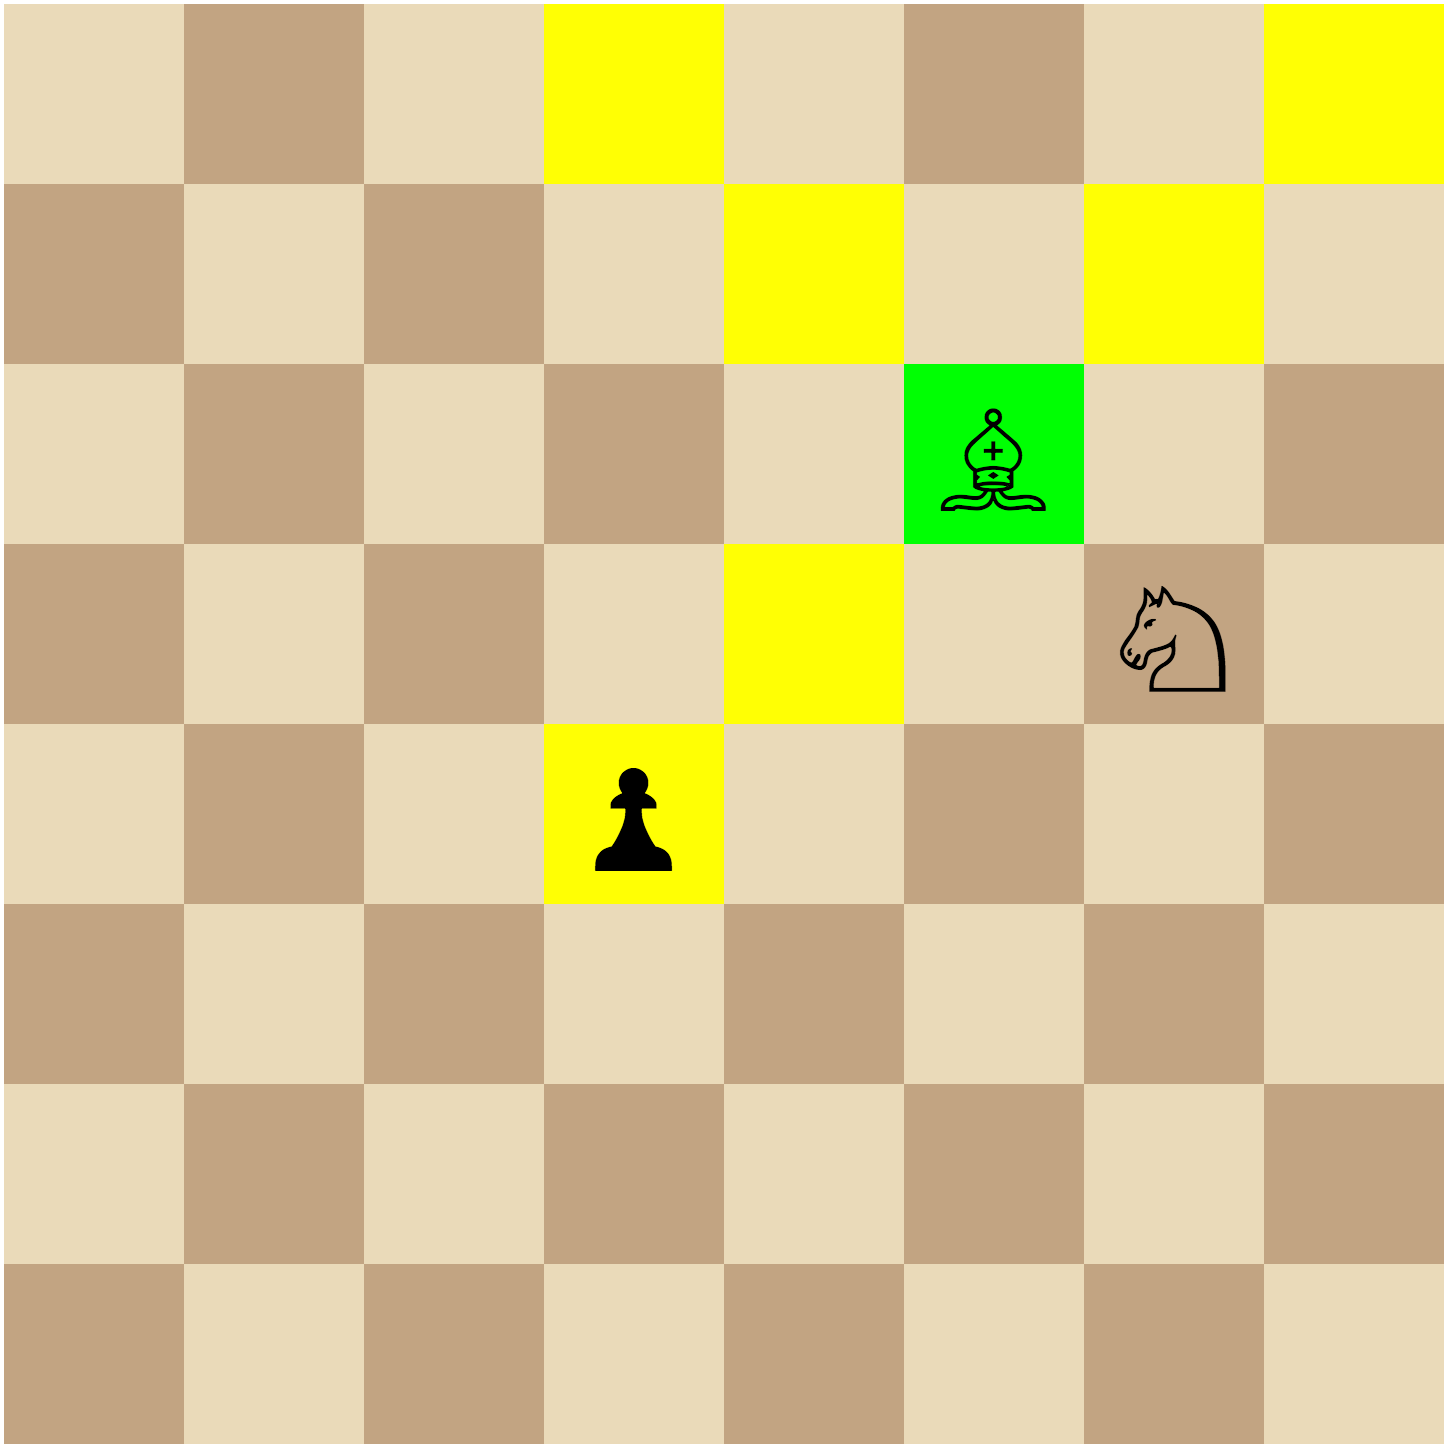
        Color::new(0.0, 1.0, 0.0, 0.4), // Semi-transparent green for the piece
    );
}

// Highlight all valid moves for the selected piece
for (rank, file) in &valid_moves {
    draw_rectangle(
        *file as f32 * SQUARE_SIZE,
        *rank as f32 * SQUARE_SIZE,
        SQUARE_SIZE,
        SQUARE_SIZE,
        Color::new(1.0, 1.0, 0.0, 0.4), // Semi-transparent yellow for moves
    );
}
Now, run your project! When you click on a piece, its square should turn green, and all the squares it can move to should turn yellow. Clicking an empty square should clear all highlights.
4. State Management in Practice
The logic we've just implemented—maintaining state based on user input and using that state to control rendering—is a fundamental pattern in game development. Let's look at a tutorial that, while using a different engine, formalizes these exact concepts.
The following blog post, 'Chess game in Rust using Bevy', walks through building a chess game with the Bevy engine. Although we are using macroquad, the underlying principles of state management and interaction are identical. Pay attention to how it separates different concerns into distinct systems and resources.
Read through the following sections to see these ideas in a different context: 'color_squares' system: Find this section. Notice how it changes the color of squares based on state (hovered, selected). This is conceptually the same as our draw_rectangle logic, which conditionally draws highlights based on the selected_piece and valid_moves states. 'select_square' system: This section shows logic that runs on a mouse click to update a SelectedSquare resource. This is directly analogous to our input handling block that updates the selected_piece variable. 'select_piece' system (in the 'Refactor' section): The author later refactors the logic to have a dedicated system for selecting a piece on a clicked square. This mirrors our logic of checking game_state.board to see if a piece exists before updating the selected_piece state.
As you can see, managing state variables like SelectedSquare or SelectedPiece is a common and powerful technique. Our selected_piece and valid_moves variables serve the exact same purpose.
Conclusion
Excellent work today! You have now built the complete interaction loop for selecting a piece. A player can click on a piece, immediately see where it can legally go, and change their mind by clicking away. This is a massive step toward a playable game.
Key Takeaways:
- Effective UI requires descriptive state variables (e.g.,
selected_piece,valid_moves) that go beyond simple input tracking. - The core interaction loop is: Input -> Update State -> Render State. You implemented this by detecting a click, updating
selected_pieceandvalid_moves, and then drawing highlights based on those variables. - You've successfully connected your backend game logic (move generation) to your frontend graphical interface.
Preview of the Next Lesson
We can now select a piece and see its valid moves. The next logical step is to act on that information. In our next lesson, we will execute a move when the player clicks a valid destination square for a selected piece. This will involve updating the game_state and redrawing the board to show the new piece positions.