Welcome to the final lesson in our first module. In the previous session, we explored the "floor plan" of your Linux environment—the Filesystem Hierarchy Standard (FHS). You learned about the roles of key directories like /home, /etc, and /var, giving you a mental map of where everything belongs.
Now, we'll bridge the gap between that internal Linux structure and the familiar ChromeOS desktop you use every day. This lesson focuses on making your Linux environment a truly integrated and practical part of your workflow. We will cover how to install and run graphical Linux applications and, crucially, how to share files seamlessly between ChromeOS and Linux. By the end, you'll see how the command-line environment and a graphical desktop can work together powerfully.
Running Graphical Linux Applications
While the command line is the heart of Linux for many tasks, a vast world of graphical (GUI) applications is also available, from code editors and office suites to tools for biology and design. On your Chromebook, the Linux environment is cleverly designed to run these applications right on your desktop, as if they were native ChromeOS apps.
There are two primary ways you'll install these applications.
Method 1: The Command Line with apt
The most common and powerful way to install software on Debian-based systems like yours is using the Advanced Package Tool, or apt. It connects to software repositories (online collections of approved software) to download and install applications and all their dependencies automatically.
This short video provides an excellent demonstration of using apt to install LibreOffice, a full-featured office suite.
How to Install Linux Apps on a Chromebook [Updated]
This clip from "How to Install Linux Apps on a Chromebook" by Peter's Google Tips shows the apt install process from start to finish.
Watch the segment from installing with the terminal. Notice how the sudo apt install command is used and how the new applications appear in a "Linux apps" folder in the ChromeOS launcher afterward.
Now, let's try it yourself. A graphical file manager is an incredibly useful tool for visualizing the filesystem we studied in the last lesson. We'll install Nautilus, the default file manager for the GNOME desktop environment.
Open your Linux terminal and run the following commands:
sudo apt update- This command doesn't install anything. Instead, it synchronizes your local package lists with the online repositories to ensure you have the latest information about available software versions. It's good practice to run this before any installation.
sudo apt install nautilus -ysudogrants administrative privileges, which are required to install system-wide software.apt install nautilusis the core command that tells the system to install the package named "nautilus".- The
-yflag automatically answers "yes" to the confirmation prompt, which is convenient.
Once the installation is complete, open your Chromebook's launcher (by pressing the "Search" key or clicking the circle in the corner) and find the "Linux apps" folder. You should now see an icon for "Files" (Nautilus). Go ahead and launch it to see a graphical view of your Linux home directory.
Method 2: Installing from .deb Files
Sometimes, you might want to install software that isn't in the default Debian repositories, or you may want a newer version. Many developers offer their Linux applications as .deb package files. Think of this as being similar to downloading an .exe file on Windows.
ChromeOS makes this process very simple. Let's watch another clip from the same video, this time showing how to install Visual Studio Code, a popular code editor, by downloading its .deb file.
How to Install Linux Apps on a Chromebook [Updated]
This part of the video demonstrates the .deb installation method.
Watch the section from installing a .deb file. The key steps are downloading the file, finding it in the ChromeOS Files app, and double-clicking it to initiate the installation.
This method is straightforward and very useful for applications like web browsers, code editors, and other specialized tools you might download directly from a developer's website.
Sharing Files Between Environments
Now that you can run graphical apps, you need a way to get your files to them. Your Linux environment is a container, which means it's partially isolated from the main ChromeOS system. Fortunately, ChromeOS provides two clear and simple mechanisms for sharing files across this boundary.
The "Linux files" Bridge
The easiest method involves a special folder that ChromeOS creates automatically. In your ChromeOS Files app, you will see a location called "Linux files".
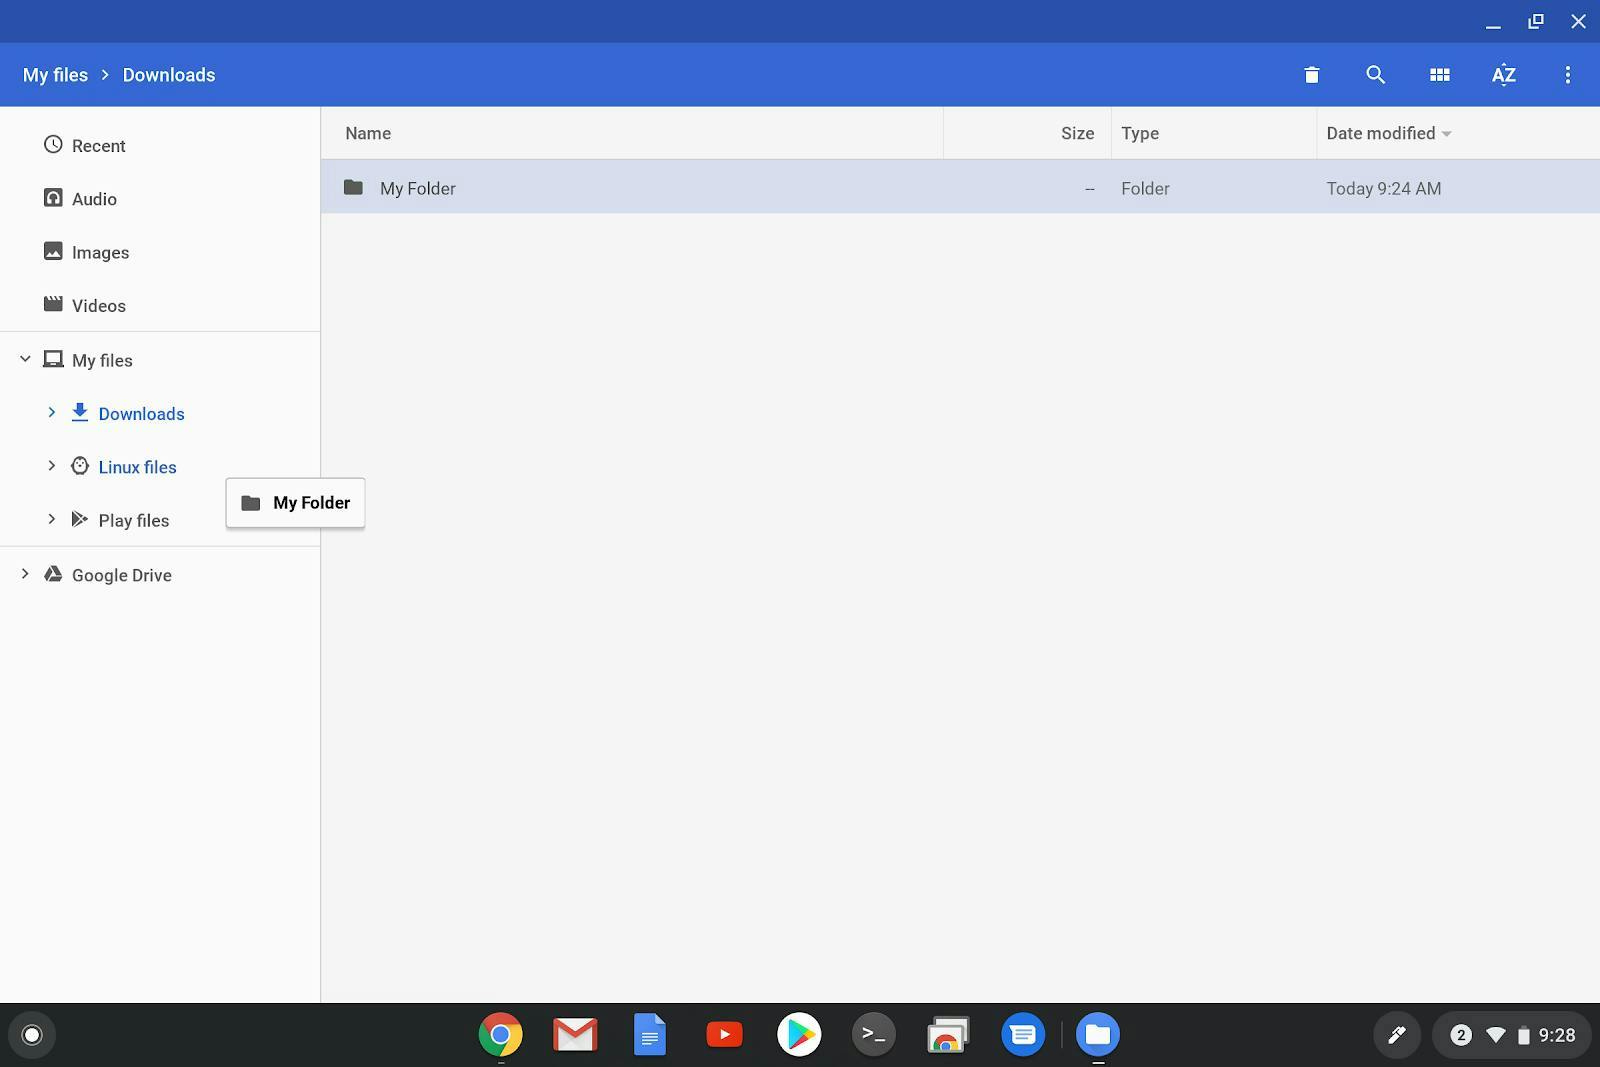
This folder is a direct link to your user's home directory within the Linux environment (/home/<your_username>). Any file you place here is immediately available inside Linux, and any file you create in your Linux home directory will appear here.
This video clip demonstrates this two-way connection perfectly.
How to Install Linux Apps on a Chromebook [Updated]
This section visually confirms the link between the ChromeOS "Linux files" folder and the Linux home directory.
Watch from accessing files. Notice how a folder created in the Files app instantly appears when the ls command is run in the terminal.
Sharing External Directories
The "Linux files" method involves copying files into that special directory. But what if you have a large project folder in your Downloads or Google Drive and don't want to create a duplicate? For this, you can share folders from ChromeOS directly with Linux.
This official guide from the ChromeOS developers explains the process clearly.
This section from the official documentation covers the two methods of file sharing.
Read the section titled Sharing files to Linux. Pay close attention to the second method. When you right-click a folder and select "Share with Linux", it becomes available inside the Linux container at a specific location: /mnt/chromeos.
This /mnt/chromeos directory is a crucial path to remember. It acts as a gateway to all the external folders you've chosen to share. To practice, try sharing your Downloads folder from the ChromeOS Files app. Then, in the Linux terminal, navigate to this gateway and see your files:
cd /mnt/chromeos/MyFiles/Downloadsls
You should see the contents of your ChromeOS Downloads folder listed in your terminal.
Accessing Shared Files from GUI Apps
Now, let's put everything together. How do you open a file from a shared folder within a Linux GUI app? The process combines what we've just learned.
The following video is a fantastic practical guide. It shows how to use a Linux app's "Open File" dialog to navigate to both the "Linux files" content and the shared /mnt/chromeos folders.
How to access files in ChromeOS Linux
This video, "How to access files in ChromeOS Linux" from Chrome Computing, walks through the exact steps for accessing different file locations from within a GUI app.
First, watch how to access your main Linux home directory from the file dialog. This is where files from your "Linux files" folder live. Next, see how to navigate to shared folders. Watch the segment showing how to find your Downloads folder by going through the path /mnt/chromeos. Finally, watch the excellent productivity tip on how to bookmark these locations (like Downloads and Google Drive) for quick access in the future. This will save you a lot of time.
This ability to bookmark remote locations makes working with files across both environments incredibly efficient.
Conclusion
In this lesson, you've unlocked the full potential of your Chromebook's Linux feature by integrating it with the graphical desktop. You now have the practical skills to install the tools you need and make your files accessible to them.
Key takeaways:
- You can install Linux GUI applications from the command line with
sudo apt installor by double-clicking downloaded.debpackage files. - Installed Linux apps appear in the "Linux apps" folder in your ChromeOS launcher.
- The "Linux files" folder in ChromeOS is a direct mirror of your Linux home directory (
/home/<user>). - You can share any ChromeOS folder (like
DownloadsorGoogle Drive) with Linux, and it will be accessible inside the container at the path/mnt/chromeos.
You have now completed the first module and have a solid foundation for understanding your Linux environment on ChromeOS.
In our next module, "Core File and Directory Operations," we will shift our focus back to the command line to build your fluency. We'll start by reviewing file system navigation and then dive into the essential commands for creating, deleting, copying, and moving files and directories: touch, mkdir, rm, cp, and mv.