Introduction
Welcome to the final lesson of our foundational recap module. In our previous session, we reviewed the core components of REST API test automation, from constructing requests to handling authentication. Now, we'll shift our focus to the user interface, completing your requested refresher on the fundamentals of web UI automation with Selenium.
Today's learning outcome is to recap Selenium WebDriver core concepts: locator strategies, wait mechanisms, and basic browser interactions. Although you have some experience with Python and Selenium, this lesson will provide a structured overview of the principles that are essential for writing robust, reliable, and maintainable UI automation. For a test lead, mastering these fundamentals is key to guiding a team toward effective and scalable UI testing practices.
We will explore the three fundamental questions of UI automation:
- How do we find elements on a web page?
- How do we interact with them?
- How do we handle the dynamic, asynchronous nature of modern web applications to avoid flaky tests?
Finding Your Target: Locator Strategies
The first and most fundamental task in UI automation is uniquely and reliably identifying web elements. An automation script is only as good as its ability to find the buttons, input fields, and links it needs to interact with. Selenium provides a powerful suite of locator strategies to accomplish this.
In modern Selenium with Python, these strategies are accessed via the By class, which helps keep the code clean and readable. The basic syntax looks like this:
from selenium.webdriver.common.by import By


# Example of finding an element by its ID
element = driver.find_element(By.ID, "some-id")
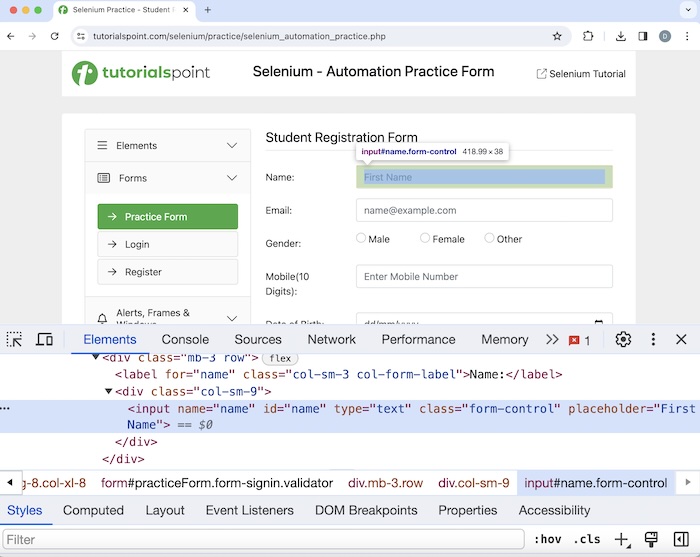
The following guide from BrowserStack provides an excellent and detailed breakdown of the different locator strategies available in Selenium.
Locators in Selenium: A Detailed Guide | BrowserStack
This guide offers a comprehensive overview of all major locator types, with Python code examples. As you read, pay attention not just to the syntax, but to the scenarios where each locator is most effective.
Please read the introductory sections, starting with the overview and the summary table. Then, continue through the detailed explanations for each locator, from ID to finding multiple elements.
As you can see, you have many options. However, from a leadership perspective focused on creating a maintainable test suite, it's crucial to understand that not all locators are created equal. The stability of your tests is directly tied to the stability of your locators. A test that breaks every time a developer refactors the UI is a drain on resources.
Your goal should be to encourage your team to use locators that are least likely to change. This creates a hierarchy of preference:
- ID: The best choice. By web standards, IDs should be unique on a page. They are also typically less likely to be changed for styling purposes.
- Name: A good, stable choice, especially for form elements (
<input>,<textarea>, etc.). - CSS Selector: Extremely powerful and fast. It allows you to create complex queries based on attributes, relationships (parent/child), and state. Often preferred over XPath for performance and readability.
- XPath: The most powerful and flexible locator, but also the slowest and potentially most brittle. It's the go-to for navigating complex DOM structures when no stable ID or CSS selector is available. However, a poorly written XPath can be very fragile.
A key best practice is to avoid absolute XPath (e.g., /html/body/div[2]/div[1]/...). This type of locator is extremely brittle and will break with almost any change to the page structure. Always favor relative XPath expressions that anchor to a stable nearby element.
The following article from Real Python further explores the practical considerations of choosing locators and warns against the brittleness of certain strategies.
Modern Web Automation With Python and Selenium – Real Python
This section reinforces the importance of choosing stable locators and provides context on why some strategies are better than others.
Focus on the part of the article under the "Locate Elements in the DOM" heading. Read from the beginning of the section down to the discussion on the brittleness of locators. Note the warning about overly fragile XPath expressions.
Interacting with Web Elements
Once you have successfully located a WebElement, you can simulate user actions on it. The Selenium WebDriver API provides a straightforward set of methods for these interactions.
The most common interactions you will automate are:
.click(): Simulates a click on an element like a button, link, or radio button..send_keys("text to type"): Types text into an element, typically an<input>field or<textarea>..clear(): Removes any existing text from an input field or textarea. It's good practice to call this before.send_keys()to ensure the field is empty..submit(): Can be called on a form element or an element within a form to trigger its submission. It's often equivalent to hitting the "Enter" key.
For sending special keys like "Enter", "Tab", or arrow keys, Selenium provides the Keys class.
from selenium.webdriver.common.keys import Keys


# Example of typing text and hitting Enter
element.send_keys("my search query" + Keys.ENTER)
The following video provides a clear, practical demonstration of these fundamental interactions.
2 | Interacting With Elements | Selenium Python
This video from Automation Step by Step walks through finding elements and performing basic actions like typing and clicking.
Watch the segment from finding and interacting with elements, where the instructor uses find_element, send_keys, and click. Then, see how to use the Keys class to simulate pressing the Enter key in the segment from this section.
The Art of Waiting: Handling Dynamic Content
Perhaps the biggest challenge in modern UI automation is synchronization. Web applications no longer load as static pages; they fetch data, render components, and run animations asynchronously. If your script tries to interact with an element before it's present, visible, or clickable, your test will fail with an error like NoSuchElementException. This leads to "flaky" tests—tests that pass sometimes and fail other times, eroding trust in the automation suite.
The wrong way to wait is using fixed-time sleeps (e.g., time.sleep(5)). This is a common anti-pattern. If the element appears in 1 second, you've wasted 4 seconds. If it takes 6 seconds, your test fails. This approach makes your test suite slow and unreliable.
Selenium provides two robust, built-in mechanisms for waiting.
-
Implicit Wait: This is a global setting for your WebDriver session. You set it once, and it tells WebDriver to poll the DOM for a certain amount of time before throwing a
NoSuchElementException.driver.implicitly_wait(10) # waits up to 10 secondsWhile better than
time.sleep(), it's a blunt instrument. It applies to allfind_elementcalls and can't handle conditions beyond an element's presence in the DOM (e.g., waiting for it to become clickable). -
Explicit Wait: This is the preferred, most powerful, and most reliable method. It allows you to wait for a specific condition to be met before proceeding. You can wait for an element to be visible, clickable, contain certain text, and much more.
from selenium.webdriver.support.ui import WebDriverWait
from selenium.webdriver.support import expected_conditions as EC


# Wait up to 10 seconds until the element is clickable, then click it
wait = WebDriverWait(driver, 10)
submit_button = wait.until(
    EC.element_to_be_clickable((By.ID, "submit-button"))
)
submit_button.click()
Using explicit waits makes your scripts more efficient and far more reliable. The test proceeds as soon as the condition is met, without any unnecessary delay, but it will patiently wait up to the timeout if needed.
The Real Python article you read earlier has an excellent section explaining this concept in detail.
Modern Web Automation With Python and Selenium – Real Python
This section provides a clear, practical guide to implementing waits in Selenium, contrasting the wrong way (time.sleep) with implicit and explicit waits.
Please read the entire "Handle Dynamic Content" section. Pay close attention to the explanation of the different wait types and the detailed code examples for implementing explicit waits with WebDriverWait and expected_conditions.
Mastering explicit waits is non-negotiable for any serious automation effort. As a lead, ensuring your team understands and correctly implements explicit waits is one of the most effective ways to combat test flakiness and improve the stability of your UI test suite.
Conclusion
In this lesson, we have recapped the three pillars of Selenium WebDriver automation: locating elements, interacting with them, and synchronizing actions with waits. While the syntax is straightforward, the true skill lies in applying these concepts to build tests that are robust, maintainable, and reliable.
Key Takeaways:
- Locator Strategy is Key: The stability of your tests depends on choosing stable locators. Prefer
ID,name, and well-writtenCSS Selectors. Avoid brittle locators like absoluteXPath. - Interactions are Simple: Core actions like
.click(),.send_keys(), and.clear()form the basis of most UI test steps. - Explicit Waits are Essential: To build a reliable automation suite that isn't flaky, you must use explicit waits (
WebDriverWait) to synchronize your script with the application's state. Avoidtime.sleep()at all costs.
This lesson concludes our foundational module. We've refreshed the core concepts of BDD, REST API testing, and now UI automation with Selenium. You now have a solid baseline to build upon as we move into higher-level strategic topics.
In our next lesson, we will begin the "Automation Strategy and Framework Design" module. We'll start by exploring the Test Automation Pyramid, a crucial model that helps you decide how to strategically distribute your testing efforts across different layers of the application.