Hello! Welcome to the next lesson in our journey.
In the last lesson, we established our first remote connection using SSH with a password. While functional, relying on passwords alone leaves a server exposed to automated brute-force attacks, a common technique used to gain initial access. As you build your skills in ethical hacking, it's crucial to understand and implement more robust security measures, not just for defending systems but also for recognizing well-hardened targets.
Today, we will address this weakness directly. This lesson is dedicated to the learning outcome: Generate an SSH key pair and configure key-based authentication for passwordless login. We'll replace vulnerable passwords with secure cryptographic keys, a fundamental best practice for system administration and security.
1. The "Why": How Asymmetric Cryptography Secures SSH
SSH key-based authentication uses a concept called asymmetric cryptography, or public-key cryptography. Instead of a single shared secret (a password), you generate a key pair consisting of two mathematically linked keys:
- A Private Key: This key is your secret. It stays on your client machine and should never be shared. It is the proof of your identity.
- A Public Key: This key is designed to be shared. You place it on any server you want to access.
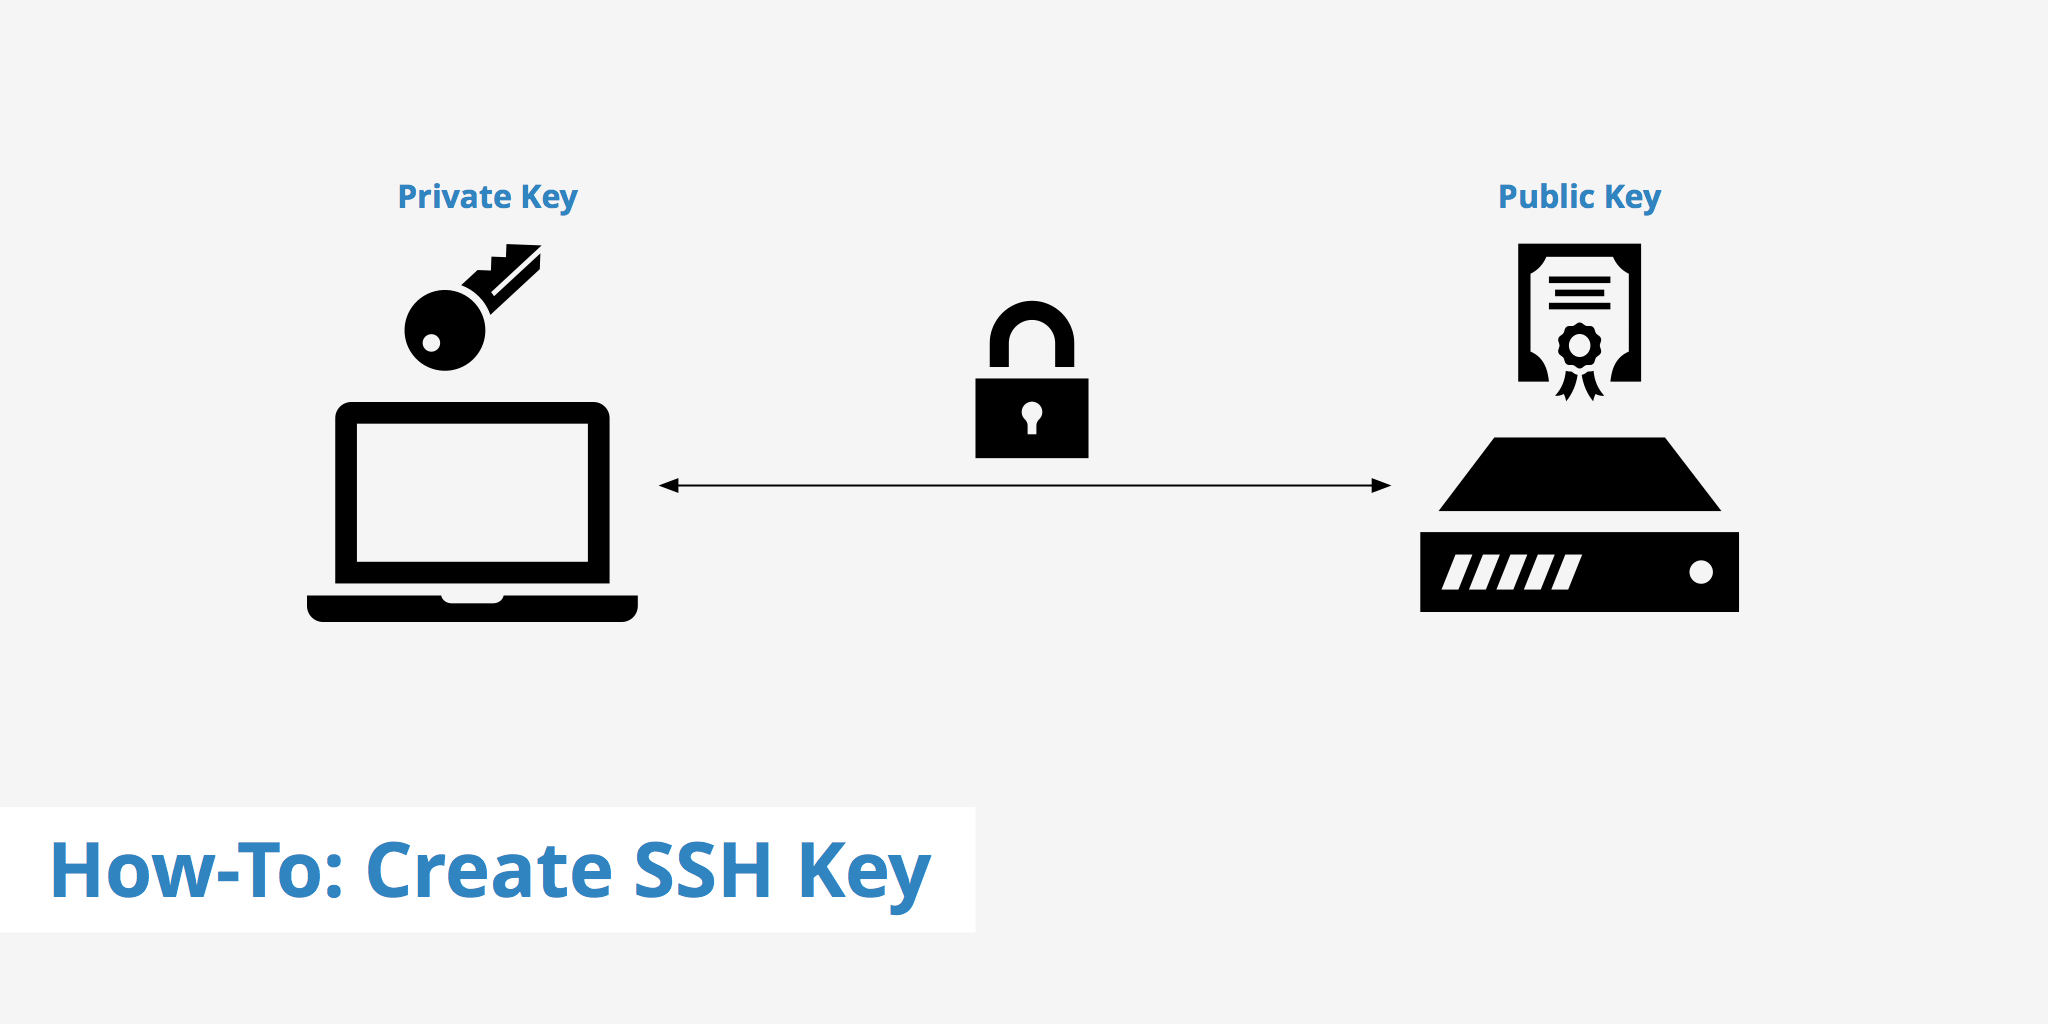
When you try to connect, the server uses your public key to issue a "challenge" — a message encrypted in a way that only your private key can decrypt. Your SSH client uses your private key to solve this challenge and sends the correct response back to the server. If the response is valid, the server grants you access. This all happens automatically in seconds.
This method is superior to passwords because:
- Complexity: The keys are far too complex to be guessed by brute force.
- No Secret Transmission: Your private key (the secret) never travels over the network.
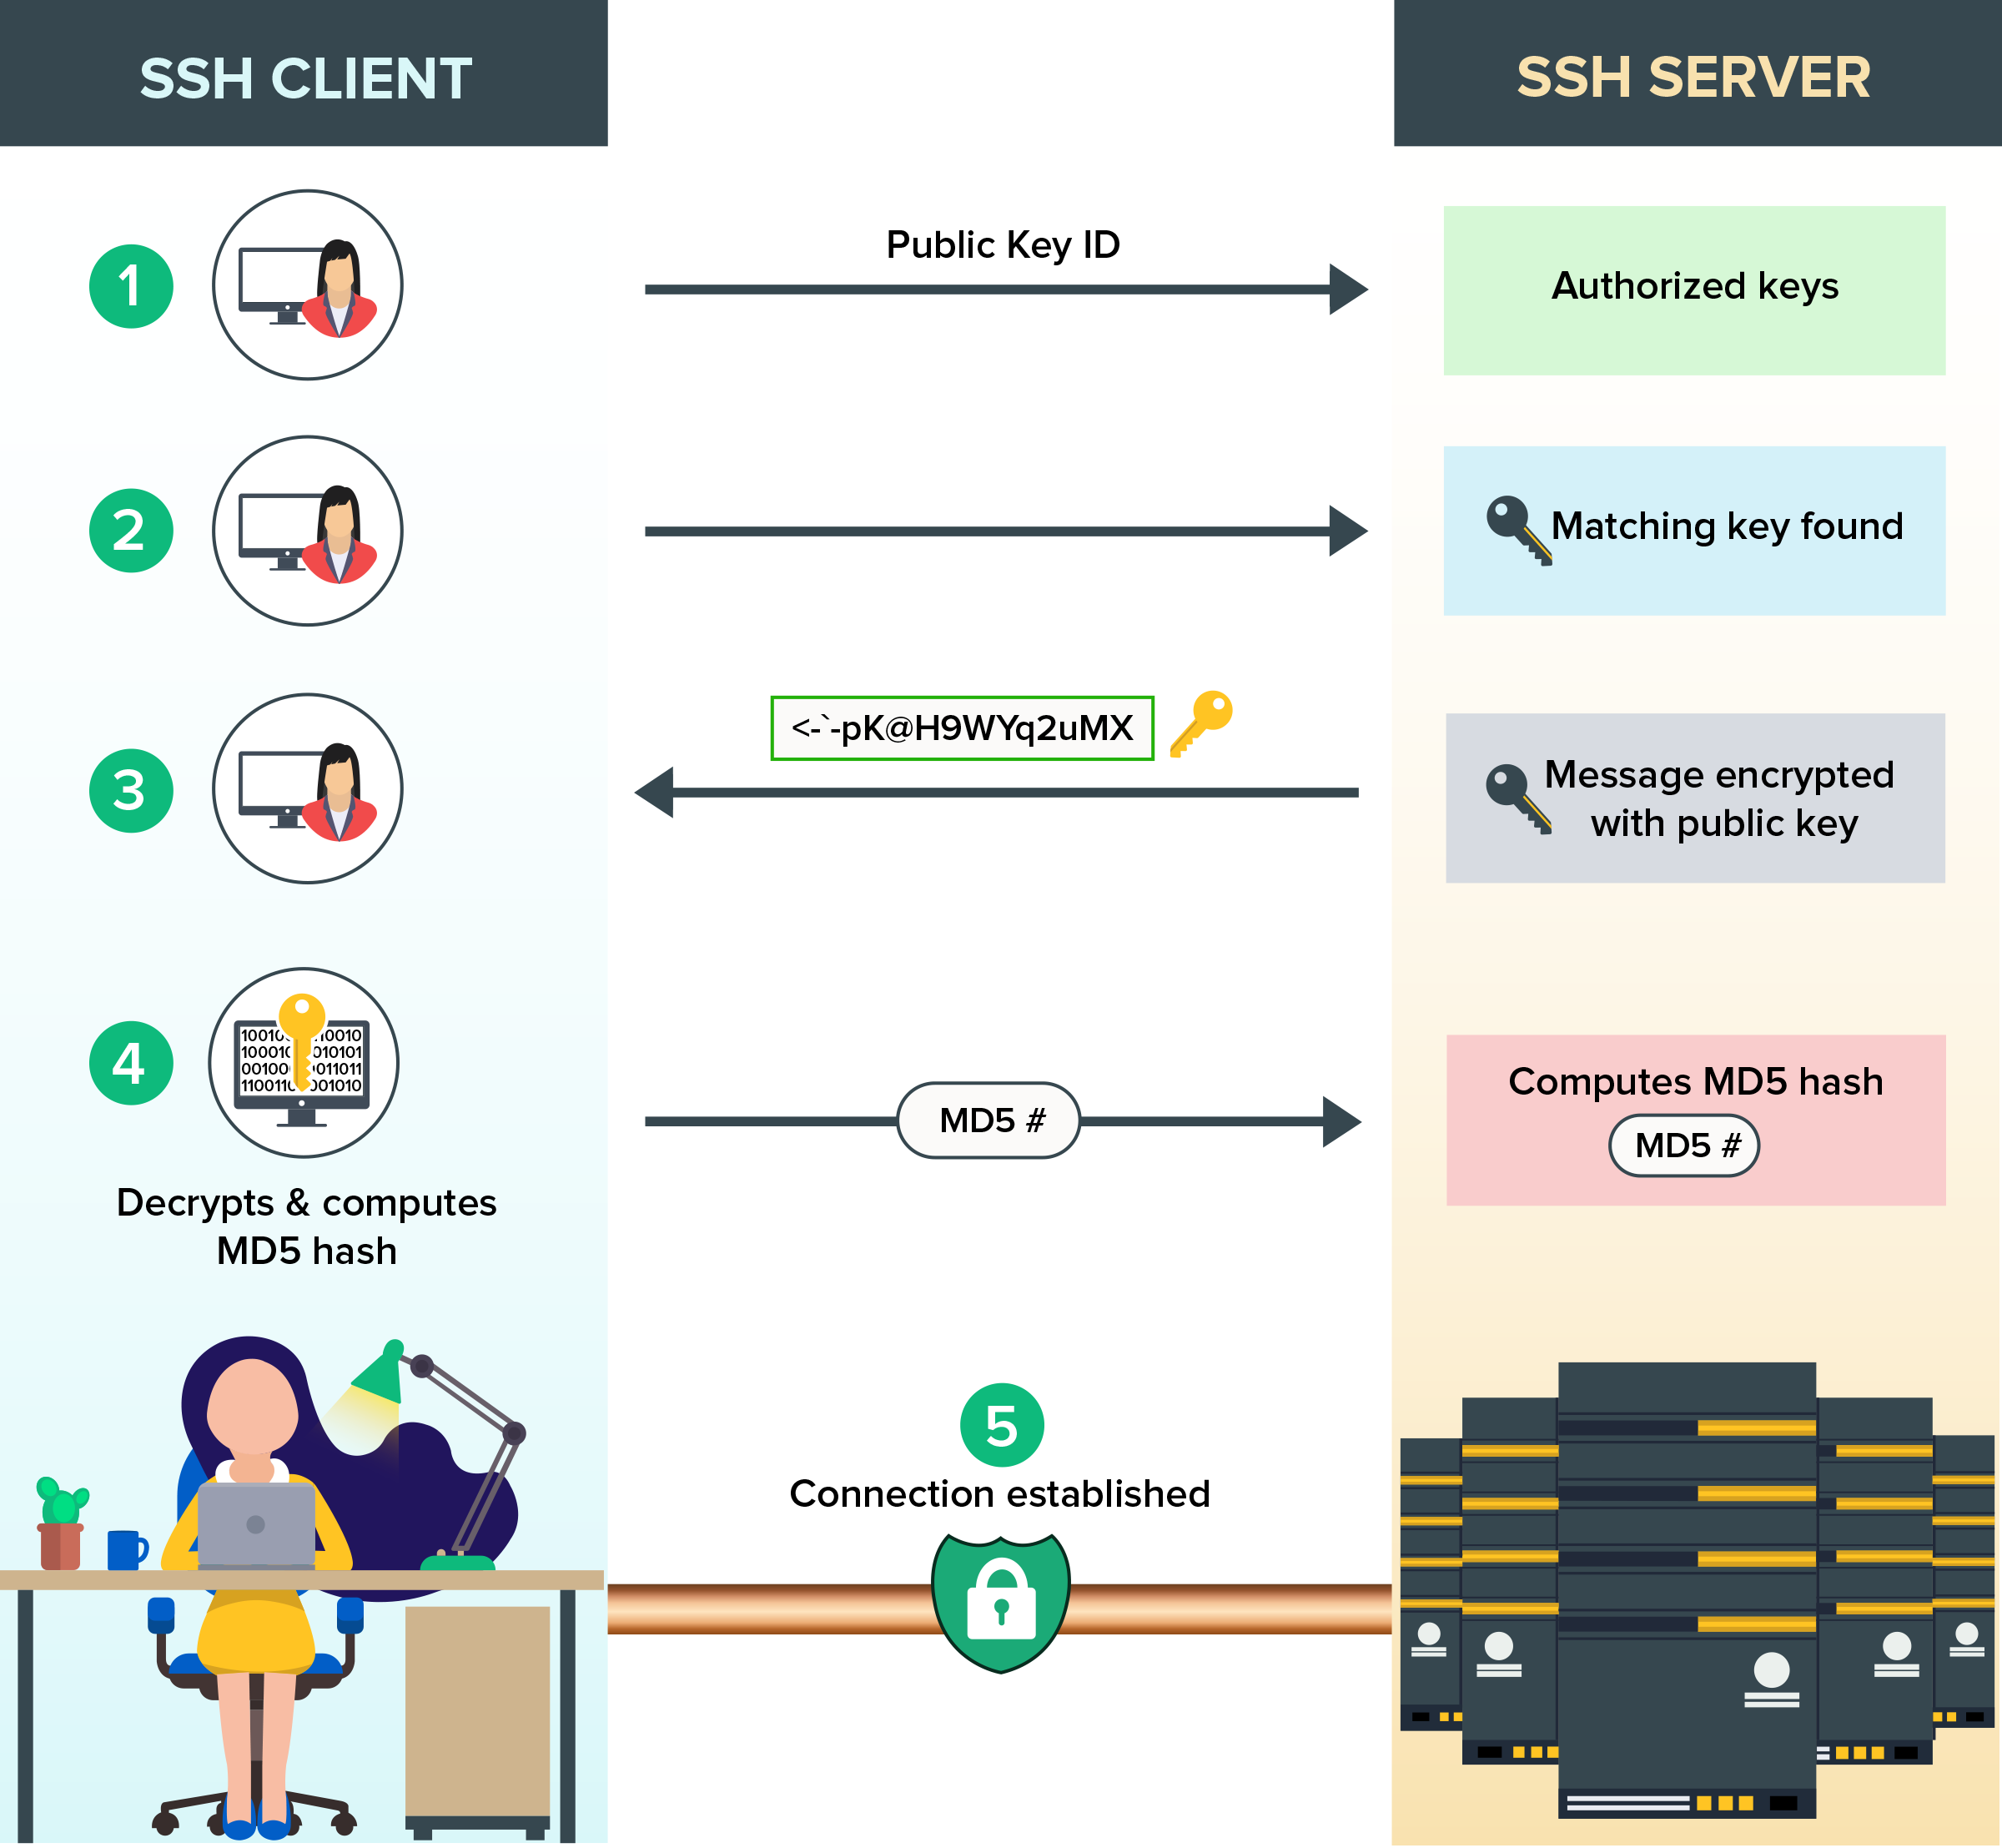
For a more detailed technical explanation, the ArchWiki provides an excellent summary. As an Arch user, you'll find it a valuable and familiar resource.
Let's read the 'SSH keys' article from the ArchWiki. It provides a solid background on the principles of challenge-response authentication.
Please read the 'Background' section. It clearly explains the roles of the private and public keys and the challenge-response mechanism.
2. Generating Your SSH Key Pair
Now for the practical part. We'll generate our own key pair using the ssh-keygen command on your local machine.
Choosing a Key Type
Modern SSH supports several types of keys. While RSA is a long-standing default, the current best practice is to use Ed25519. It offers stronger security with a smaller key size, making it faster and more efficient. We will use this type.
The ssh-keygen Command
Open your terminal and run the following command:
ssh-keygen -t ed25519 -C "your_email@example.com"
-t ed25519: Specifies the key type we want to create.-C "...": Adds an optional comment, usually your email or another identifier, to make it easier to track which key is which.
The command will then ask you two questions:
- File location:
Enter file in which to save the key...- It's highly recommended to accept the default location (
~/.ssh/id_ed25519) by pressingEnter. SSH clients automatically look for keys in this directory.
- It's highly recommended to accept the default location (
- Passphrase:
Enter passphrase (empty for no passphrase):- This is a crucial security step. The passphrase encrypts your private key file on your computer. If someone were to steal your laptop or gain access to your files, they still wouldn't be able to use your SSH key without knowing its passphrase. Always set a strong passphrase.
The following video provides a clear, step-by-step demonstration of this entire process.
SSH for Beginners: The Ultimate Getting Started Guide
This segment from Learn Linux TV will walk you through using ssh-keygen. The presenter does an excellent job of explaining each prompt and the resulting files.
Watch from 27:59 to 36:10. The presenter first generates a key without a passphrase for demonstration, then later shows how to create one with a passphrase. Pay attention to the two files created: id_rsa (private) and id_rsa.pub (public). While he uses RSA in the first example, the process is identical for the Ed25519 key we are creating.
3. Placing Your Public Key on the Server
With your key pair generated, the next step is to copy your public key to the target server. The server needs this key to issue the authentication challenge.
The standard location for public keys on a Linux server is inside the file ~/.ssh/authorized_keys. Each key is on its own line. While you can do this manually, there is a much safer and easier way.
The Easy Way: ssh-copy-id
The ssh-copy-id utility is designed specifically for this task. It connects to the server using the password you used in the last lesson, and automatically handles creating the ~/.ssh directory, creating the authorized_keys file, appending your public key to it, and setting the correct, secure file permissions.
The syntax is:
ssh-copy-id username@remote_host
If you created your key in a non-default location or have multiple keys, you can specify which one to copy with the -i flag:ssh-copy-id -i ~/.ssh/id_ed25519.pub username@remote_host
The video below demonstrates this command in action.
SSH for Beginners: The Ultimate Getting Started Guide
Let's return to the Learn Linux TV video to see the ssh-copy-id command. This is the preferred method for installing your public key.
Watch from 42:45 to 45:16. Notice how the command prompts for the user's password one last time to make the connection and copy the key.
Understanding the Manual Method
For your own deeper understanding, it's useful to know what ssh-copy-id does behind the scenes. The manual process involves:
- Copying the public key file (e.g.,
id_ed25519.pub) to the server. - Logging into the server.
- Appending the content of the public key file to
~/.ssh/authorized_keys. - Crucially, setting the correct permissions. Incorrect permissions will cause SSH to reject the key for security reasons.
- The
~/.sshdirectory must be700(only the owner can read, write, and execute). - The
~/.ssh/authorized_keysfile must be600(only the owner can read and write).
- The
This ArchWiki section details both the ssh-copy-id command and the manual steps, including the necessary permission changes.
This section of the ArchWiki covers both the simple and manual methods for copying your key. Pay special attention to the chmod commands in the manual method, as this is a very common point of failure.
Read the section 'Copying the public key to the remote server'. Focus on the 'Simple method' using ssh-copy-id first, then review the 'Manual method' to understand the underlying steps.
Practice: Configure Passwordless Access
It's time to apply this to your virtual lab.
- Generate Key: On your Arch Linux machine, run
ssh-keygen -t ed25519and provide a strong passphrase. - Copy Key: Use
ssh-copy-idto copy your new public key to your Metasploitable2 VM. The command will be:
You will be prompted for thessh-copy-id msfadmin@<IP_OF_METASPLOITABLE>msfadminpassword. This should be the last time you need it. - Test Connection: Now, try to log in again:
This time, instead of asking for the server password, it should prompt you for your key's passphrase. After you enter it, you should be logged in.ssh msfadmin@<IP_OF_METASPLOITABLE>
4. For Ultimate Convenience: ssh-agent
You might be thinking, "I still have to type a passphrase, so it's not truly passwordless." This is where the ssh-agent comes in. It's a background program that securely caches your decrypted private key in memory for the duration of your terminal session.
You only need to unlock your key once with its passphrase, and the agent handles providing it to ssh for all subsequent connections.
Here's the workflow:
- Start the agent: The command is a bit unusual because it needs to set environment variables for your current shell.
eval $(ssh-agent) - Add your key to the agent:
This command will prompt you for your key's passphrase. Once entered, the key is "unlocked" and cached by the agent.ssh-add ~/.ssh/id_ed25519 - Connect: Now, any
sshcommand will automatically and seamlessly use the key from the agent, with no further prompts.
SSH for Beginners: The Ultimate Getting Started Guide
Managing keys with passphrases can become tedious. This video segment demonstrates how to use the ssh-agent to cache your key's passphrase, giving you both security and convenience.
Watch from 55:50 to 59:56. This part shows how to start the agent and add a key to it, enabling truly seamless logins for the rest of your session.
Note: On most modern desktop environments, an SSH agent is often started automatically when you log in, so you may only need to run ssh-add once per session.
Conclusion
Congratulations! You have now mastered a core security practice for remote administration. You've moved beyond simple passwords to a cryptographically secure method of authentication that is both more secure and, with ssh-agent, more convenient.
Key Takeaways:
- SSH keys work in pairs: a private key that you keep secret and a public key that you share with servers.
- The modern, recommended key type is
Ed25519, which you generate withssh-keygen -t ed25519. - Always protect your private key file with a strong passphrase.
ssh-copy-idis the standard tool to safely install your public key on a remote server.- Incorrect file permissions on the server (
~/.sshand~/.ssh/authorized_keys) are a common cause of key authentication failure. ssh-agentandssh-addprovide convenience by caching your unlocked key in memory.
Next Lesson Preview:
Now that we've hardened our method for logging into the server, the next logical step is to control who can even attempt to connect. In our next lesson, we will begin exploring the first line of defense at the network level: firewalls. You'll learn what a firewall is, the difference between stateless and stateful inspection, and how they are used to protect servers.