Hello! Welcome back to your design course.
In our last session, we explored the theory of creating imagery and texture in filet crochet by mapping designs from a square grid to a circular one. We now have the "what" and the "why." Today, we shift from theory to practice and focus on the "how."
This lesson is a hands-on workshop where you'll apply everything you've learned. Our goal is to chart a geometric pattern, like a diamond lattice, using filet crochet techniques on a radial grid. This is a core skill for creating the beautiful, structured doilies of the mid-20th century. By the end of this lesson, you will have a clear, step-by-step process for translating a geometric idea onto your hand-drawn circular charts.
1. The Building Blocks: A Quick Refresher
Before we start drawing, let's quickly review the fundamentals of filet crochet. Remember, it's a binary system of open mesh (e.g., dc, ch 2, sk 2) and solid mesh (e.g., 3 dc) that creates patterns on a grid.
For creating crisp geometric designs, the shape of your mesh cells is important. Ideally, you want your cells to be as close to square as possible. As you know from your own crochet experience, a standard double crochet stitch is often shorter than it is wide, which can lead to rectangular, squashed-looking grids.
An introduction to filet crochet; tips, tricks and modifications
The article 'An introduction to filet crochet' by Dora Does offers an excellent discussion on this topic. It compares how different stitches affect the grid shape.
Please review the start of the article and then focus on the section 'How to make crochet filet squares more square'. Look at the comparison images showing the diamond pattern worked in double crochet, treble crochet, and extended double crochet. This will help you decide which stitch will give you the best result for your own tension.
As the article suggests, using a taller stitch like a US treble (tr) or an extended double crochet (edc) can help you achieve a more square-like mesh. For the rest of this lesson, we will assume a standard dc and ch 2 mesh for simplicity, but remember that you can and should substitute taller stitches if your swatches look better with them.
2. Phase 1: Sketching the Motif on a Square Grid
All complex circular patterns begin with a simple, repeatable unit. It's much easier to design this unit on standard graph paper before tackling the complexities of a radial grid. Let's design a classic diamond lattice.
- Get your graph paper and pencil.
- Draw the basic unit. A diamond is formed by offsetting solid blocks on each row. A simple repeating unit for a lattice might look like this over 8 rows:
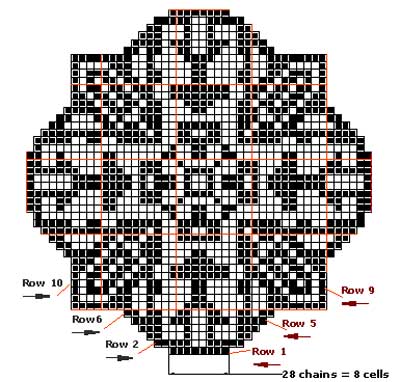
*This is an example of a more complex geometric filet chart. For our exercise, we'll start with a simpler repeating diamond shape, but this demonstrates the kind of intricate pattern you can build.*

Let's chart a simpler segment. Imagine a pattern that repeats over 8 blocks in width:
*   **Row 1:** O O O S O O O O  (O=Open, S=Solid)
*   **Row 2:** O O S O S O O O
*   **Row 3:** O S O O O S O O
*   **Row 4:** S O O O O O S O
*   **Row 5:** O S O O O S O O
*   **Row 6:** O O S O S O O O
*   **Row 7:** O O O S O O O O
*   **Row 8:** O O O O O O O O (a "breather" row)

Sketch this out. This 8-row, 8-block segment is the fundamental DNA of our pattern.
3. Phase 2: Preparing the Radial Chart
Now, let's prepare the canvas for our doily. This step calls back to what we learned in Module 3 about using drafting tools.
- Choose your parameters. Let's decide on a design with 8 repeats (wedges). This is a common and manageable number. Our filet section will be 8 rounds high to match our pattern sketch.
- Draft the grid. Using your compass, protractor, and ruler:
- Draw two large concentric circles to define the inner and outer boundaries of your 8-round filet band.
- Use the protractor to divide the circle into 8 equal 45-degree wedges. Draw these radial lines.
- Draw 7 more concentric circles between your inner and outer boundaries, creating an 8-round grid.
Your hand-drawn chart will look something like this commercially available circular graph paper.
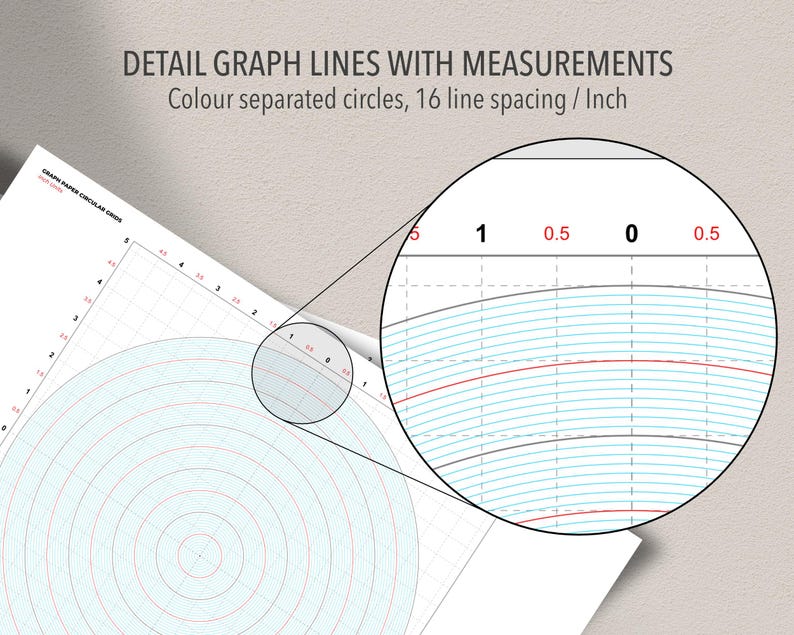
This is what a finished radial grid looks like. You are creating your own custom version of this with your drafting tools.
4. Phase 3: Charting the Pattern (The Main Event)
This is where we merge the square pattern with the circular grid. The key challenge is incorporating the necessary increases for a flat circle while maintaining the integrity of the diamond lattice.
Step 1: Calculate and Place Your Increases
From our previous lesson, we know a dc filet circle needs approximately 4 extra blocks per round to lie flat. With 8 wedges, a simple way to distribute this is to add one increase in every other wedge on each round.
- Rounds 1, 3, 5, 7: Add one increase in wedges 1, 3, 5, 7.
- Rounds 2, 4, 6, 8: Add one increase in wedges 2, 4, 6, 8.
On your radial chart, make a small pencil mark in the designated wedges for each round to remind you where the increases go.
Step 2: Transfer the Pattern, Round by Round
Let's assume our first round has 8 blocks per wedge. We'll chart the first wedge and then repeat it 7 more times.
-
Round 1 (8 blocks/wedge):
- Look at your square grid sketch:
O O O S O O O O. - Chart this onto Wedge 1 of your radial grid.
- Now, look at your increase plan. This round has an increase in Wedge 1. So, we must add a block. The easiest place is in a large open space. Let's change the pattern for this wedge to
O O O S O O O O O(9 blocks). - Wedge 2 has no increase, so it's
O O O S O O O O(8 blocks). - Wedge 3 gets the increase:
O O O S O O O O O(9 blocks). - ...and so on around the circle.
- Look at your square grid sketch:
-
Round 2 (starts with 9 blocks in Wedge 1, 8 in Wedge 2):
- Our square grid pattern is
O O S O S O O O. - Wedge 1 (9 blocks): How do we map an 8-block pattern onto a 9-block space? We add an extra open mesh. Let's place it in the middle for symmetry:
O O S O O S O O O. - Wedge 2 (8 blocks): No increase from the previous round, so it fits perfectly:
O O S O S O O O. But wait! This round gets an increase in Wedge 2. So we must add a block. It now becomesO O S O O S O O O(9 blocks). - You can see the pattern emerging: the wedges that get an increase in a given round will grow, and you'll adapt the pattern to fit the new space, usually by adding to the "negative space" (the open meshes).
- Our square grid pattern is
Test your understanding!
You are charting Round 3 of our diamond lattice.
- Your square grid sketch for this row is
O S O O O S O O. - Wedge 1 has 9 blocks from the previous round. It is scheduled for an increase this round, so it must grow to 10 blocks.
How would you chart the pattern in Wedge 1 to accommodate the increase while keeping the diamond shape logical?
Show answer
The original pattern is O S O O O S O O (8 blocks). We need to fit this into a 10-block space. This means adding 2 extra open blocks.
A good solution would be to add the open blocks to the negative space between the diamonds and on the edge, maintaining the core S O O O S structure.
One possible charting is: O O S O O O S O O O.
Here, we've preserved the five-block gap (O O O) between the two solid stitches of the expanding diamond, and added the extra open blocks at the start and end of the repeat. This keeps the pattern looking clean and symmetrical within its wedge.
5. Generalizing to Other Geometric Patterns
The same logic applies to any geometric pattern. For example, to chart chevrons, you would:
- Sketch a 'V' shape on your square grid:
- Row 1:
S O O O O O O S - Row 2:
O S O O O O S O - Row 3:
O O S O O S O O - Row 4:
O O O S S O O O
- Row 1:
- Prepare your radial grid as before.
- Transfer the pattern, adapting for the increases in each round, just as we did with the diamond lattice. The key is to decide where to add the extra open meshes—either between the 'V' shapes or within the arms of the 'V's themselves, depending on the visual effect you want.
Conclusion
Congratulations! You've just walked through the complete, practical process of charting a geometric filet pattern on a radial grid. This is no small feat; it combines mathematical precision with artistic adaptation.
Key Takeaways:
- The charting process flows from a simple square grid sketch to a complex radial chart.
- For crisp geometrics, consider using taller stitches (like
troredc) to create squarer meshes. - The primary challenge is to gracefully integrate circular increases without distorting the pattern. This is often done by adding extra open meshes in the "negative space" of the design.
- The method is universal: whether you're charting diamonds, chevrons, or other shapes, the workflow of Plan -> Draft -> Transfer -> Adapt remains the same.
Next Lesson:
A doily made of only intricate patterns can feel very busy. The best retro designs knew when to pull back and let the work breathe. In our next lesson, we will learn how to design 'breather' rounds using simple stitches or mesh to visually separate complex pattern bands, like the one you've just charted. This will add rhythm and elegance to your overall design.