Hello! Welcome back.
In our last lesson, we performed an "anatomical study" of the classic pineapple motif, deconstructing it into its three core parts: the base, the netting, and the crown. You learned to identify this structure in both written patterns and charts. Now, we shift from analysis to creation.
This lesson is all about putting that theoretical knowledge into practice. Your goal is to draft a single pineapple motif on graph paper, charting its growth and closure. We will take a set of written instructions and translate them, stitch by stitch, into a visual blueprint. This is the essential hands-on skill you'll need before you can begin designing your own pineapple variations and integrating them into a full doily.
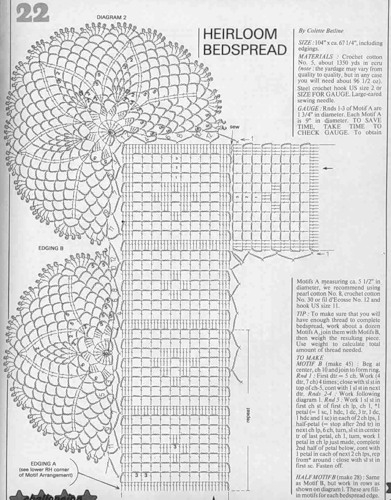
Let's look at the kind of beautiful, intricate designs this skill unlocks.
From Written Pattern to Visual Chart
The process of charting is one of translation. You're converting the linear, step-by-step information of a written pattern into a spatial, two-dimensional map. Given your background in web design, you can think of the written pattern as the raw code and the chart as the visual rendering—it provides an immediate, intuitive understanding of the structure that text alone cannot.
For this exercise, you'll need your preferred drafting tools: graph paper, a pencil, and an eraser. It's also a good idea to have your personal stitch symbol key, which you developed in Module 3, handy.
The Source Pattern: Isolating the Pineapple
We will use a written pattern as the source for our chart. The tutorial below describes how to create a shawl that starts with a single pineapple, but we will focus only on the rows that form that first, isolated motif.
How To Crochet The Pineapple Stitch
The following tutorial, 'How To Crochet The Pineapple Stitch' from The Snugglery, provides a clear, row-by-row written pattern. We will use this as the basis for our charting exercise.
Read through the instructions for Rows 6 through 15. These ten rows contain the complete formation of a single pineapple motif. Pay close attention to the stitch counts and the creation of chain loops. We will be charting the central pineapple part of these rows.
You'll notice the pattern includes "shell" stitches at the beginning and end of each row. These shells are part of the shawl's triangular increase structure. For this exercise, we will ignore the side shells and focus exclusively on charting the central pineapple itself, which begins in Row 6.
Charting the Pineapple: Growth and Closure
Let's walk through how to translate these specific written instructions into a chart, referencing the anatomical parts we learned about in the last lesson.
1. Charting the Netting: Expansion (Row 6 & 7)
The pineapple truly begins to take shape in Row 6. This is the expansion phase of the netting.
-
Row 6 Instructions:
...Ch3, 9dc into the next shell. Ch3... -
How to Chart It: On your graph paper, find the center point where the pineapple will grow from. Draw the symbol for 9 double crochet stitches, all originating from that single point, fanning outwards. You should also chart the
ch-3on either side of this fan. -
Row 7 Instructions:
...Ch3, 1dc into the next dc, *ch1, 1dc in the next st* repeat... across all 9dcs... Ch 3... -
How to Chart It: In the row above your 9-dc fan, you will draw one double crochet symbol directly above each
dcfrom the row below. Between each of thesedcsymbols, draw the symbol for a chain stitch. This creates the netted structure.
2. Charting the Crown: Tapering (Rows 8-15)
Now we begin creating the lacy body and tapering it to a point. This is the most recognizable part of the pineapple.
-
Row 8 Instructions:
...*Ch3, 1sc in the ch1 space* repeat... You'll have a total of 7 ch3 loops... Ch 3... -
How to Chart It: This is the first row of true netting. Draw a single crochet symbol in the middle of each
ch-1space from Row 7. Then, connect eachscwith a curved line or a series of chain symbols representing thech-3loops. You should have 7 distinct loops. -
Rows 9-15 Instructions: The instructions for these rows follow the same logic:
*Ch3, 1sc in the ch3 space* repeat.... Notice how the loop count decreases with each row:- Row 9: 6 loops
- Row 10: 5 loops
- Row 11: 4 loops
- ...and so on, until...
- Row 15:
...Ch3, 1sc in the last ch3 space of your pineapple. Ch 3...This final row has only 1 loop.
-
How to Chart It: For each new row on your chart, you will draw an
scin the center of eachch-3loop from the row below, then connect them with newch-3loops. Because you are working into the loops and not thescstitches, your chart will naturally show a decrease of one loop per row, creating the tapered shape of the crown.
The image below shows a completed chart for a different pineapple motif. Notice how the rows at the top (rows 9-12) clearly show the number of loops decreasing one by one until a single point is formed. This is the visual effect you are aiming for.

Test your understanding!
Look at the chart in the image above (LINK). Starting from Row 8, which has the most loops, count the number of chain loops in each subsequent row (9, 10, 11, and 12). What is the sequence of loop counts that forms the crown?
Show answer
The sequence of loop counts is:
- Row 8: 6 loops
- Row 9: 5 loops
- Row 10: 4 loops
- Row 11: 3 loops
- Row 12: 2 loops
(The final point would be formed in the next, un-numbered row, creating a single loop or point). This visual decrease is exactly what defines the crown in a chart.
Your Task: Draft the Pineapple Motif
Now it's your turn. Using your graph paper and pencil, create a complete chart for the central pineapple motif as described in Rows 6 through 15 of the "How To Crochet The Pineapple Stitch" tutorial.
- Start with Row 6: Draw the fan of 9
dcstitches. - Draw Row 7: Add the
dcandch-1spaces above the fan. - Draw Rows 8-15: Systematically chart the decreasing chain loops to form the body and crown, ending with a single loop at the top.
Take your time and refer back to the written instructions for each row. The goal is to create a clear, accurate visual representation of the pineapple's growth and closure.
Conclusion
Congratulations! You have successfully translated a written pattern into a complete, hand-drawn chart for a classic pineapple motif. This is a fundamental skill in pattern design. You didn't just copy a chart; you built one from scratch, reinforcing your understanding of how the pineapple's anatomy is constructed, row by row.
Key Takeaways:
- Charting is a process of translating linear written instructions into a two-dimensional visual map.
- The growth and closure of a pineapple motif can be clearly represented on graph paper.
- The expansion of the netting is charted as a fan of tall stitches.
- The crown is charted by systematically reducing the number of chain loops in each successive row until a single point remains.
Next Lesson:
You can now analyze and chart an isolated pineapple. But how does this motif fit into a larger, circular design without causing it to ruffle or cup? In the next lesson, we will tackle this crucial question by learning how to calculate the stitch adjustments needed in the surrounding fabric to accommodate a pineapple motif while keeping the doily flat.