Hello!
In our last lesson, you successfully translated your hand-drawn chart into a complete set of round-by-round written instructions. This was a crucial step, forming the core narrative of your pattern. Now, we'll build the final, professional framework around that core.
This lesson addresses the last step in our design journey: compiling the final pattern notes regarding materials, special stitches, and finishing instructions. We will assemble all the supporting information a crocheter needs to successfully recreate your doily design.
From your background in web development, you can think of this stage as preparing the essential metadata for a project. The written instructions you created are the <body> of the document—the main content. Today, we're building the <head> section and adding the final scripts: the configuration, dependencies, and finishing procedures that ensure the content renders perfectly for the user.
By the end of this lesson, you will have a complete, professional-grade pattern template ready for your first original retro doily design.
1. The 'Cover Page': Information Before the First Stitch
Most professional patterns begin with a "cover page" or a preliminary section. This isn't just a title; it's a comprehensive summary of everything the crocheter needs to gather and understand before they begin. Getting this right prevents confusion and ensures the final project matches your vision.
Let's break down the key components of this section.
Materials and Tools
This is arguably the most critical part of the preliminary notes. Vague material lists lead to failed projects. For doily design, specificity is paramount.
To understand the professional standard for this section, the following video provides an excellent walkthrough.
Template To Write Crochet Patterns
The video 'Template To Write Crochet Patterns' by the American Crochet Association offers a fantastic breakdown of a universal pattern template. We'll focus on the sections that detail the 'cover page' components.
Please watch the segment from 11:48 to 15:38. Pay close attention to the justification for having a 'cover page' and the detailed explanation of what to include in the materials list, including yarn specifics and other tools.
As the video explains, your materials list should include:
- Thread: Be extremely specific.
- Size: e.g., Size 10, Size 20.
- Fiber Content: e.g., 100% Mercerized Cotton.
- Brand and Name (Recommended): e.g., Aunt Lydia's Classic 10.
- Yardage/Meterage: Specify the amount needed. This is more reliable than "1 ball," as ball sizes vary.
- Hook:
- Size: Provide the metric size (e.g., 1.75 mm) as it's a universal standard. You can also include the corresponding US steel hook number (e.g., US 7).
- Notions: List all other required tools, such as a tapestry needle, scissors, and rust-proof blocking pins.
For doilies, choosing the right thread and hook is essential. The article below is a fantastic technical guide for this.
A Guide to Crochet Thread and Steel Hook Sizes
To help you make precise recommendations in your patterns, please read 'A Guide to Crochet Thread and Steel Hook Sizes' from Aabhar Creations. It explains the inverse sizing system for thread and steel hooks, which is fundamental to doily design.
Read the sections explaining thread sizes ('Bigger is Smaller'), common thread sizes used for doilies, the corresponding hook sizing system, and finally, look closely at the table 'Crochet Thread Size, Steel Hook Size, and Ideal Projects'. This table will be your go-to reference.
Based on this resource, you now know that for a classic doily using Size 10 thread, you would recommend a 1.5 mm or 1.75 mm hook. If you design with a finer Size 30 thread, you'd suggest a hook in the 0.75 mm to 0.95 mm range. This level of detail empowers the person following your pattern.
Gauge and Finished Size
Gauge ensures that if someone uses your recommended materials, their project will come out the same size as yours.
- Gauge for a Doily: It's typically measured by the diameter after a certain number of rounds. For example:
First 5 rounds = 4 inches (10 cm) in diameter after blocking. - Finished Size: State the final, blocked dimensions of the doily, e.g.,
Approx. 12 inches (30.5 cm) in diameter.
The article "How to read (and write) a quality crochet pattern" from Dora Does provides a good summary of why these elements are considered essential. You can refer back to it for reinforcing these concepts (sections Measurements and Gauge).
2. The Pattern's Dictionary: Stitches and Notes
After the materials, you need to define the language of your pattern. This ensures there is no ambiguity in your instructions.
Abbreviations and Special Stitches
You already have a list of standard abbreviations from our last lesson. In your pattern document, you'll create two key lists:
- Abbreviations Key: A list of all standard stitches used (e.g.,
ch- chain,dc- double crochet). Crucially, you must state which terminology you're using (e.g.,This pattern uses US crochet terminology.). - Special Stitches Key: This is where you define any custom stitch combinations or complex stitches that you've named for brevity. This is vital for motifs like pineapples and shells.
The decision of what needs a definition is important. A stitch with a single, universal execution (like a front post double crochet) may not need a definition. But a stitch with many variations (like a shell or cluster) absolutely does.
Let's return to the American Crochet Association video for a clear explanation of this distinction.
Template To Write Crochet Patterns
This segment clearly explains the difference between a standard stitch key and a specialty stitch key, guiding you on when a full written definition is necessary.
Please watch the segment from 17:17 to 22:33. Focus on the logic for deciding what constitutes a 'specialty stitch' that requires a definition (like a shell or fan) versus a standard term that does not.
Here’s how you’d format a special stitch definition in your pattern:
Shell: (2 dc, ch 2, 2 dc) worked in the same stitch or space.
pc (Popcorn Stitch): Work 5 dc in the same st. Drop the loop from the hook, insert hook from front to back through the top of the first dc, place the dropped loop back on the hook and pull it through the stitch.
Pattern Notes
This is your "cheat sheet" section for global rules that apply to the whole pattern. It prevents you from having to repeat instructions in every round.
How to read (and write) a quality crochet pattern
The article from Dora Does, 'How to read (and write) a quality crochet pattern,' perfectly describes this section's purpose.
Please read the section titled 'The Pattern Notes.' It clearly explains how these notes function as a 'cheat sheet' for the user.
Examples of excellent pattern notes include:
This pattern is worked in joined rounds from the center out.The beginning ch-3 counts as the first double crochet unless otherwise stated.Stitch counts at the end of each round are listed in (parentheses).
Test your understanding!
Imagine you've designed a doily that uses a unique cluster you decide to call a "Grape Cluster." It's made by working 3 double crochet stitches together in the same stitch. How would you write the entry for this in your "Special Stitches" section?
Show answer
You would create an abbreviation and provide a clear, concise definition. For example:
gc (Grape Cluster): [Yarn over, insert hook in indicated st, yarn over and pull up a loop, yarn over and draw through 2 loops] 3 times in the same st, yarn over and draw through all 4 loops on hook.
(Note: There are different ways to write this, but the key is to be unambiguous and define both the abbreviation and the steps.)
3. The Final Polish: Finishing Instructions
A doily is not finished when the last stitch is made. The finishing instructions are what elevate it from a crocheted object to a piece of lace art.
Your pattern must include instructions for:
- Weaving in Ends: Advise the crocheter to weave in all ends securely with a tapestry needle. For fine thread, this needs to be done meticulously to be invisible.
- Blocking: This is non-negotiable for doilies. Blocking opens up the lacework, flattens the circle, and defines the points and edges of your design.
Your blocking instructions should outline the basic steps:
- Wet the doily: Soak the finished piece in lukewarm water.
- Remove excess water: Gently squeeze out the water (do not wring). Roll it in a towel to absorb more moisture.
- Pin it out: Lay the damp doily on a blocking mat or a thick towel. Using rust-proof T-pins, start by pinning the center. Then, working outwards, gently stretch the doily to its final dimensions, pinning as you go. Pay special attention to pinning out any points, scallops, or picots along the border to define their shape.
- Let it dry: Allow the doily to dry completely before unpinning.
Your Complete Pattern Template
You now have all the components. Since you prefer a pen-and-paper approach, you can create a master template in a notebook to use for all your future designs. The checklist in the image below is an excellent summary of a complete, professional pattern structure.
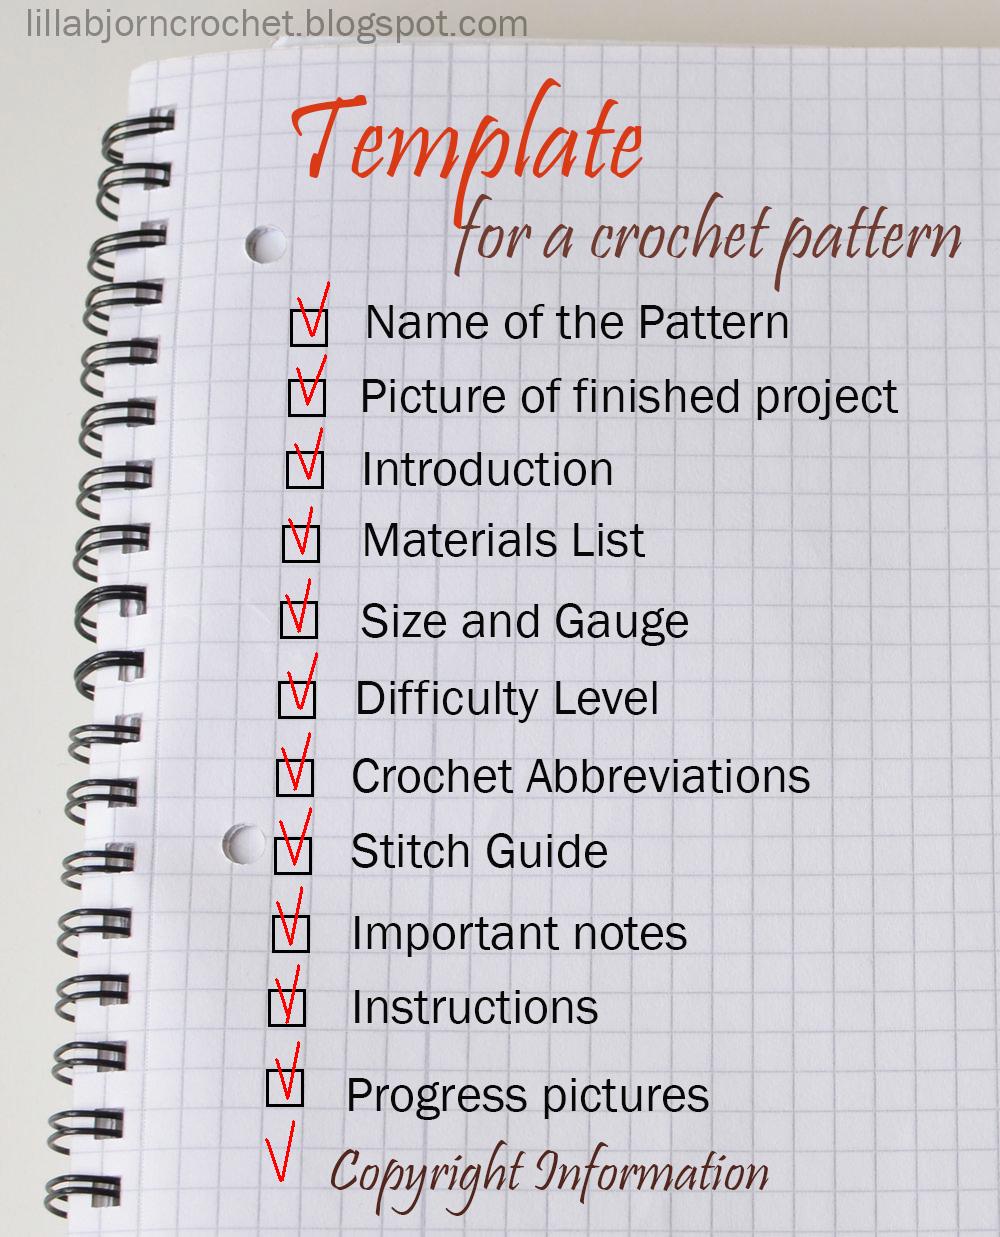
Your final document, whether on paper or typed, should follow this order:
- Pattern Title
- Introduction/Photo
- Skill Level
- Finished Size
- Materials (Thread, Hook, Notions)
- Gauge
- Abbreviations Key (e.g., US terms)
- Special Stitches Key
- Pattern Notes
- Written Instructions (Round by Round) - This is what you created in the last lesson.
- Finishing Instructions (Weaving ends, Blocking)
- Chart (Your beautiful hand-drawn chart!)
- Copyright Notice
Conclusion
Congratulations! You have now walked through the entire process of designing a retro doily, from analyzing vintage structures to creating a complete, professional-grade pattern document. You’ve learned not just how to create the design, but how to communicate it clearly and effectively to others.
Key Takeaways:
- A professional pattern provides comprehensive preliminary information—the "cover page"—including specific materials, gauge, and finished size.
- The "Special Stitches" and "Pattern Notes" sections act as a dictionary and a rulebook, eliminating ambiguity for the user.
- Finishing instructions, especially for blocking, are a critical part of a doily pattern that ensures the final piece looks as the designer intended.
- All these elements combine with the core instructions and chart to form a complete, shareable, and successful pattern.
This lesson marks the end of our formal course. You are now fully equipped with the theory, mathematics, and documentation skills to begin designing your own beautiful, retro-inspired circular patterns. The world of vintage doilies is now yours to explore and reinvent. Happy designing