Hello and welcome back!
In our last lesson, we learned how to create a dynamic user interface by using the Condition tool to show or hide questions based on a user's choices. This is a great way to make your apps cleaner and more intuitive. However, a user-friendly app doesn't just adapt; it also protects itself and the user from invalid inputs that could cause the workflow to fail or produce incorrect results.
Today, we'll address this by focusing on how to add user input validation and custom error messages using the Error Message tool. This is a critical skill for building robust, professional-grade analytic apps that can handle user error gracefully. By the end of this lesson, you'll be able to stop bad data at the source—the app interface itself.
The Guardian of Your App: The Error Message Tool
The Error Message tool, found in the Interface tool palette, acts as a validator for your app's inputs. Its job is to test a condition you define before the workflow runs. If that condition is met (meaning an error state exists), it halts the app and displays a helpful, custom message to the user, guiding them to fix the input.
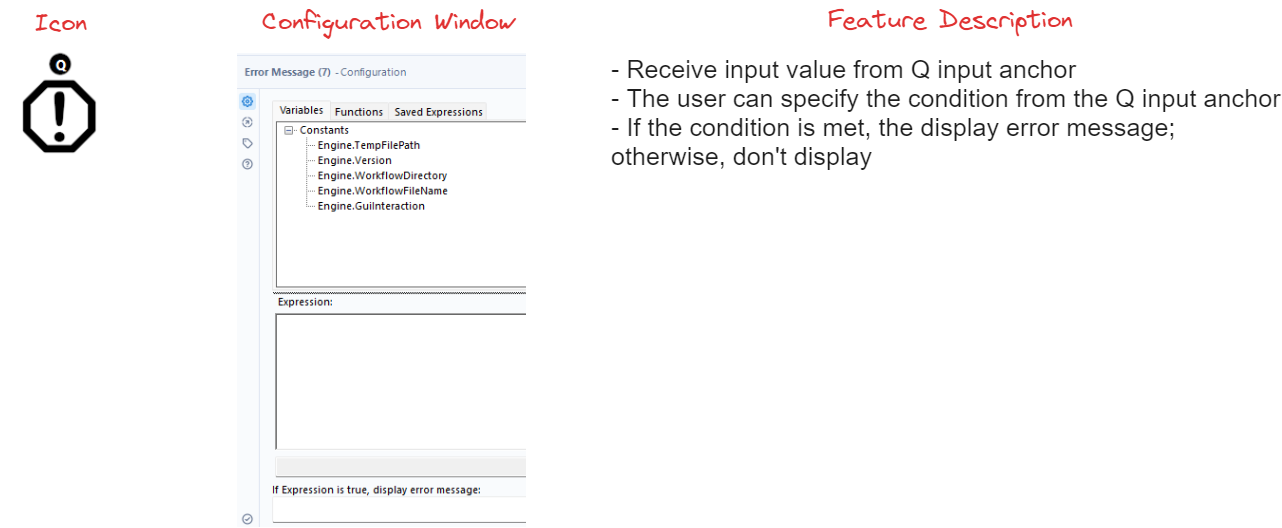
The logic of the Error Message tool is key: The expression you write must evaluate to True for the error message to be displayed. You are defining the error condition.
For example, if you want to ensure a text box is not empty, your expression would check if it is empty.
- Incorrect Logic:
!IsEmpty([#1])(This is true when the box has text, which is not an error). - Correct Logic:
IsEmpty([#1])(This is true when the box is empty, which is the error you want to catch).
Simple Validation: Checking a Single Input
Let's start with a common scenario: validating the format of a single input field. Imagine you need a user to enter a 5-digit zip code. They might accidentally enter four digits, six digits, or even letters. The Error Message tool can catch all of these.

Let's analyze the expression used in the image above:length([#1]) != 5 OR regex_countmatches([#1], "\d") != 5
This expression is composed of two parts, combined with an OR:
length([#1]) != 5: This checks if the length of the input string (referenced by[#1]) is not equal to 5.regex_countmatches([#1], "\d") != 5: This uses a regular expression to count the number of digit characters (\d) in the input. It then checks if that count is not equal to 5. This cleverly catches cases where the user enters non-numeric characters (e.g., "1234a").
If either of these conditions is True, the entire expression becomes True, and the app displays the custom error: "Error!!!! This is not a 5 digit number".
Advanced Validation: Comparing Multiple Inputs
Often, you need to validate the relationship between two or more user inputs. For example:
- An end date must be after a start date.
- A minimum value must be less than a maximum value.
The Error Message tool can handle this by accepting connections from multiple Interface tools. The order in which you connect the tools to the Error Message tool determines their reference number ([#1], [#2], etc.).
Let's explore a practical example of setting a valid price range. We'll look at how the validation logic changes depending on the type of Interface tool used.
Alteryx Analytic Apps Introduction and Deep Dive Series: Part 4
This article from the Alteryx Community blog provides an excellent deep dive into building an app with price range filters. It clearly demonstrates how to use the Error Message tool to compare two inputs from different Interface tools.
Please read the sections 'Option 1: Two Numeric Up Downs' and 'Option 2: Two Text Boxes'. Focus on the configuration of the Error Message tool shown in the images for each option. Pay close attention to how the expressions differ.
Analysis of the Reading
After reviewing the article, you'll notice two key approaches to validating the price range.
1. Using Numeric Up/Down Tools
When you use Numeric Up Down tools, Alteryx treats the inputs as numbers. This makes the comparison straightforward. If you connect the 'Lower Price' tool first ([#1]) and the 'Upper Price' tool second ([#2]), your error condition is simple: the lower price should not be greater than or equal to the upper price.
- Error Condition:
[#1] >= [#2] - Error Message: "Lowest Gas Price must be lower than Highest Gas Price"
This expression is clean and easy to understand because the data types are already correct.
2. Using Text Box Tools
When you use Text Box tools, the inputs are always strings, even if the user types numbers. You cannot directly compare "10.00" and "5.00" as strings and get a reliable numeric result. Therefore, you must first convert them to numbers within your expression.
- Error Condition:
ToNumber([#1]) >= ToNumber([#2]) - Error Message: "Lowest Gas Price must be lower than Highest Gas Price"
Here, the ToNumber() function is essential to ensure a proper numeric comparison. As the article notes, using Text Box tools for numeric input adds risk. You would ideally add another Error Message tool to validate that the inputs are in a valid number format (using RegEx, as we saw earlier) before you even attempt to compare them. This demonstrates how you can layer validation rules for more robust error checking.
Putting It All Together
You've now seen how to build a dynamic interface with the Condition tool and how to make it robust with the Error Message tool. These two tools are fundamental to creating a positive user experience. One guides the user by simplifying the interface, while the other prevents them from making mistakes.
Imagine an app where a user selects "Custom Date Range" from a dropdown.
- A
Conditiontool shows the "Start Date" and "End Date" input fields. - An
Error Messagetool, connected to both date inputs, checks that[#1] < [#2](Start Date is before End Date).
This combination creates an interface that is both intuitive and foolproof.
Conclusion
In this lesson, we focused on making your analytic apps more robust and user-friendly by implementing input validation. You now have the skills to prevent common user errors before they disrupt your workflow.
Key Takeaways:
- The Error Message tool is used to validate user input in an Analytic App.
- It works by evaluating an expression; if the expression returns
True, the app stops and displays a custom error message. - You can validate single inputs (e.g., checking format with RegEx) or compare multiple inputs to ensure their relationship is valid.
- Always be mindful of data types. Inputs from
Text Boxtools are strings and may need to be converted to numbers or dates using functions likeToNumber()orToDate()before comparison.
In our next lesson, we'll continue to refine the user interface of our apps. We will learn how to design a user-friendly app interface using grouping and layout options. This will involve organizing your interface tools into logical sections and tabs, making even the most complex apps easy for a user to navigate.