Hello! Welcome back to your course on changing a car tyre.
In our previous lessons, we successfully located your vehicle's emergency toolkit and, just as importantly, performed a full inspection of the spare tyre to ensure it's safe and ready for use. This preparation is crucial—having the right equipment is one thing, but knowing it's in working order is another.
Today, we'll get familiar with that equipment. The goal of this lesson is to explain the function of each tool required for a tyre change. Think of this as the orientation phase before starting a new project; just as you'd want to understand the function of each tool in a design software's toolbar, knowing what each automotive tool does is essential for using it safely and effectively. This understanding builds confidence and prevents dangerous mistakes.
Let's dive into the "cast of characters" for our roadside tyre change.
The Standard Issue Toolkit
Most vehicles come equipped with a basic set of tools for a roadside tyre change. While the exact design can vary, their functions are universal. The image below shows several of these key items.
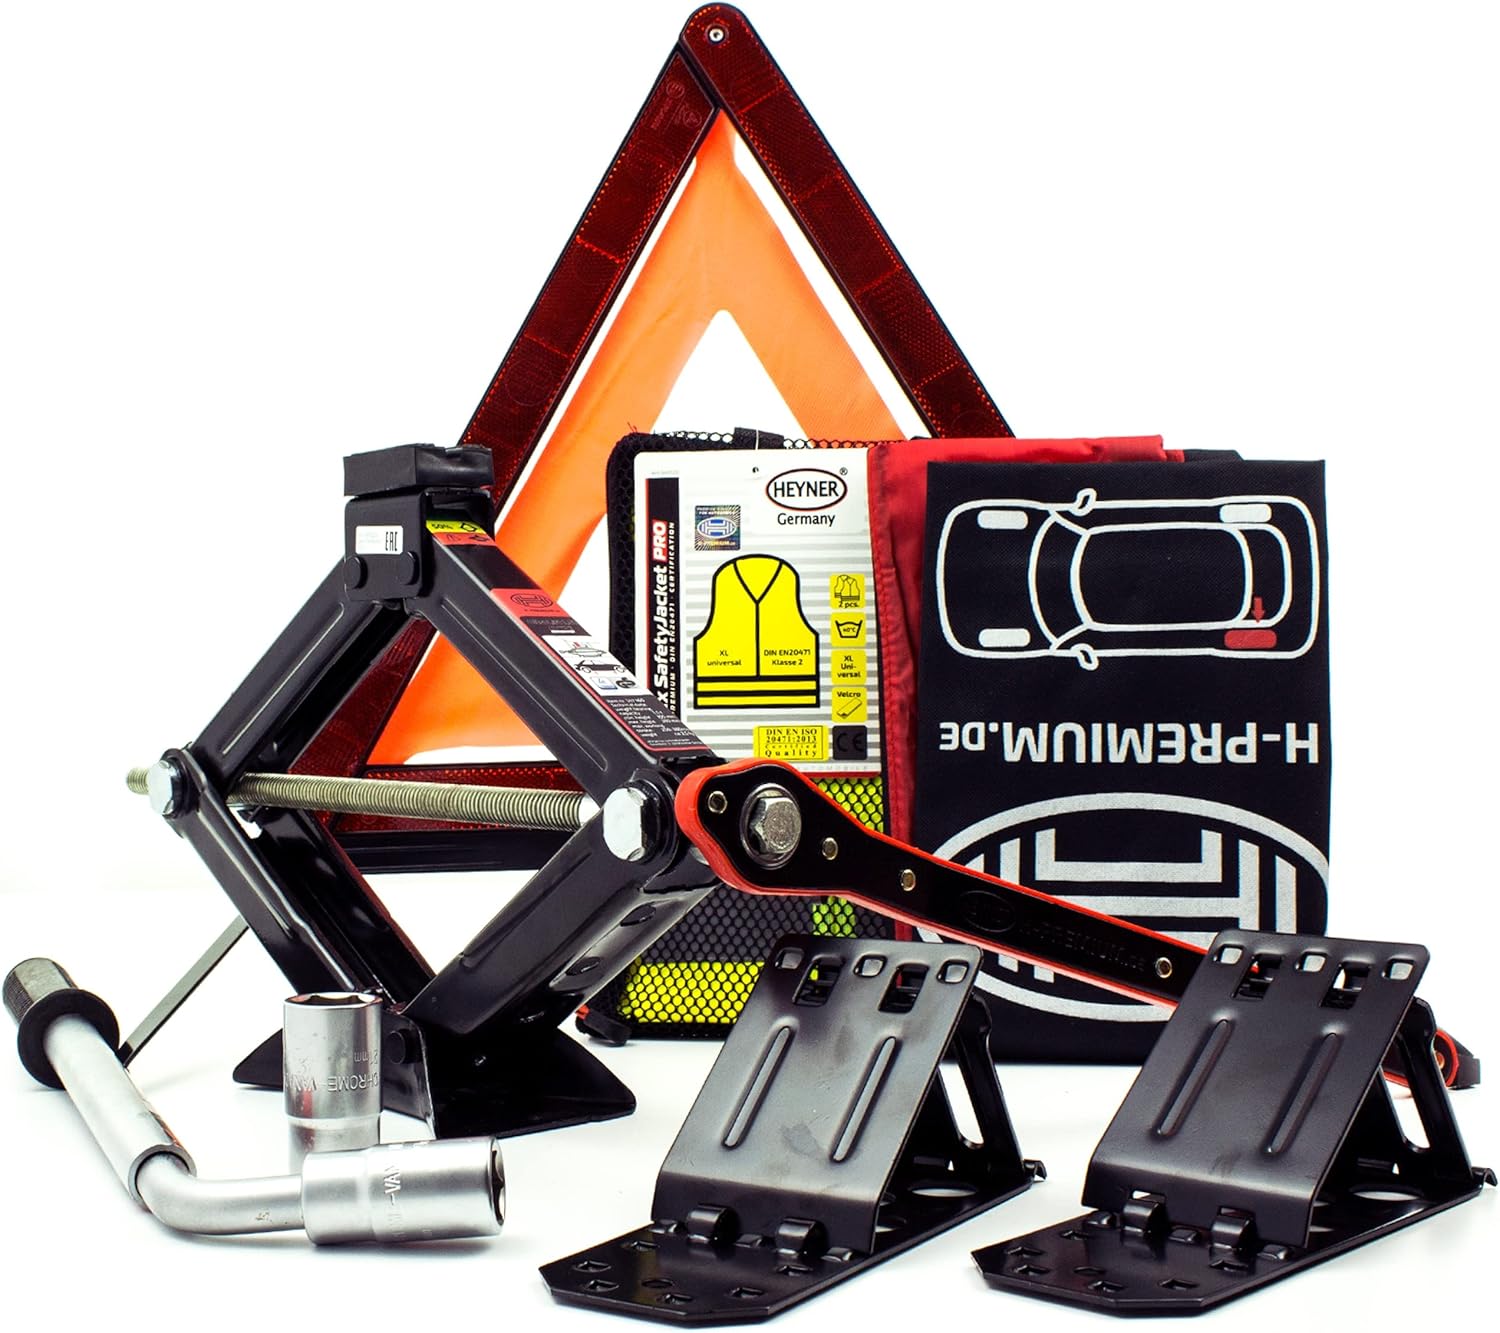
Let's break down what each of these tools does.
1. The Jack: The Lifter
The jack is the most powerful tool in your kit. Its sole function is to lift a corner of your vehicle off the ground high enough for the wheel to be removed. Without a jack, a tyre change is impossible.
The most common type of jack included with passenger cars is a scissor jack, named for its diamond-shaped, scissor-like mechanism. As a product designer, you'll appreciate its elegant simplicity and efficiency for its intended purpose. It’s designed to be lightweight, compact, and manually operated—perfect for an emergency kit where space is at a premium.
To learn more about its mechanics and operation, please review the following resource.
Scissor Jack vs. Floor Jack: Elevate Your Car Maintenance
This article from VEVOR provides a clear and concise explanation of how a scissor jack works.
Please read the short section titled 'What is a Scissor Jack?' and then skip down to 'Operating a Scissor Jack'. These will explain the tool's simple but effective mechanical design (the lead screw) and how it is operated by cranking a handle.
As you read, the key principle to note is how rotational motion (cranking the handle) is converted into linear motion (lifting the car) through the screw. It’s a classic piece of mechanical design.
2. The Lug Wrench: The Turner
The lug wrench is designed for one specific task: loosening and tightening the lug nuts that secure your wheel to the vehicle.
Lug nuts are tightened very securely, and you cannot remove them by hand. The lug wrench acts as a long lever, giving you the mechanical advantage (torque) needed to break the nuts loose and to tighten them properly when you're done. The standard wrench that comes with a car is typically an L-shaped bar.
3. The Owner's Manual: The Guide
While not a "tool" in the traditional sense, the owner's manual is one of the most critical components of your kit. For a tyre change, its primary function is to provide two pieces of vital information:
- The correct jacking points: These are specific, reinforced locations on your vehicle's frame designed to bear the load from the jack. Using a non-specified point can damage your car or lead to the jack slipping, which is extremely dangerous.
- The specific procedure: While the overall process is similar for most cars, your manual may have vehicle-specific instructions.
Think of it as the non-negotiable user guide for this procedure. We will refer to it directly in a future lesson when we locate the jacking point.
4. Wheel Chocks: The Stabilizer
Wheel chocks are simple wedges of sturdy material (hard rubber or plastic) that you place against the tyres remaining on the ground. Their function is purely for safety: they physically prevent the vehicle from rolling while it is being lifted.
Your car may or may not have come with a set of chocks, but they are an inexpensive and absolutely essential piece of safety equipment. In a pinch, a solid block of wood or a large rock can serve the same purpose, but dedicated chocks are designed for the job.
Upgrading Your Emergency Kit
The basic toolkit will get the job done, but a few additional items can make the process significantly safer, cleaner, and more manageable, especially in challenging conditions like at night or in bad weather.
The following resource describes several of these useful additions.
Essential Items to Keep in Your Car for Tire Emergencies
This article from RNR Tires outlines some items that, while not always standard, are highly recommended for any roadside emergency kit.
Please read the sections on 'Hydraulic Jack and Jack Stands', 'Flashlight or Headlamp and Batteries', and 'Mechanic Gloves'. Focus on the purpose of each item and why it's considered essential for a well-rounded kit.
Based on that reading, let's highlight a few of the most important additions:
- Jack Stands: This is a crucial safety upgrade. As the article notes, jack stands are designed to securely support the vehicle's weight after it has been lifted. A jack is a lifting device, not a holding device. Once the car is up, placing a jack stand underneath provides a much more stable and reliable support, protecting you while you work.
- Gloves: A simple but brilliant addition. Their function is to protect your hands from grease, grime, and potential cuts or scrapes from tools and sharp edges. This also helps you maintain a better grip on the lug wrench.
- Flashlight or Headlamp: Flat tyres don't only happen in broad daylight. A powerful light source is essential for seeing what you're doing. A headlamp is a particularly excellent example of user-centered design, as it keeps your hands free to work.
Conclusion
Well done. You are now familiar with the purpose and function of every major tool you'll need to change a tyre. Knowing what each tool is designed to do is the first step toward using it with confidence.
Key Takeaways:
- The Jack is a lifting device used to raise the vehicle off the ground. Scissor jacks are common and use a screw mechanism.
- The Lug Wrench is a lever used to provide the torque needed to loosen and tighten lug nuts.
- The Owner's Manual is your guide to vehicle-specific information, especially the correct jacking points.
- Wheel Chocks are a critical safety item used to prevent the car from rolling.
- Additional items like jack stands, gloves, and a headlamp significantly improve the safety and ease of the task.
In our last couple of lessons, we've located our tools and confirmed we have a usable spare. Now we know what each tool is for. The next logical step is to prepare the car itself for the lift.
In the next lesson, we will secure the vehicle by engaging the parking brake and placing wheel chocks correctly, ensuring the car is completely stable before we begin.