Hello! Welcome back to your course on changing a car tyre.
In our last session, we accomplished the critical and potentially intimidating task of safely lifting the car with a jack. The vehicle is now raised, stable, and the lug nuts have already been loosened. You're in a great position to proceed.
This lesson focuses on the next practical step: finishing the removal of the lug nuts and carefully taking the damaged tyre off the vehicle. While this may seem straightforward, we'll cover the proper technique to ensure you maintain stability and handle the weight of the wheel safely.
Part 1: Final Removal of the Lug Nuts
With the car jacked up, there's no longer any weight pressing the wheel against the hub. Since you already did the hard work of breaking the lug nuts free with the wrench, finishing the job should be easy.
You can now unscrew the lug nuts the rest of the way by hand.

A key part of this process, especially in a roadside situation, is keeping track of the lug nuts. They are small and can easily get lost.
- Create a designated spot: Place the lug nuts in a safe, contained space as you remove them. Good options include the hubcap if you've removed one, a pocket, or the passenger-side floor of your car. Don't just put them on the ground where they can roll away or be kicked by accident.
The following guide from AAA provides an excellent, safety-conscious overview of this step and the next.
How To Change a Tire in 11 Easy Steps
This article from AAA clearly outlines the process of removing the lug nuts and the flat tyre. It offers practical tips that directly relate to the roadside emergency scenario you're preparing for.
Please read section 6, titled 'Loosen the Lug Nuts the Rest of the Way and Set Them Aside Before Removing the Flat Tire'. Pay close attention to the advice on removing the tyre smoothly to avoid shaking the car.
Part 2: Removing the Flat Tyre
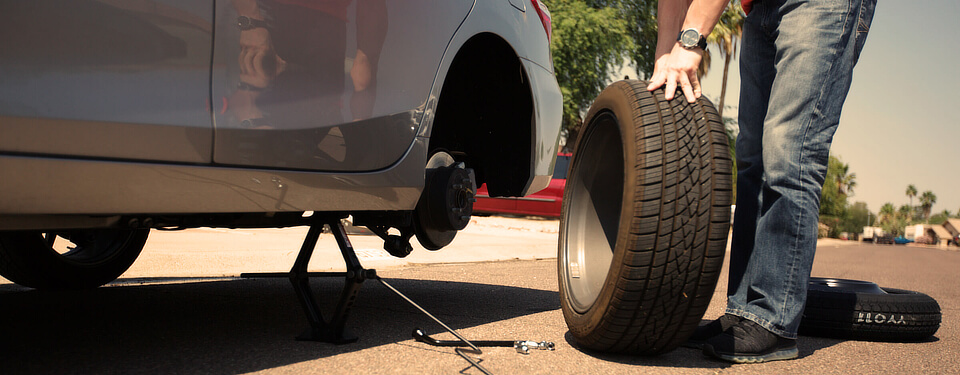
Once all the lug nuts are off and safely stored, you can remove the tyre.
- Get a Good Grip: Place your hands on opposite sides of the tyre, for instance, at the 9 o'clock and 3 o'clock positions. This gives you a balanced and stable grip.
- Pull Straight Back: Pull the tyre directly toward you, off the long threaded bolts (these are called wheel studs). It should slide off. Be prepared for the weight; a typical car wheel and tyre assembly can weigh between 15-25 kg (35-55 lbs).
- Handle the Weight: Use a firm stance and be ready to support the full weight of the wheel as it comes free. As with any heavy object, bend your knees and use your legs, not your back, to handle the load.
- Secure the Tyre: Once the tyre is off, immediately lay it flat on the ground. This prevents it from rolling away, potentially into traffic or down an embankment.
What If the Wheel is Stuck?
Sometimes, a wheel can become stuck to the hub due to rust or corrosion, especially in areas with wet climates or where roads are salted in winter. Pulling on it won't be enough to free it. This is a common problem, so it's good to know how to handle it.
The goal is to break the corrosion seal with a sharp jolt without destabilizing the car on the jack.
The reading below provides a few expert-certified methods for this.
How to Remove Lug Nuts & Tires: Expert-Certified Steps
This wikiHow article illustrates the removal process and provides a key troubleshooting tip for what to do when a wheel is stuck.
Focus on the steps under the heading 'How to Remove a Jacked Up Wheel'. Specifically, review Step 5 ('Pull the wheel toward you') and Step 6 ('Use a rubber mallet to loosen stuck wheels').
As the article suggests, a rubber mallet is the ideal tool. However, you likely won't have one in an emergency kit. Here are two practical alternatives:
- The Heel Kick: Remain seated on the ground for stability. Strike the side of the tyre firmly with the heel of your shoe. Rotate the wheel 180 degrees and strike the opposite side. Repeat this a few times. The alternating force should break the rust seal. Important: Hit the rubber tyre only, not the metal rim, to avoid damaging it.
- The Spare Tyre Tap: Carefully use the spare tyre itself as a soft battering ram. Hold it by the sides and give the stuck tyre a firm tap. This is often enough to knock it loose.
In either case, perform the action with sharp, controlled force. Avoid wild swings that could cause you to lose your balance or shake the car excessively.
Conclusion
Excellent work. You've now removed all the lug nuts, dealt with the weight of the wheel, and successfully taken the flat tyre off the car. You also know how to handle the common problem of a stuck wheel.
Key Takeaways:
- After loosening with a wrench, lug nuts should be removed by hand.
- Always store lug nuts in a secure place so they don't get lost.
- Use a firm, balanced grip to pull the tyre straight off the wheel studs.
- Be prepared for the wheel's weight and lay it flat on the ground immediately after removal.
- If a wheel is stuck, use firm, alternating jolts to the tyre (not the rim) to break the corrosion seal.
The damaged wheel is now off and out of the way. The car is ready for its replacement. In our next lesson, we will focus on how to mount the spare tyre correctly onto the wheel hub.