Hello! Let's get started on the next critical step in changing your tyre.
In our last lesson, you did the hard work of loosening the very tight lug nuts while the car was safely on the ground. This was a crucial preparatory step. Now, with the car secured and the lug nuts broken free, it's time to get the flat tyre off the ground.
This lesson's objective is to position the jack on the correct jacking point and safely lift the vehicle. This is arguably the most dangerous part of the entire process if done incorrectly. A car weighing over a tonne can cause serious injury or damage if it falls. We'll focus on the 'why' behind each safety measure, so you can perform this step with confidence and precision.
Part 1: Why Jacking Points Are Non-Negotiable
In a previous module, you learned how to locate your car's jacking points using the owner's manual. Now, let's delve deeper into why using these exact spots is so critical.
Modern cars are marvels of engineering, designed to be both lightweight for fuel efficiency and strong enough to protect occupants in a crash. Most are built with a "unibody" construction, meaning the frame and body are a single, integrated structure. While this structure is very strong overall, it's not designed to bear the vehicle's entire weight at just any random point.
Placing a jack incorrectly can easily bend the frame, puncture the floor pan, or damage components running along the underside of the car. The designated jacking points are areas that the car's designers have specifically reinforced to handle the concentrated force of lifting. Think of them as the load-bearing columns in a building, designed specifically for that purpose.
To get a comprehensive overview of how to find these points and why they matter, please read the following article.
How to Find a Car's Jacking Points
This guide from Kwik Fit explains the importance of using correct jacking points and provides practical tips on how to locate them on different types of vehicles.
Please read the introduction and the first two main sections: 'Why is it important to use the right jacking points?' and 'Where are the jack points on your car?'. Focus on understanding the difference between older frame-based cars and modern unibody designs, and the common locations to check for jacking points.
As the article mentions, the most common jacking points for a roadside tyre change are located on a reinforced metal seam called a pinch weld, just behind the front wheels and in front of the rear wheels. These often have small notches or arrows indicating the precise spot for the jack.

Part 2: Positioning and Lifting
Now that we've reinforced the importance of the where, let's focus on the how. You have your jack, which is most likely a scissor jack that came with your vehicle. It works by turning a crank to expand the "scissor" mechanism, pushing the car upwards.
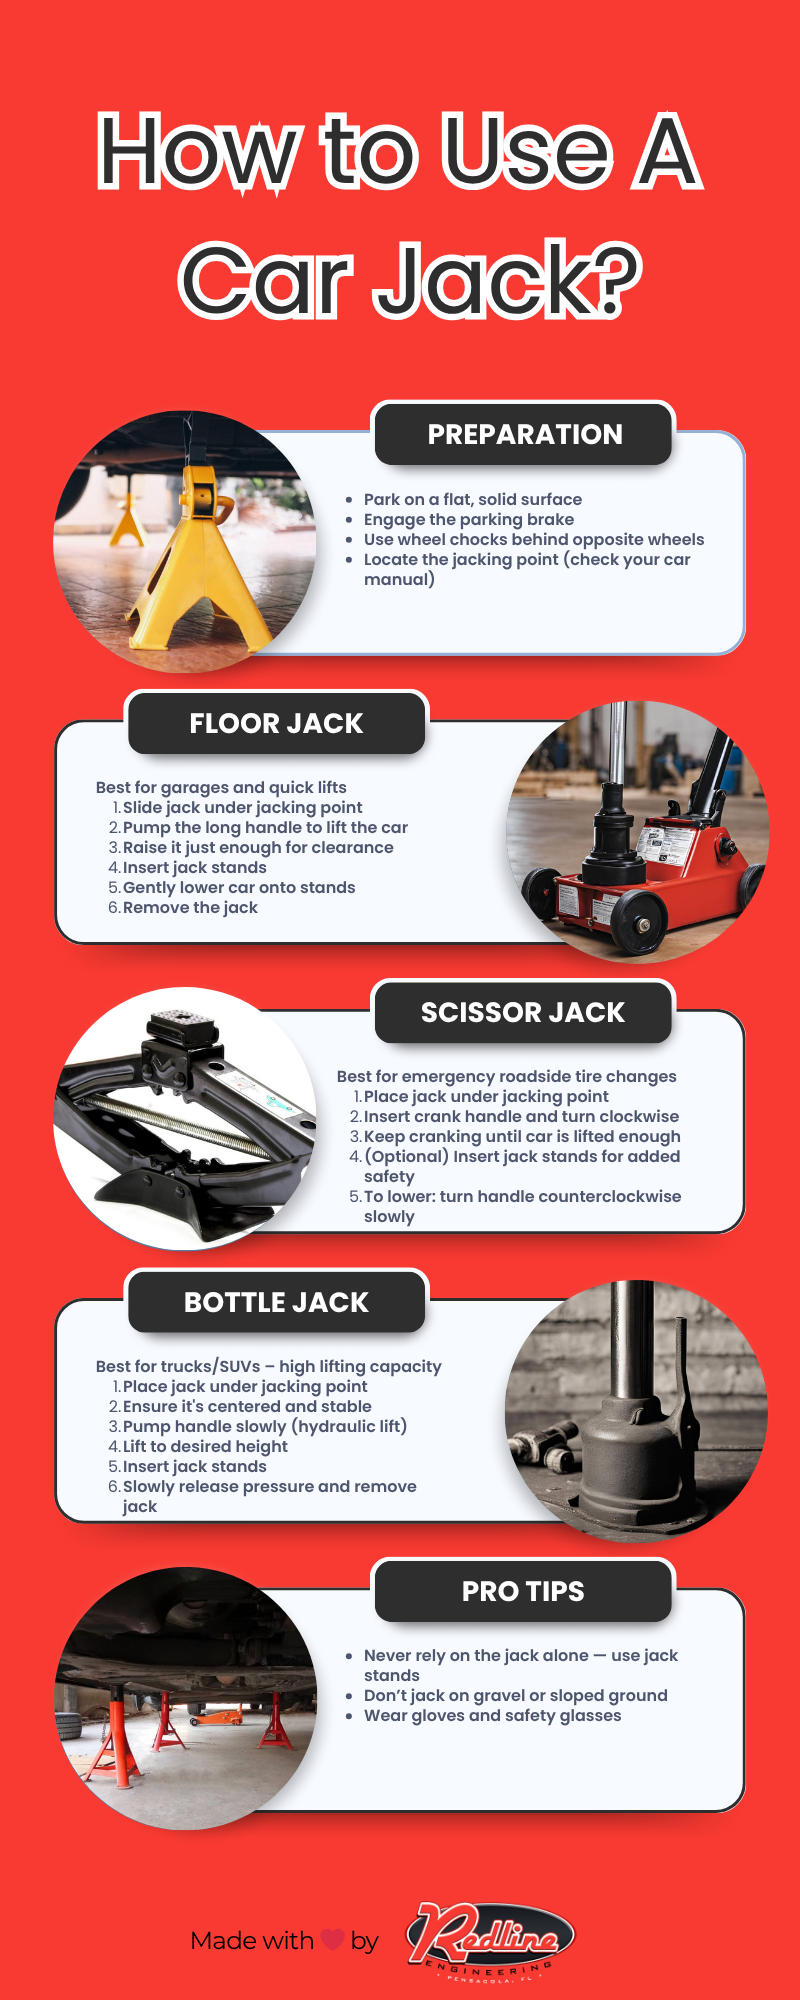
Here is the step-by-step process to safely lift your vehicle:
Step 1: Position the Jack
- Find a Firm, Level Surface: This is non-negotiable. The base of the jack must be on solid, flat ground. Never jack a car on a slope, soft ground, or an uneven surface. The jack could slip or sink, causing the car to fall.
- Place the Jack: Slide the jack under the car next to the flat tyre. Position it directly beneath the designated jacking point you identified earlier.
- Align the Jack Head: The top of the jack, called the saddle, often has a slot in it. This slot is designed to fit snugly onto the pinch weld. Ensure the weld is centered in the slot. If your jacking point is a flat reinforced plate, center the saddle on it.
Step 2: Raise the Jack
- Initial Lift: Begin turning the jack handle clockwise. At first, you can go relatively quickly to raise the jack until the saddle makes firm contact with the jacking point.
- Double-Check Alignment: Once there is pressure between the jack and the car, stop and do one final check. Is the jack perfectly vertical? Is the saddle correctly seated? Is the base still flat on the ground? It is much easier and safer to make adjustments now than when the car's weight is on the jack.
- Slow and Steady Lift: Continue turning the handle slowly and steadily. You will feel the resistance increase as the car begins to lift off its suspension. Keep an eye on the stability of the jack and car as you go. Listen for any unusual sounds.
Step 3: Know How High to Go
You only need to lift the car high enough for the flat tyre to be clear of the ground. An inch or two of clearance is plenty.
- How to check? Once you see a gap between the tyre and the ground, stop lifting. You can try to spin the wheel by hand. If it rotates freely without scraping the ground, you have lifted it high enough.
Lifting the car higher than necessary makes it less stable and requires more effort.
The following resource provides a concise description of this lifting process.
Where Are The Jacking Points on a Car?
This article from AutoZone provides clear, safety-focused instructions on positioning the jack and lifting the vehicle.
Please read the sections titled 'Positioning the Jack Correctly' and 'Lifting the Vehicle Safely'. Note the emphasis on slow, steady lifting and constant observation.
A Critical Note on Safety: Jack Stands
The AutoZone article you just reviewed mentions that jack stands are mandatory for safety. A jack is a lifting device; it is not designed to securely hold a vehicle for an extended period. The hydraulic seals in a floor jack can fail, and the gear mechanism in a scissor jack can slip under the right (or wrong) conditions.
For a quick, emergency roadside tyre change where you will not be placing any part of your body under the vehicle, using only the car's supplied jack is common practice. However, you must be aware of the risk.
- NEVER, under any circumstances, put any part of your body under a car that is supported only by a jack.
- If the car were to fall while you are simply swapping the wheel, you would be startled, but likely uninjured if you are positioned correctly to the side of the wheel arch. If any part of you is under the car, the consequences could be fatal.
If you were doing any other maintenance (like an oil change), you would lift the car with the jack and then lower it onto sturdy jack stands placed at a secure point on the frame. The jack stands, not the jack, would bear the load. This is the gold standard for safety.
Conclusion
Great job. You've successfully and safely navigated the most precarious part of changing a tyre. By understanding the structural design of your car and the mechanics of the jack, you've lifted the vehicle off the ground, ready for the wheel to be removed.
Key Takeaways:
- Jacking Point is Critical: Always use the manufacturer-specified jacking points to avoid damaging your vehicle and ensure a stable lift.
- Surface Matters: Only use a jack on a firm, flat, and level surface.
- Position with Precision: Ensure the jack saddle is perfectly centered on the jacking point before applying the car's weight.
- Lift Slowly: Raise the vehicle with slow, steady movements, and only lift it high enough for the wheel to clear the ground.
- Safety First: Never get under a car supported only by a jack. While jack stands are not typically used for a roadside tyre change, understanding their purpose highlights the inherent risk of a jack.
The car is now securely in the air with the lug nuts loosened. The next logical step is to get that flat tyre off. In the next lesson, we'll cover how to: Finish removing the lug nuts and carefully remove the damaged tyre from the wheel hub.