Hello! Welcome back.
In our last lesson, you did a fantastic job implementing the Patrol state, bringing your NPC to life by having it navigate a series of waypoints. Currently, your NPC will diligently follow its patrol route, but it remains oblivious to its surroundings. We're about to change that.
This lesson directly addresses the learning outcome: Implement player proximity detection to trigger a transition from 'Patrol' to 'Chase'. We will make your NPC aware of the player's presence, and when detected, it will transition from its passive Patrol state into an aggressive Chase state. This is a fundamental step toward creating engaging and interactive AI.
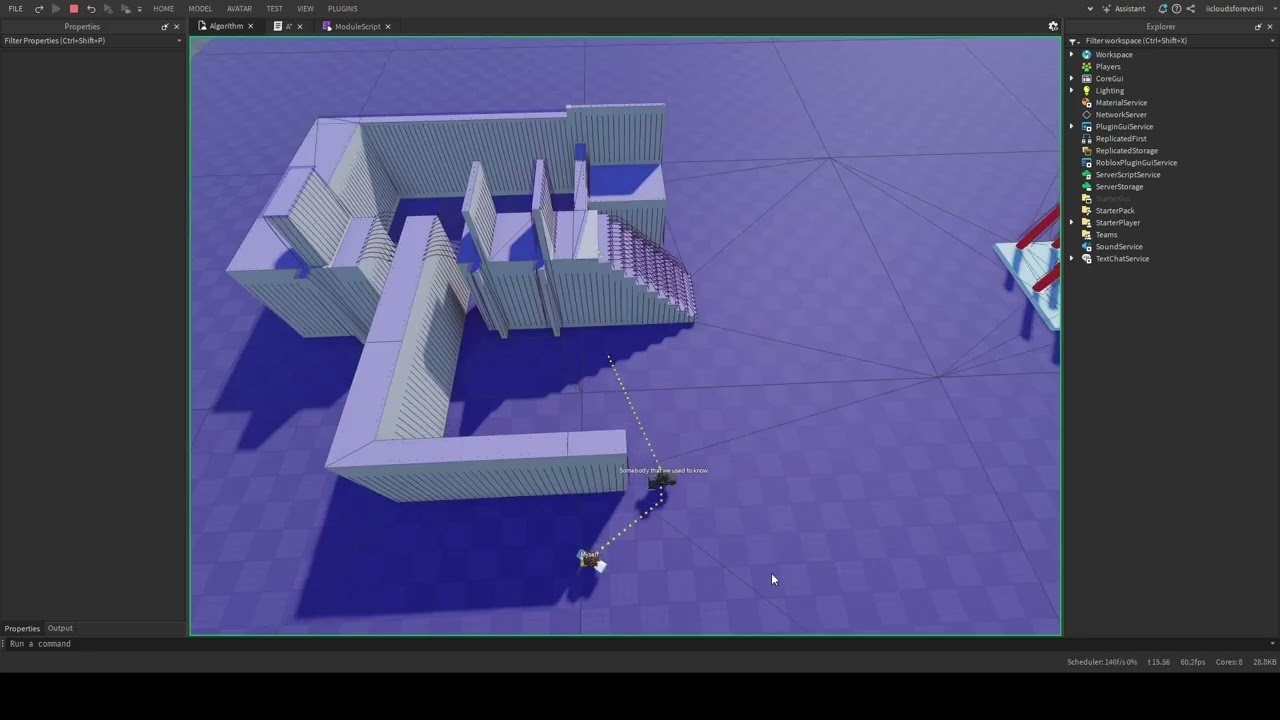
How Does an NPC "See"?
For an NPC to react to a player, it needs a way to "see" them. In game development, this isn't magic; it's a two-step logical process:
-
Proximity Check: Is the player close enough to be noticed? We'll define a "detection radius" around the NPC. If a player enters this circle, they are considered a potential target. This is a simple distance calculation, which is very efficient. We can get the distance between two objects using the
.Magnitudeproperty of the vector that separates them:(positionA - positionB).Magnitude. -
Line-of-Sight (LoS) Check: Just because a player is nearby doesn't mean they are visible. There could be a wall or another obstacle in the way. To solve this, we perform a line-of-sight check using raycasting. We cast an invisible ray from the NPC's head to the player's head. If the first thing the ray hits is the player, the NPC has a clear line of sight. If it hits a wall first, the view is obstructed.
This combination of a proximity check followed by a raycast is a standard and efficient technique for AI target detection in many games, including those on Roblox.
Implementing Detection Logic in Luau
Let's look at a practical example of how to code these checks. The following video demonstrates how to build a getNearbyPlayers function (for proximity) and a canSee function (for line-of-sight).
Zombie AI and Finite State Machines with Transition Hooks
This video by SimTek Game Development provides a clear, step-by-step implementation of the core detection functions we need. We will adapt this logic for our own FSM.
Watch the segment from 38:03 to 48:47. Focus on: The logic inside getNearbyPlayers: How it loops through all players and uses .Magnitude to check if they are within a given radius. The canSee function: How it uses workspace:Raycast() to check for an unobstructed view. Pay close attention to the use of RaycastParams. This is crucial for telling the ray to ignore the NPC itself, so it doesn't just detect its own body.
As you saw, the process involves first getting a list of all nearby players, and then iterating through that list to see if any of them are visible. This is exactly what we'll integrate into our Patrol state.
Exercise: Adding Player Detection to Your FSM
It's time to apply these concepts to your FSM. We'll add the detection logic and create the transition from Patrol to Chase.
1. Define the 'Chase' State
First, we need a state to transition to. Open your NPC Script and add a simple definition for the Chase state. For now, it will just print messages so we can confirm the transition is working.
-- In your state definitions section

local chaseState = {
    Enter = function()
        print("NPC has entered the Chase state.")
        -- Stop any current movement from the Patrol state
        humanoid:MoveTo(npc.PrimaryPart.Position)
    end,
    Update = function(dt)
        -- We will implement the chase logic in the next lesson
    end,
    Exit = function()
        print("NPC is leaving the Chase state.")
    end
}
Now, register this new state with your FSM instance, just like you did for Idle and Patrol.
-- In your FSM Initialization section
fsm:defineState("Chase", chaseState)
2. Add Detection Helper Functions
Next, let's add the functions that will handle player detection. We will adapt the logic from the video you just watched. Add these two new functions to your NPC Script, preferably near the top with your other configurations.
-- == NEW: DETECTION CONFIGURATION & FUNCTIONS ==
local DETECTION_RADIUS = 40 -- How far the NPC can detect players (in studs)
local PLAYERS_SERVICE = game:GetService("Players")

-- Finds the closest visible player within the detection radius
local function findVisibleTarget()
    local players = PLAYERS_SERVICE:GetPlayers()
    local npcPosition = npc.PrimaryPart.Position
    local closestTarget = nil
    local minDistance = DETECTION_RADIUS

    for _, player in ipairs(players) do
        local character = player.Character
        if character then
            local targetPosition = character.PrimaryPart and character.PrimaryPart.Position
            if targetPosition then
                local distance = (npcPosition - targetPosition).Magnitude

                -- Is the player the closest one we've found so far?
                if distance < minDistance then
                    -- Check for line of sight
                    local raycastParams = RaycastParams.new()
                    raycastParams.FilterDescendantsInstances = {npc, character} -- Ignore both NPC and target to see what's BETWEEN them
                    raycastParams.FilterType = Enum.RaycastFilterType.Exclude

                    local raycastResult = workspace:Raycast(npcPosition, (targetPosition - npcPosition).Unit * distance, raycastParams)

                    -- If raycastResult is nil, it means the ray didn't hit anything, so we have clear line of sight.
                    if not raycastResult then
                        minDistance = distance
                        closestTarget = character
                    end
                end
            end
        end
    end

    return closestTarget
end
A quick note on the raycast logic: we are a bit clever here. By putting both the NPC and the target character in the FilterDescendantsInstances list, we ensure the ray only reports obstacles between them. If it hits nothing (raycastResult is nil), our path is clear!
3. Modify the Patrol State to Trigger the Transition
This is the final and most important step. We need to use our new findVisibleTarget function within the Update callback of the patrolState. If a target is found, we'll trigger the transition to Chase.
The logic here perfectly mirrors the pseudocode from the Roblox Developer Forum article, "Using AI Behavior Frameworks For NPCs," which states: if target: state = "CHASE".
Using AI Behavior Frameworks For NPCs
Review this section of the developer forum post. Focus on the pseudocode example for the state machine, which shows a state checking for a target and then changing its state variable. This is the exact pattern we are implementing.
Read the second pseudocode block under the heading 'A pseudocode example is:'. Notice how inside the 'WANDER' state, it calls findTarget() and then sets state = "CHASE". Our patrolState.Update will do the same.
Now, let's update your patrolState:
-- Find your existing patrolState and modify its Update function.

local patrolState = {
    Enter = function()
        print("NPC has entered the Patrol state.")
        -- ... (your existing Enter logic)
    end,

    Update = function(dt)
        -- == NEW: Check for a target on each update cycle ==
        local target = findVisibleTarget()
        if target then
            print("Player target found! Transitioning to Chase.")
            fsm:transitionTo("Chase", target) -- Pass the target to the next state
        end
    end,

    Exit = function()
        -- ... (your existing Exit logic)
    end,

    OnPathComplete = function()
        -- ... (your existing OnPathComplete logic)
    end
}
Important Change: Notice we are passing the target object in fsm:transitionTo("Chase", target). This is a powerful technique! It allows us to give the Chase state information about what it should be chasing. You'll need to update your chaseState.Enter function to accept this argument.
-- Modify your chaseState.Enter function
local chaseState = {
    Enter = function(target) -- The 'target' character is received here
        print("NPC has entered the Chase state. Chasing: " .. target.Name)
        humanoid:MoveTo(npc.PrimaryPart.Position)
    end,
    --...
}
(You may also need to update your FSM module slightly to pass arguments from transitionTo to the state's Enter function if it doesn't already support this.)
4. Test Your Implementation
Run the simulation and test the behavior:
- The NPC should start in the
Idlestate as before. - After the timer, it will transition to the
Patrolstate and begin walking its route. - Walk your player character near the NPC.
- If you are within the
DETECTION_RADIUS(40 studs) and have a clear line of sight, you should see the following in your output:Player target found! Transitioning to Chase.NPC is leaving the Patrol state.NPC has entered the Chase state. Chasing: [YourPlayerName]
- The NPC should stop its patrol movement.
- Try hiding behind a wall and walking into the detection radius. The NPC should ignore you because there is no line of sight.
Conclusion
Excellent work! Your FSM is now capable of dynamic, conditional transitions based on environmental factors. This is a massive leap forward in creating intelligent and believable AI.
Here are your key takeaways from this lesson:
- Player detection is typically a two-step process: a cheap proximity check (
.Magnitude) followed by a more expensive line-of-sight check (workspace:Raycast). RaycastParamsare essential for filtering objects, such as the NPC itself, to ensure the raycast provides useful information.- The
Updatefunction of a state is the perfect place to perform continuous checks for conditions that should trigger a transition. - You can pass data (like a target) between states during a transition, making your FSM more powerful and context-aware.
Next Steps
Your NPC can now decide to chase the player, but it doesn't yet know how. In our next lesson, we will fully implement the 'Chase' state, using PathfindingService to make the NPC actively follow a player, with a transition back to 'Patrol' if the player is lost.