Hello! Welcome to the next lesson in our journey to build a C++ ray tracer.
In the previous lesson, we made a huge leap by implementing a recursive ray_color function. This allowed us to simulate light bouncing from one surface to another, which is the cornerstone of realistic rendering. However, as with any powerful tool, recursion comes with its own set of challenges that we need to manage.
Today, we will focus on making our recursive renderer robust and controllable. Our primary learning outcome is to limit the recursion depth to prevent stack overflow and control render time. We will explore why this is necessary, how to implement a depth limit, and tackle a related practical issue known as "shadow acne".
1. The Problem: Infinite Bounces and Exponential Cost
In the last lesson, you implemented the core recursive logic:
// Simplified from last lesson
return attenuation * ray_color(scattered, world, depth - 1);
This is elegant, but it contains a potential time bomb. What happens if a ray gets trapped between two perfectly reflective, parallel surfaces?
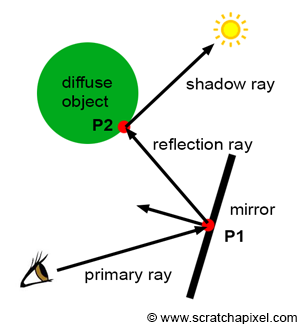
This scenario, often called the "barber shop effect," would cause ray_color to call itself infinitely. In programming, this leads to a stack overflow, a fatal error where the program runs out of memory reserved for function calls, causing it to crash.
Even without infinite loops, recursion can be computationally expensive. Watch this short clip that revisits the topic of recursion.
Ray Tracing in 5 minutes: Part 3 -- recursive ray tracing
The video "Ray Tracing in 5 minutes" briefly touches on the need to terminate recursion. Let's watch the part that explicitly mentions this.
Watch from 00:02:59 to 00:03:18. The narrator points out that we must terminate the recursion to avoid an infinite loop and suggests a simple fix.
As the video suggests, the simplest solution is to stop after a certain number of bounces. Beyond preventing crashes, this is also a critical performance control. As explained in the Scratchapixel article "Overview of the Ray-Tracing Rendering Technique", the number of rays can grow exponentially with each bounce, especially when we add materials that split rays (like glass). Limiting the depth puts a hard cap on this growth and, consequently, on our render times.
Let's hear a more detailed explanation of this problem from a university lecture.
This section of the UC Davis lecture on "Recursive Ray Tracing" gives a clear explanation of the 'infinite bounce' problem and proposes the exact solution we will implement.
Watch from 00:45:34 to 00:47:21. The lecturer discusses the 'barber shop' scenario and introduces the idea of passing an extra parameter to track the number of bounces and stop after a limit.
2. Implementation: Setting a Maximum Depth
The solution, as you've now heard, is to pass a "depth" or "bounces remaining" counter through our recursive calls and stop when it reaches zero. You've already laid the groundwork for this in the previous lesson. Now, we will formalize it based on the excellent guide in the Ray Tracing in One Weekend series.
Ray Tracing in One Weekend - Limiting Child Rays
This section of the 'Ray Tracing in One Weekend' book provides a clean, step-by-step C++ implementation for limiting recursion depth. We will follow this approach.
Read the section titled 'Limiting the Number of Child Rays'. Pay close attention to the code changes in camera.h and main.cc. We will be implementing these exact changes.
Let's break down the implementation steps from the resource:
Step 1: The Base Case
The most important part is the "bail out" condition at the very beginning of your ray_color function. This is the base case of the recursion. If we've run out of bounces, the light path terminates and contributes no more energy (color).
color ray_color(const ray& r, const hittable& world, int depth) const {
    // If we've exceeded the ray bounce limit, no more light is gathered.
    if (depth <= 0)
        return color(0,0,0);

    // ... rest of the function
}
Step 2: Decrementing Depth
In the recursive call, you must pass the decremented depth value. This ensures that with each bounce, we get one step closer to the base case.
// Inside the 'if (world.hit(...))' block
if (rec.mat->scatter(r, rec, attenuation, scattered)) {
    return attenuation * ray_color(scattered, world, depth - 1);
}
(Note: As before, your material access might be rec.mat_ptr or similar depending on your specific implementation).
Step 3: Setting the Global Limit
Finally, you need to define the maximum depth for the entire render and pass it to the initial ray_color call in your main render loop. A value around 50 is a generous starting point.
// In your main() function or camera class
int main() {
    // ...
    camera cam;
    cam.max_depth = 50;
    // ...
    cam.render(world); // Or inside your render loop
}


// In your render loop inside the camera class
// ...
for (int sample = 0; sample < samples_per_pixel; sample++) {
    ray r = get_ray(i, j);
    pixel_color += ray_color(r, world, max_depth); // Pass the initial depth
}
// ...
By implementing these changes, your ray tracer is now protected from infinite recursion and you've gained a crucial lever to balance image quality against render time. Rendering with max_depth = 1 will give you direct lighting only, while max_depth = 50 will allow for many indirect bounces, creating softer, more realistic global illumination at the cost of more computation.
Test your understanding!
If max_depth is set to 5, and a ray path hits 6 different diffuse surfaces in a row before flying off into the black background, what is the color contribution of the 6th surface to the final pixel color?
Show answer
The color contribution is zero (black). Let's trace the depth parameter:
- Initial call:
depth = 5 - 1st bounce:
depth = 4 - 2nd bounce:
depth = 3 - 3rd bounce:
depth = 2 - 4th bounce:
depth = 1 - 5th bounce:
depth = 0. Theray_colorfunction for the 5th bounce will receivedepth=1and call itself withdepth=0. - When the ray from the 5th surface hits the 6th surface, the call to
ray_colorwill havedepth = 0. Theif (depth <= 0)check will trigger, and the function will immediately returncolor(0,0,0). This black color will then propagate back up the call stack, ultimately making the 6th surface (and any subsequent ones) contribute nothing to the final pixel.
3. A Practical Fix: Shadow Acne
There's a subtle but common bug that often appears once you implement recursive bounces. Because of floating-point precision limitations, the origin of a scattered ray might not be exactly on the surface it's scattering from. It could be a tiny fraction below the surface.
When the new ray is traced, its first intersection might be with the very surface it just left, at a t value that is nearly zero (e.g., t = 0.0000001). This causes the object to incorrectly shadow itself, resulting in ugly black artifacts on the surface. This phenomenon is descriptively named shadow acne.
The solution is a simple but effective hack: we ignore all ray intersections that are very close to the ray's origin. We can do this by setting a minimum valid t value (t_min) greater than zero.
Let's see how Ray Tracing in One Weekend implements this fix.
Ray Tracing in One Weekend - Fixing Shadow Acne
The section 'Fixing Shadow Acne' explains this problem and provides the one-line code change to fix it.
Read this short section and locate the single line in ray_color that is modified to solve the problem.
As the text shows, the fix is to change the world.hit call inside ray_color:
// Before
if (world.hit(r, interval(0, infinity), rec)) { ... }

// After
if (world.hit(r, interval(0.001, infinity), rec)) { ... }
(If you are not using an interval class, this corresponds to changing t_min from 0 to 0.001)
This small positive offset for t_min ensures that the ray travels a small distance away from its origin before it is allowed to register a hit, effectively preventing it from re-intersecting with its parent surface.
Conclusion
Excellent work! You've now made your ray tracer significantly more robust and practical. By managing the recursion depth, you've taken control of both program stability and performance.
Key Takeaways:
- Unchecked recursion in a ray tracer can lead to infinite loops (the "barber shop effect") and cause a stack overflow.
- We prevent this by passing a depth counter through our recursive calls and stopping when it reaches a predefined limit (
max_depth). - The
max_depthparameter acts as a critical control, allowing you to trade render time for the quality of global illumination effects. - Shadow acne is a common artifact caused by floating-point imprecision with secondary rays. It's fixed by using a small, non-zero minimum distance (
t_min) for intersection tests.
Next Steps
Our rendering engine is now stable and ready for more advanced features. So far, we've only implemented a diffuse material that scatters light randomly. What about mirror-like surfaces? In the next lesson, we will derive the reflection formula for a vector about a normal and use it to implement a metal material class. This will allow you to render shiny, reflective objects and see the power of your recursive engine in action.